Viewing and Adjusting Study Images
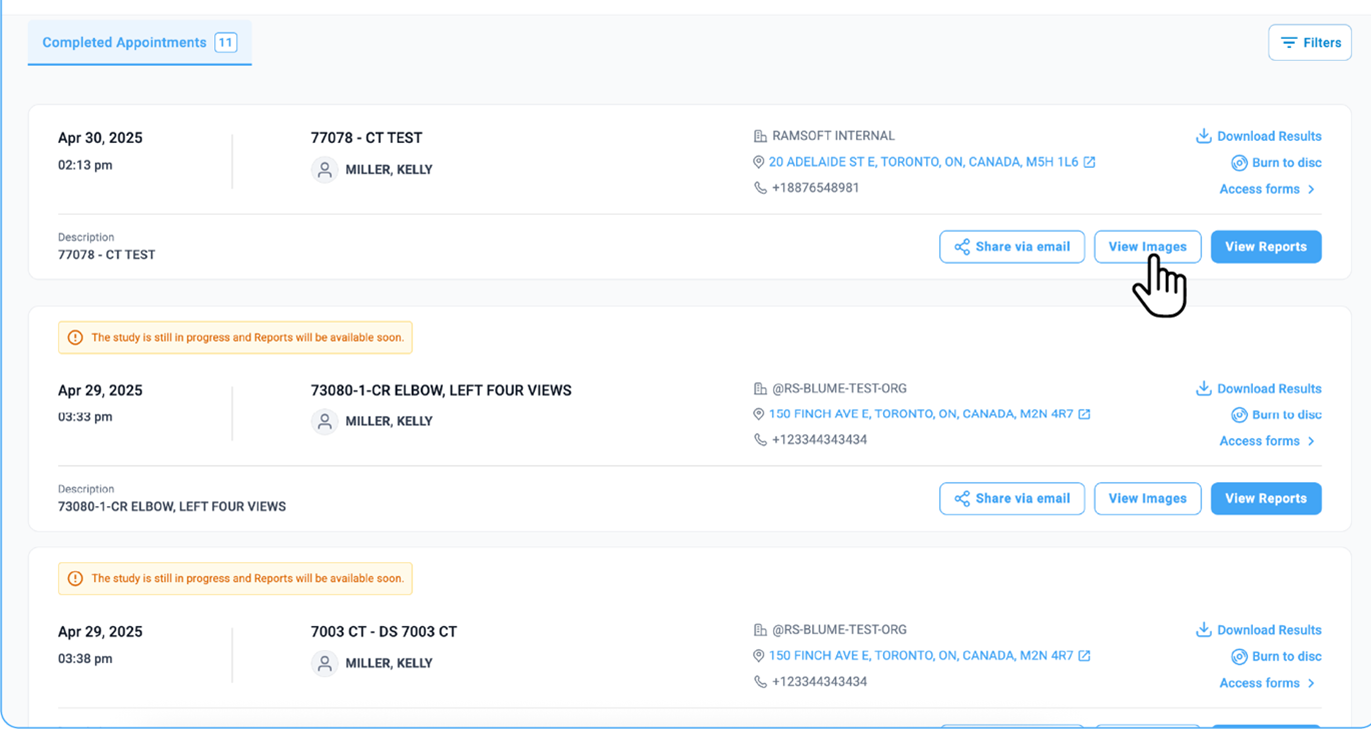
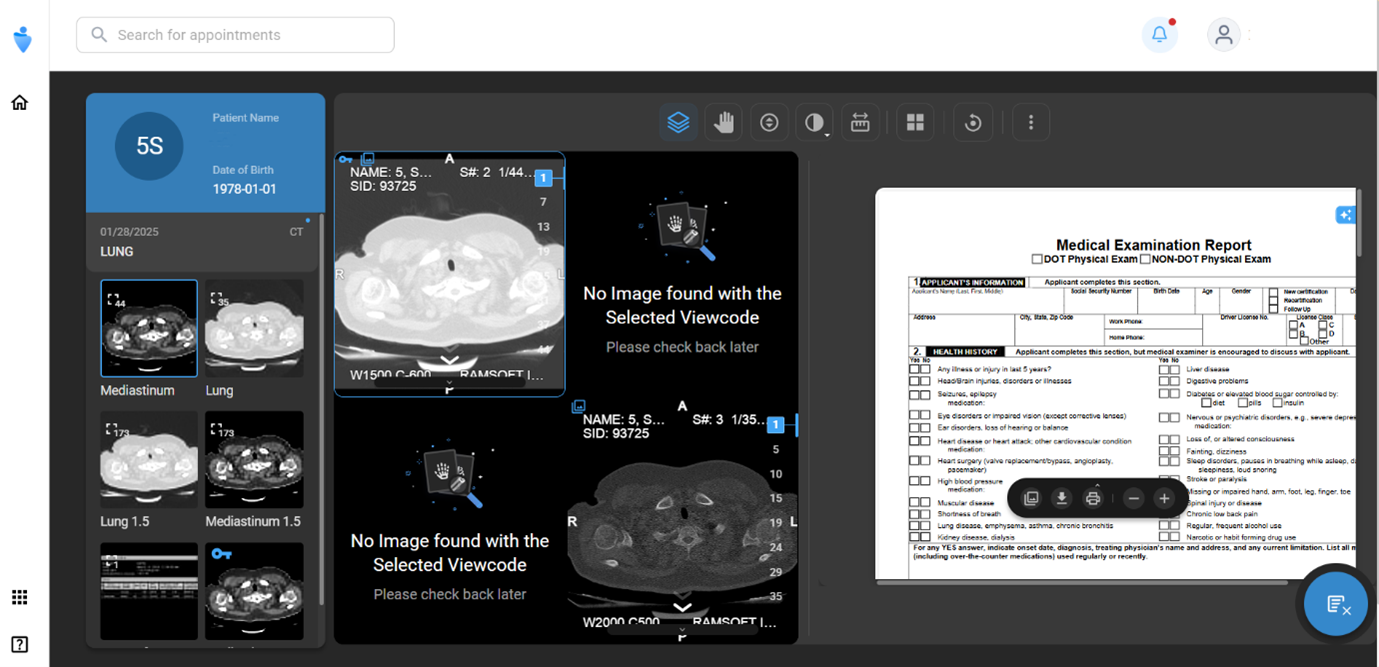
Once you click View Images from the bottom of a completed appointment card (for studies with DICOM images), the Image Viewer opens.
- The available images display in the viewer.
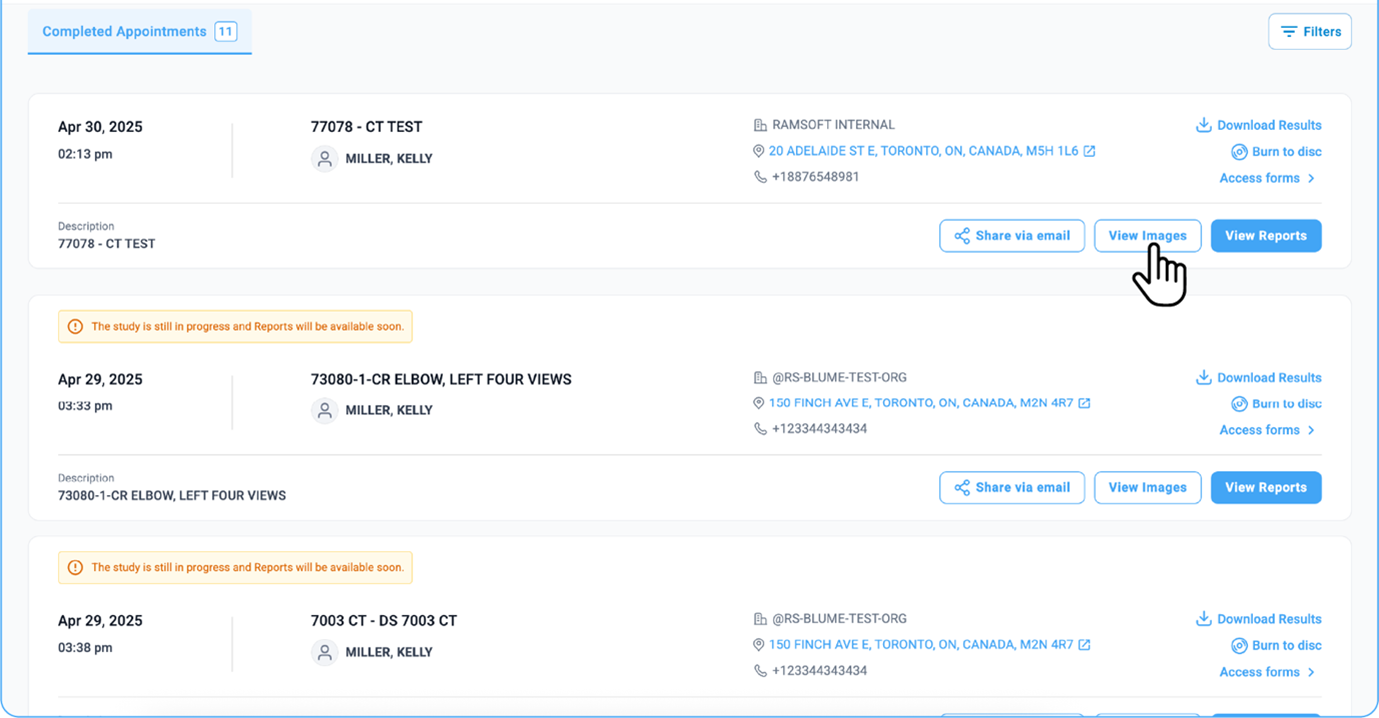
- If reports/documents are attached, they will also open alongside. You can close them and view them later if needed.

- All the tools described below are available on the top toolbar in the Image Viewer.
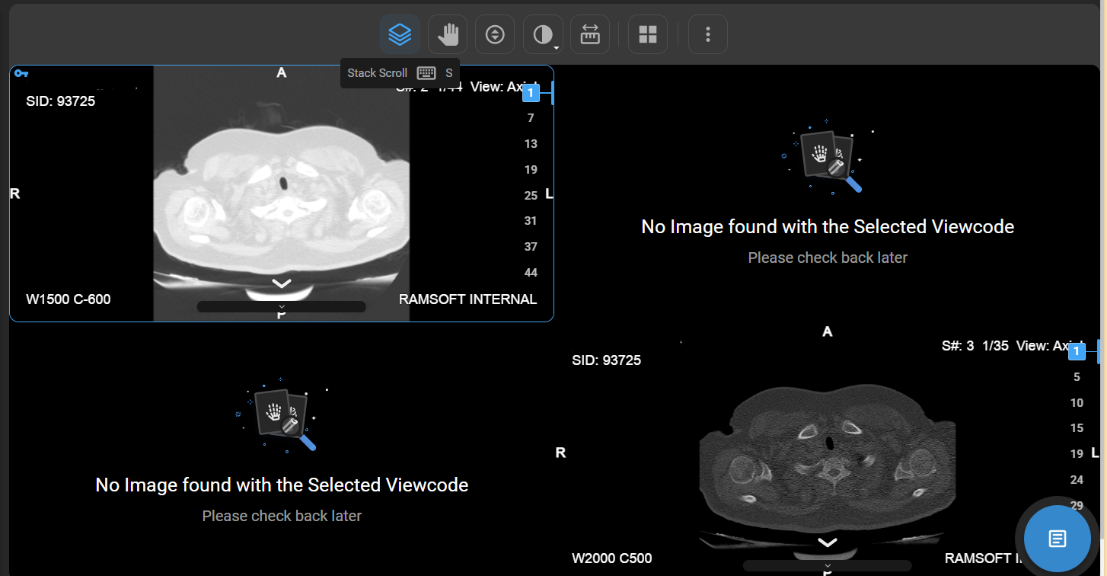
How Do I Use the Stack Scroll Tool?
-
Usage: Browse through multi-frame image series (e.g., MRI, CT).
-
Operation: Move the mouse vertically to scroll through slices.
-
Hotkey: Press S.
-
Clinical Utility: Helps view sequential images for better diagnosis.
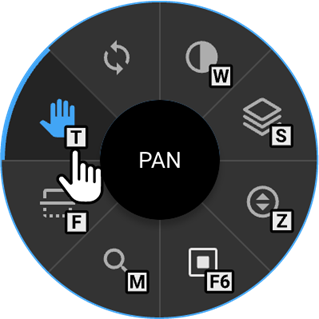
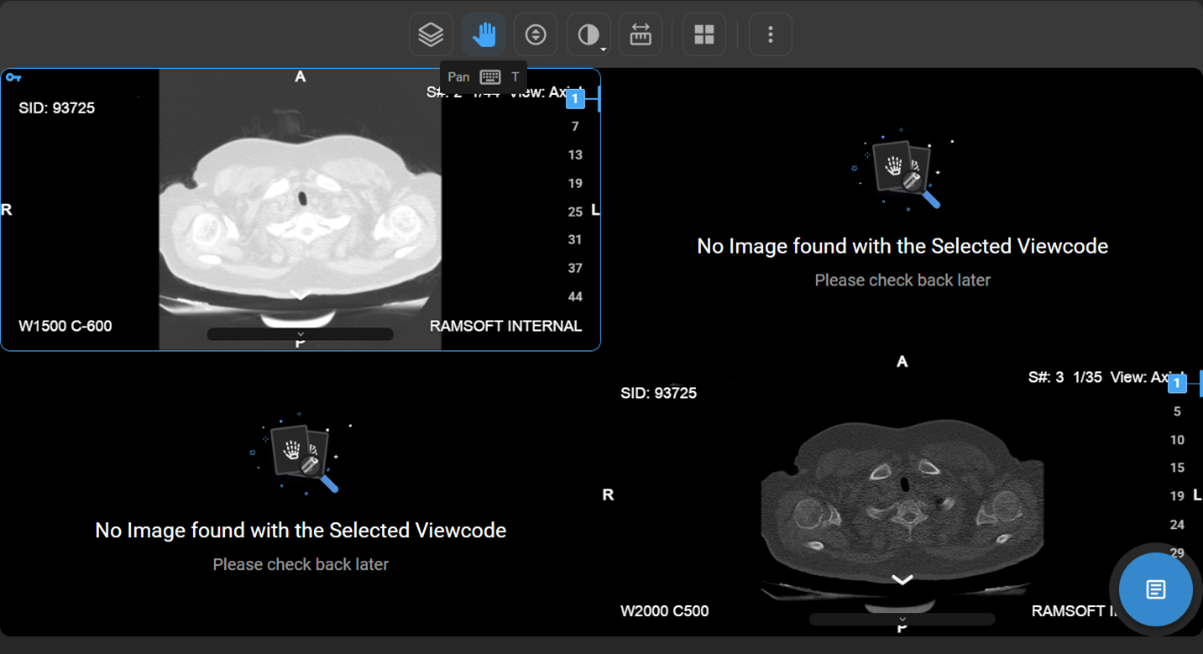
How Do I Pan the Image?
-
Usage : Move the image within the viewport.
-
Operation: Hold the left mouse button and drag.
-
Hotkey: Press T.
-
Clinical Utility: Navigate across large or detailed images for focused viewing.
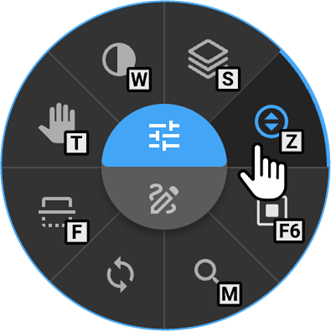
How Do I Zoom In/Out?
-
Usage: Change the scale of the image.
-
Operation: Right-click and drag.
-
Hotkey: Press Z.
-
Clinical Utility: Essential for examining fine details (e.g., micro-calcifications, tissue structures).
What Is the Clamped Window Level Tool?
The Clamped Window Level Tool enhances brightness and contrast with more precision, available for CT, NM, PET-CT (CT only), and PT studies.
-
Clamped Behaviour:
-
Lower Bound (L) = 0 (default)
-
Upper Bound (U) = WL + (WW/2)
-
-
Integration: Available in Adjustment Tools (Toolbar/Wheel).
-
Cursor: Changes to a special control cursor.
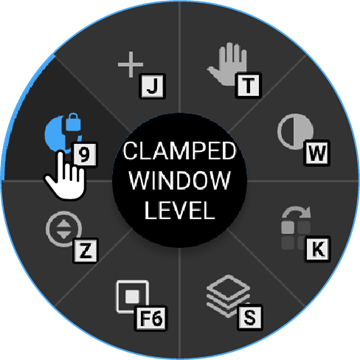
How to Use:
-
Open a CT, NM, PET-CT, or PT study.
-
From the toolbar/wheel, select Clamped Window Level.
-
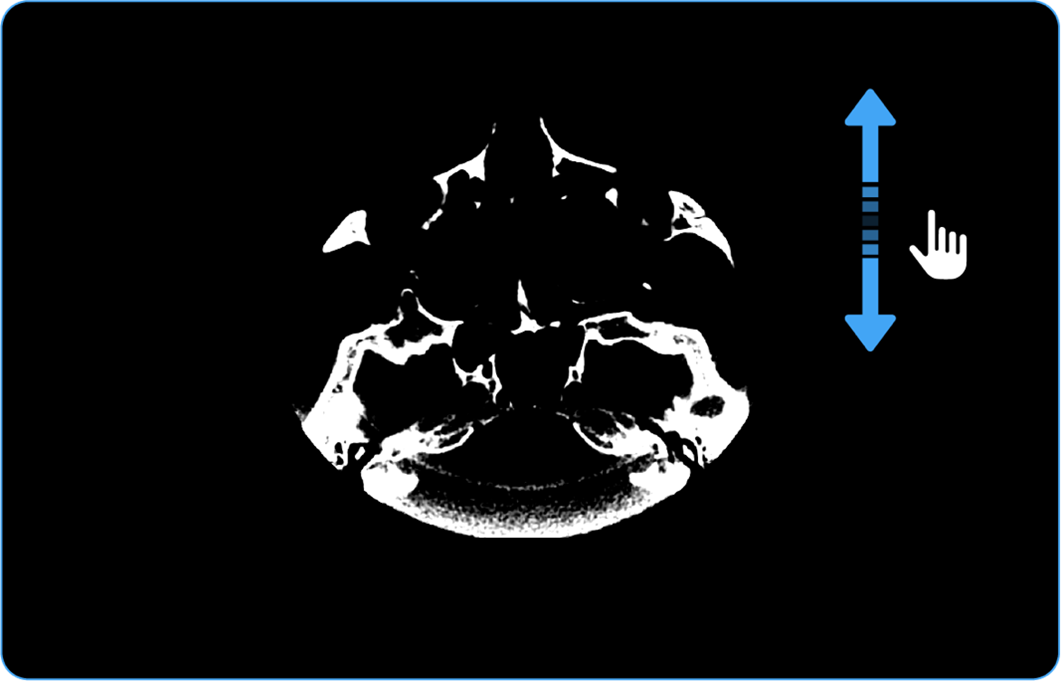
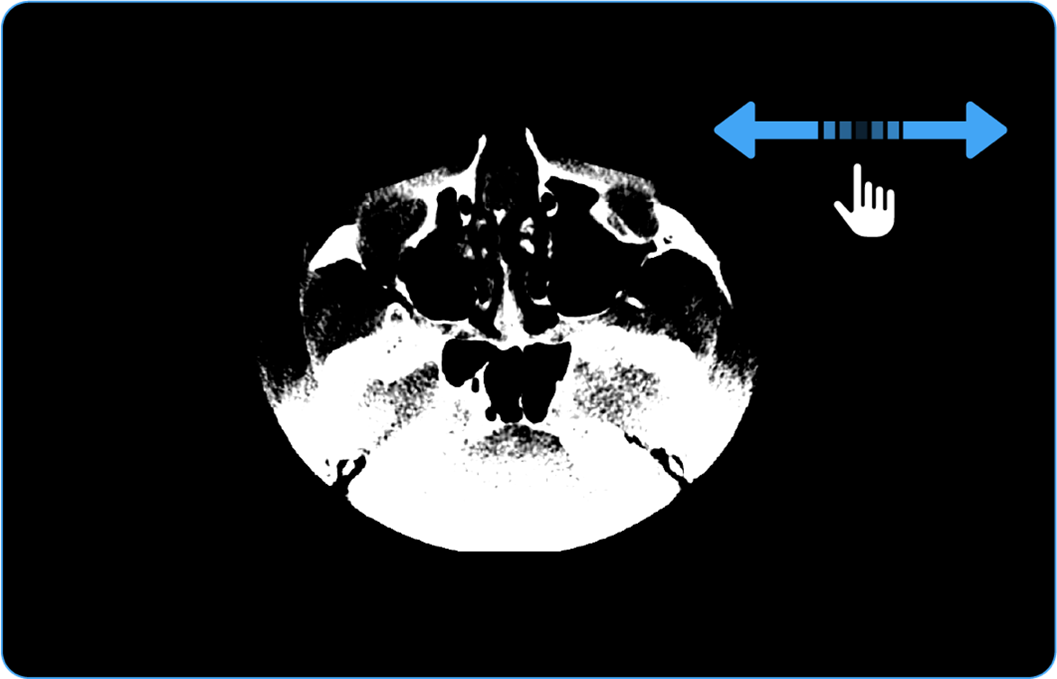
Adjust with mouse movements:
a. Up/Down = Window Level (WL)b. Left/Right = Upper Bound (U)
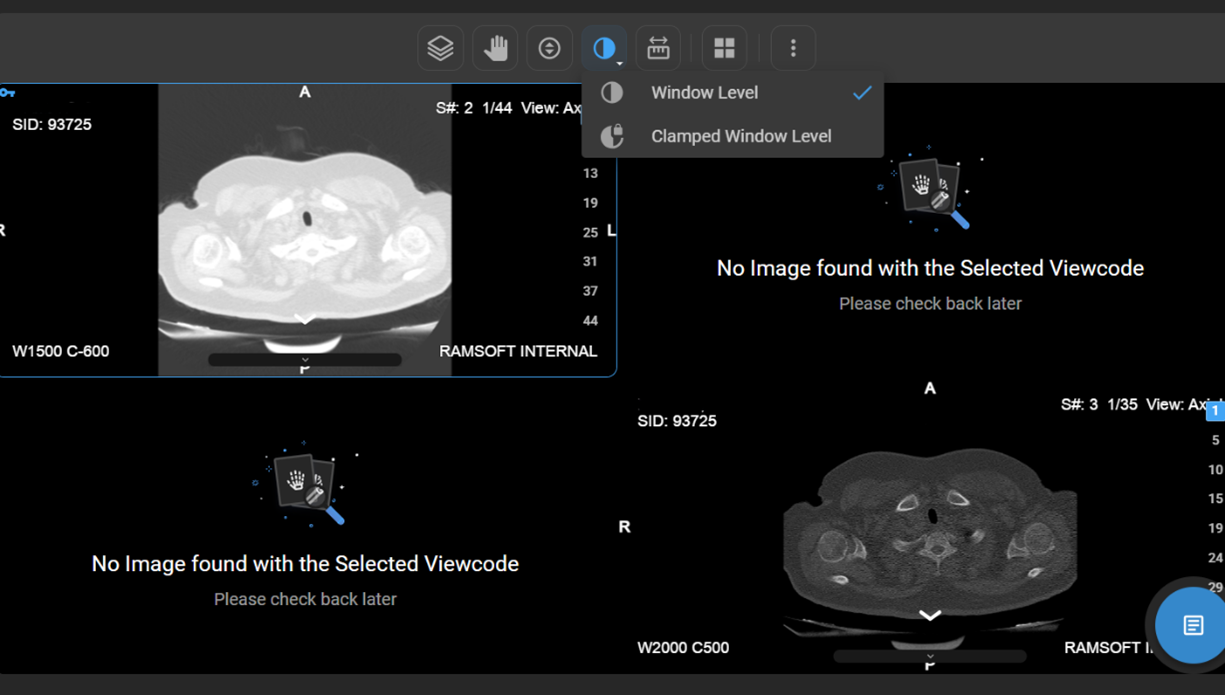
How Do I Adjust Window Level (Brightness/Contrast)?
The Window Level Tool helps highlight specific tissues or lesions.
- Activation:
- Open the Window Level tool from the toolbar/wheel.
- Drag the mouse across the image to adjust brightness and contrast.


- Options:
-
Custom adjustments
-
Presets (Auto Window, Sigmoid, others)
-
Auto Window Level:
-
Automatically applied when you open a study.
-
To apply manually:
- Select the Window Level tool.
- Left-click and choose Auto Window Level from the preset list.
- The system adjusts brightness/contrast automatically.
-
Reset Anytime: Revert to default settings with Reset to Default.

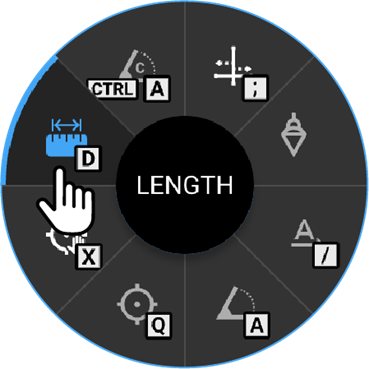
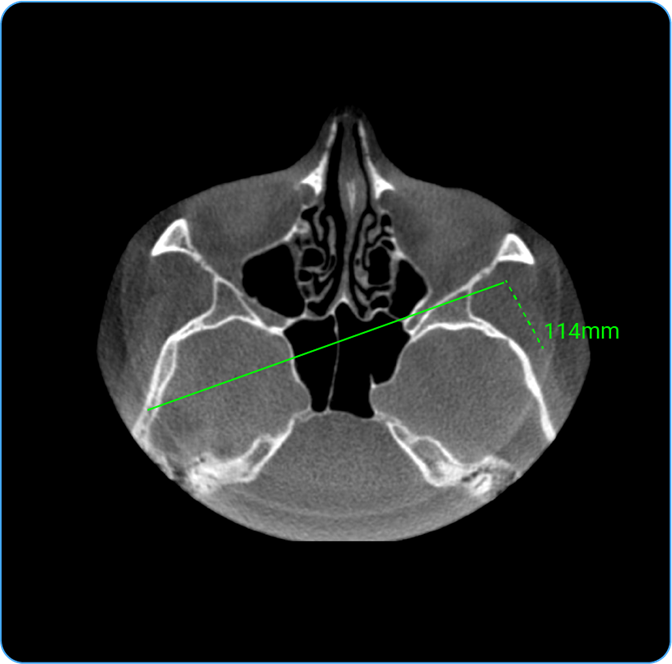
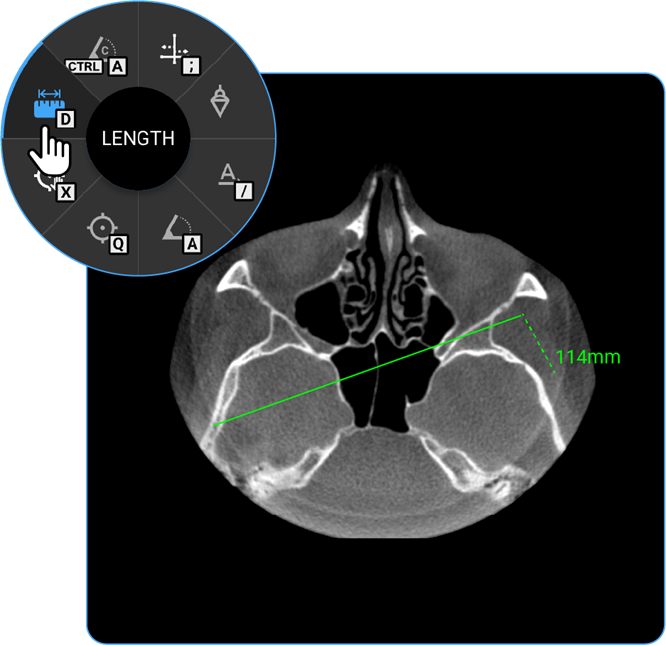
How Do I Measure Length?
- Usage: Measure distance between two points.
- Hotkey: Press D.
- Clinical Utility: Helps measure anatomical structures or lesion sizes.
- Locate the Length tool on the wheel and click on it to calculate the distance between two points on the image, useful for measuring anatomical structures.
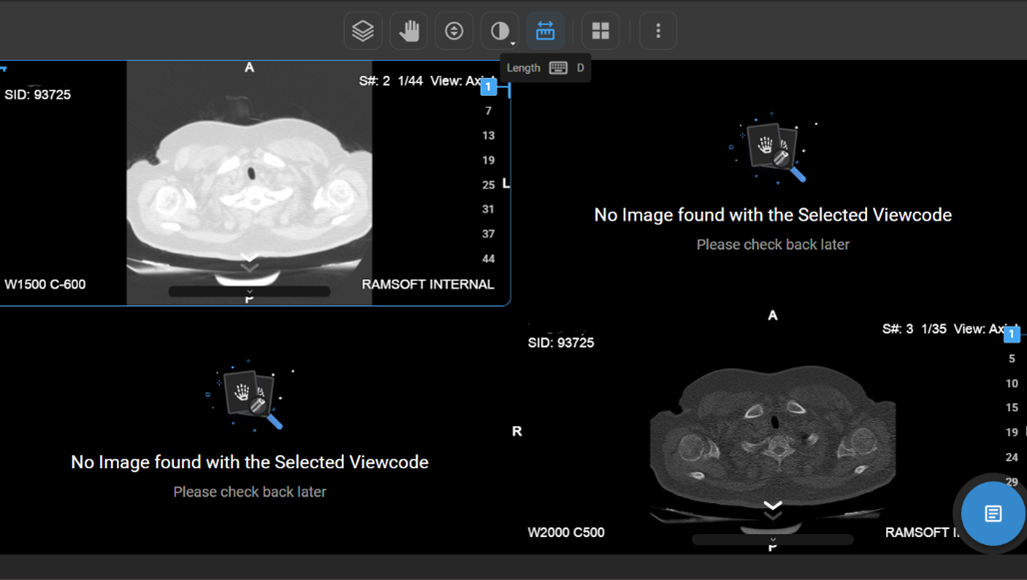
How Do I Change the Viewport Layout?
-
Open Layout Selector from the toolbar.
a. A 3×3 grid appears, with the current layout highlighted.
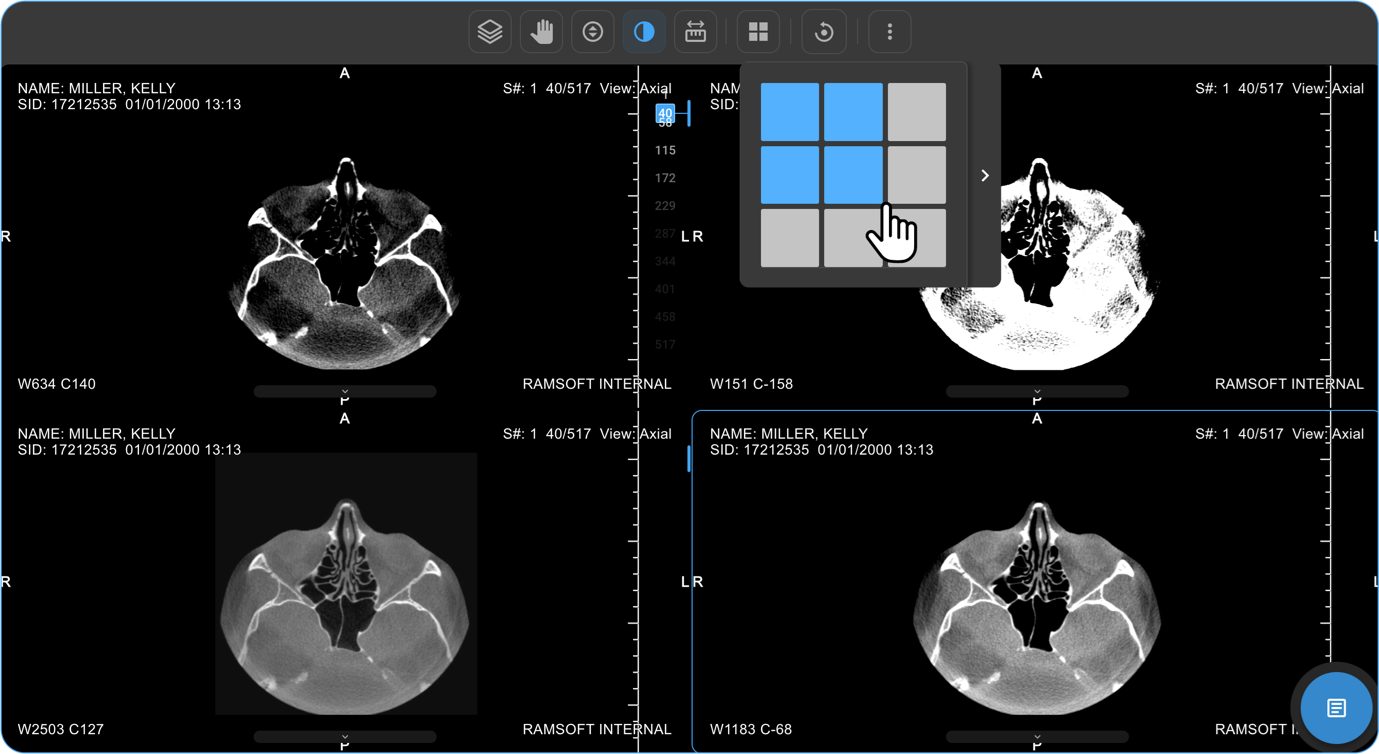
-
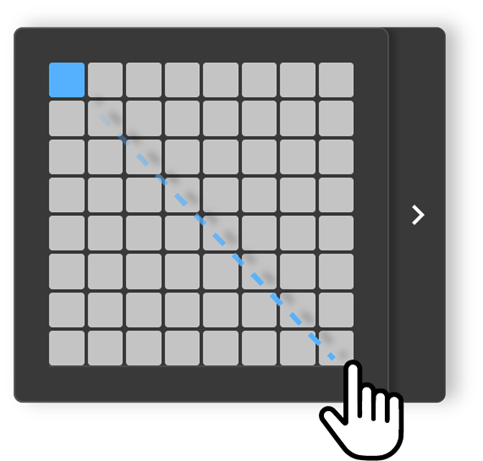
Adjust Viewports:
a. Drag to increase/decrease viewports (up to 8×8 grid per monitor).
-
Apply Hanging Protocols:
a. Available in a drawer beside the selector.
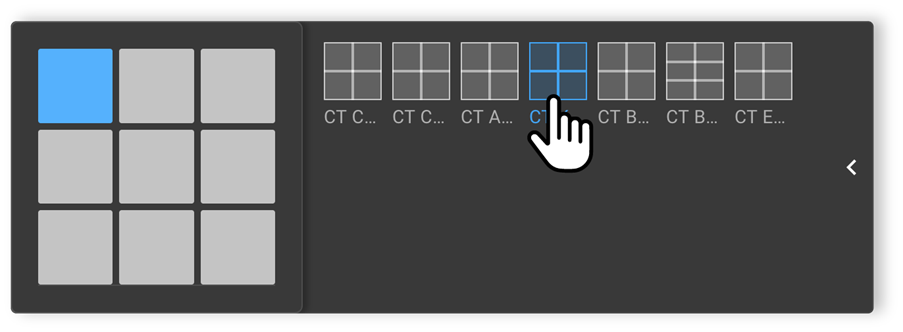
-
Select one to apply it:
a. Single Monitor: Affects only that monitor.
b. Multi-Monitor: Applies to all monitors.
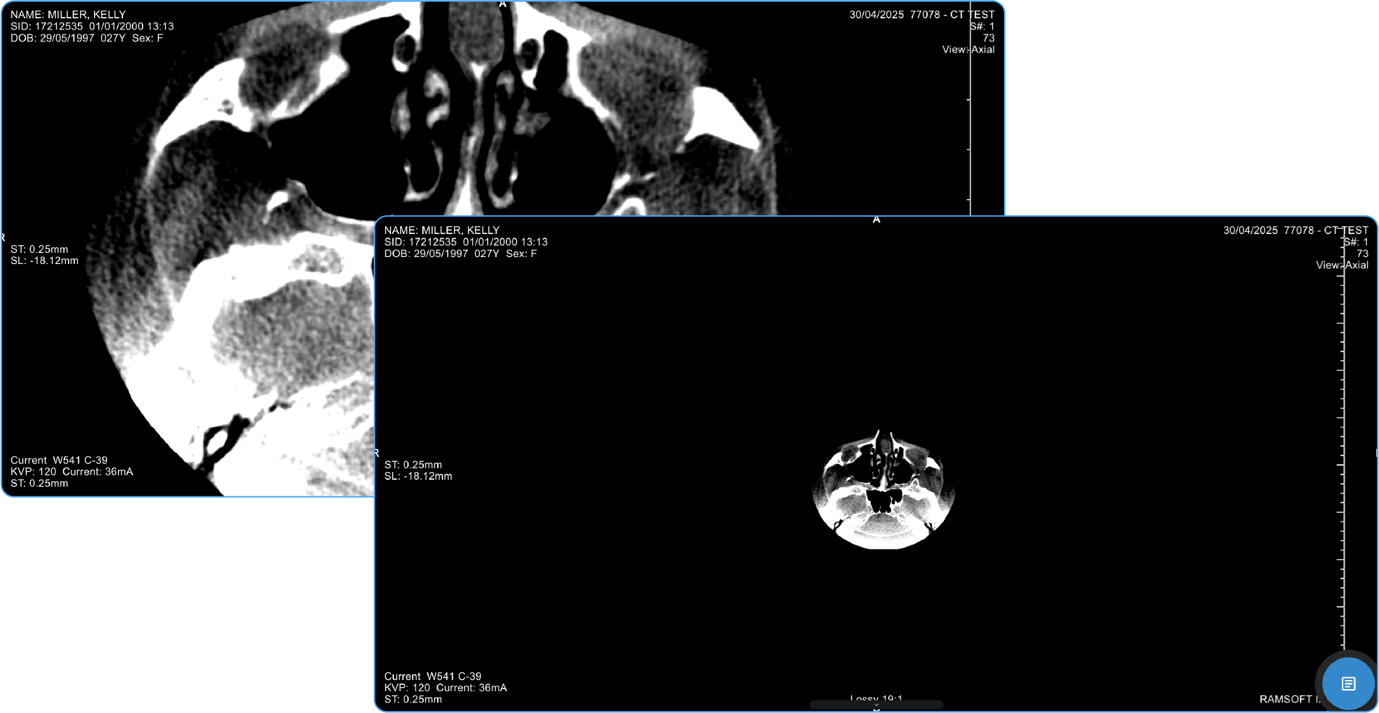
How Do I View Multiple Images or Series in Different Layouts?
- If there are multiple images or a series of images, you can customise the display layout to enhance your viewing experience.
- Locate and click on the Change Layout icon in the image viewer toolbar at the top of the screen.
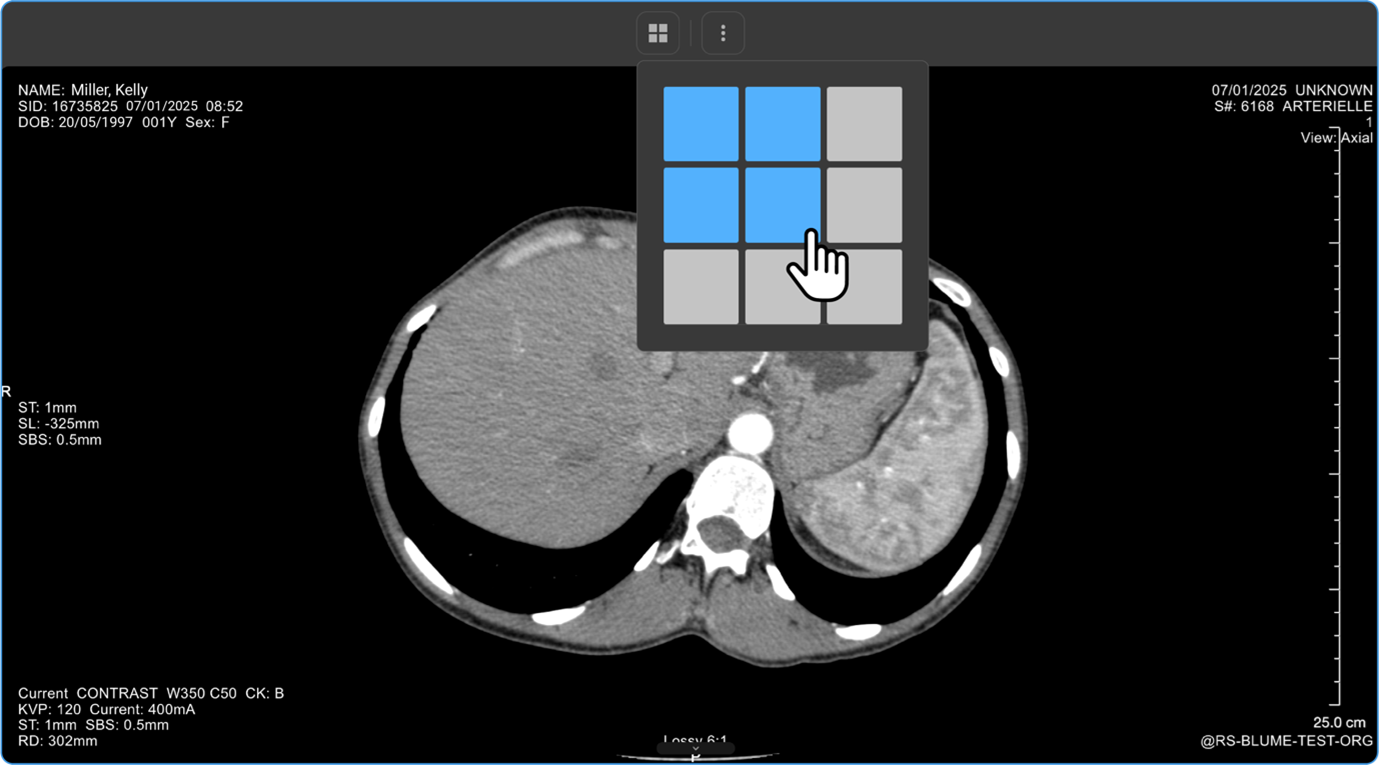
- Select the desired layout format to switch between a single-frame view and a multi-frame display for comparing multiple images simultaneously.
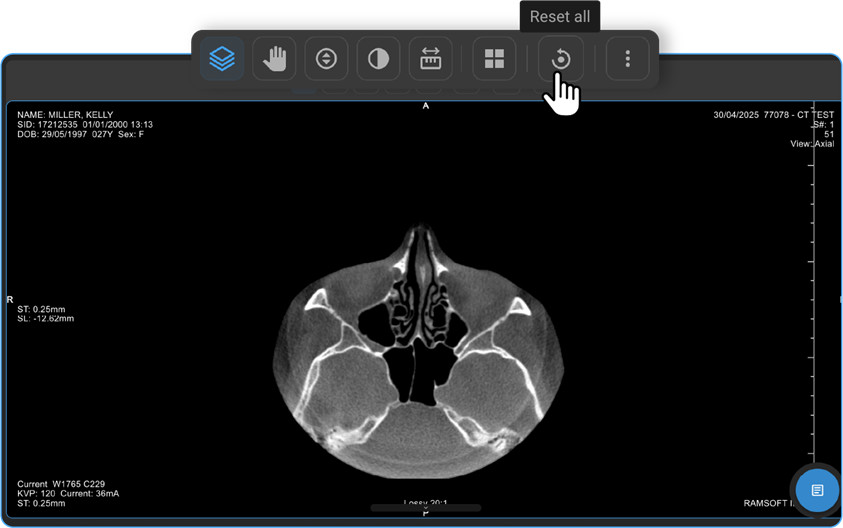
How Do I Reset All Changes?
- The Reset All option appears on the toolbar only if you’ve applied changes.
- Click it to revert everything to default.
- Once reset, the option disappears.
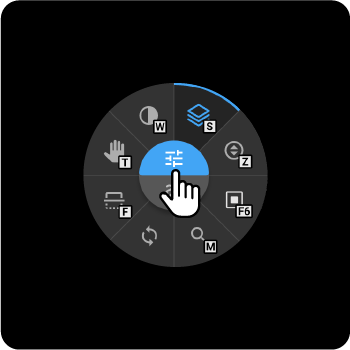
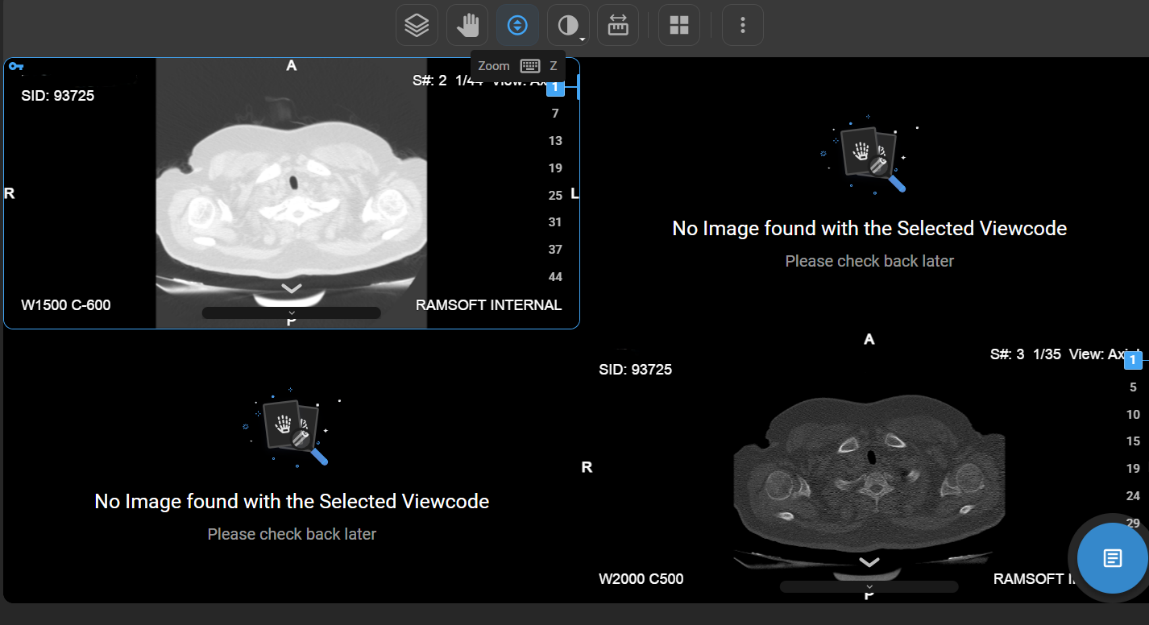
What does the Adjustment Wheel do, and how do I find it in the viewer?
The Adjustment Wheel in the OmegaAI Image Viewer offers a powerful set of tools to enhance your view, analysis, and interaction with medical images.
To open the Adjustment Wheel:
- On the home page of Blume, go to Completed Studies, open the desired study, and click View Images.
- In the Image Viewer, right-click anywhere on the image.
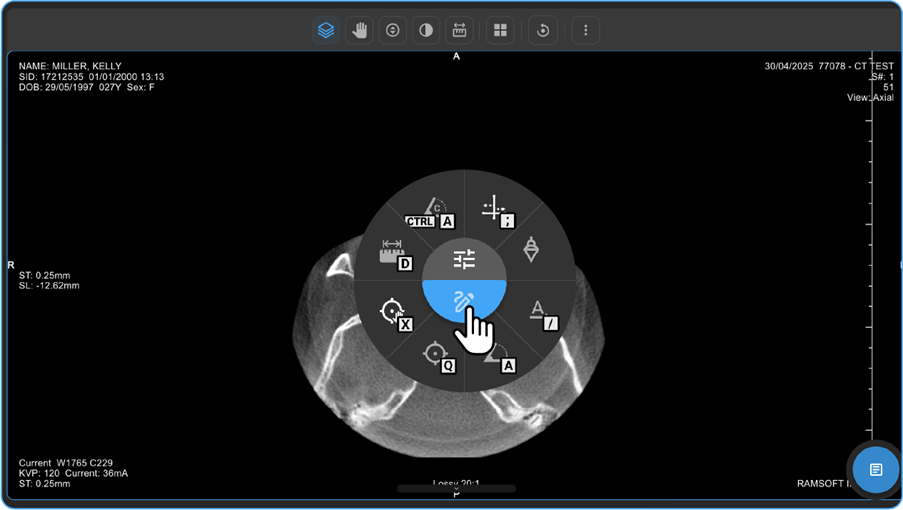
- The Adjustment Wheel will appear, displaying multiple image manipulation and analysis tools.
Key Features of the Adjustment Wheel
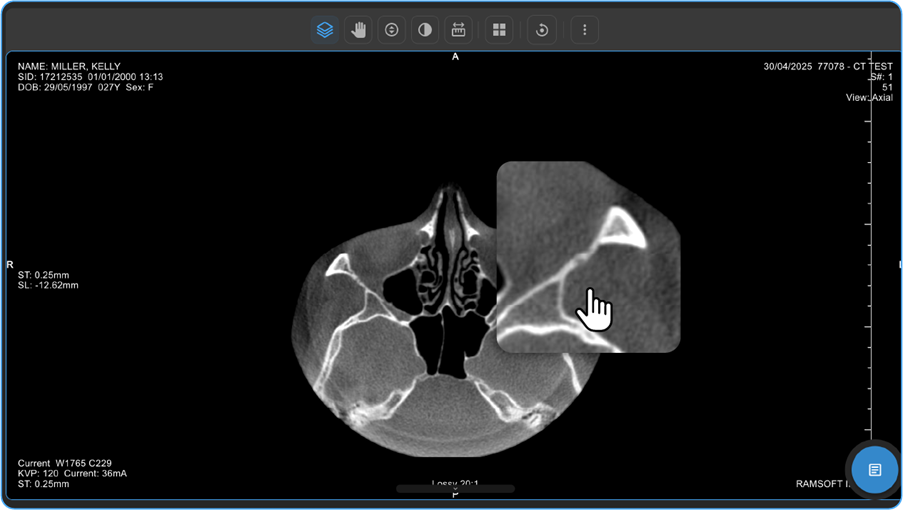
- Zoom & Magnify
- On the Blume Homepage, go to the Completed Studies, open the desired study, and click View Images.
- On the image viewer, Right-click anywhere on the study image to open the adjustment wheel.
- You can locate the looking glass icon on the lower side of the wheel. When you hover the cursor over the icon, it brightens in Blue, and you can see the name "Magnify" in the middle of the wheel.
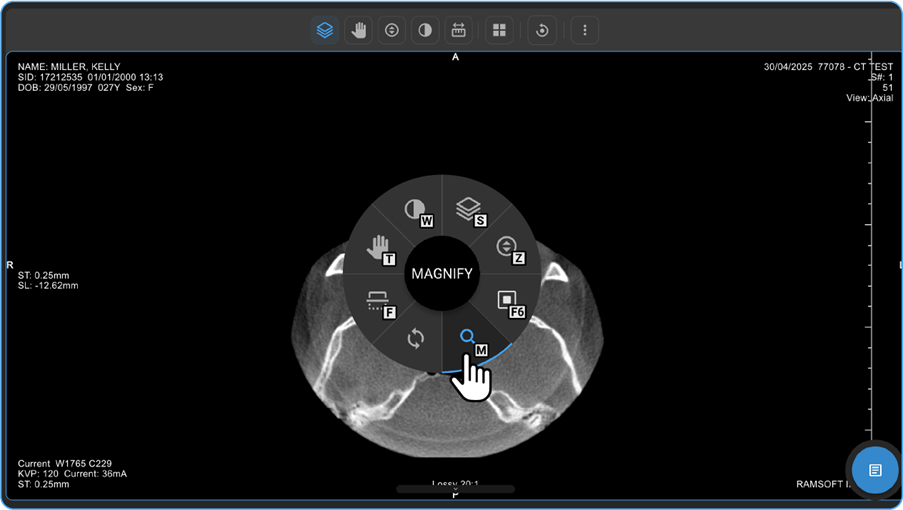
- Select the Magnify option.
- Hold the left mouse button and move the mouse in desired directions over the image to see the magnified view of the part/region of the image.
- Alternatively, you can also locate the Up-Down Arrow inside a Circle icon, which represents the Zoom In/Out function.
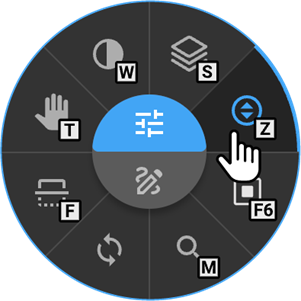
- Hover your cursor over the icon to see it illuminate and display its name, "Zoom," at the centre of the wheel.
- Click on the Zoom icon.
Zooming Options:
- Scroll Method: Press and hold the left-click button on your mouse and scroll up to zoom out or down to zoom in.
- Click Method: After clicking on the Zoom icon, left-click once to reveal three options:
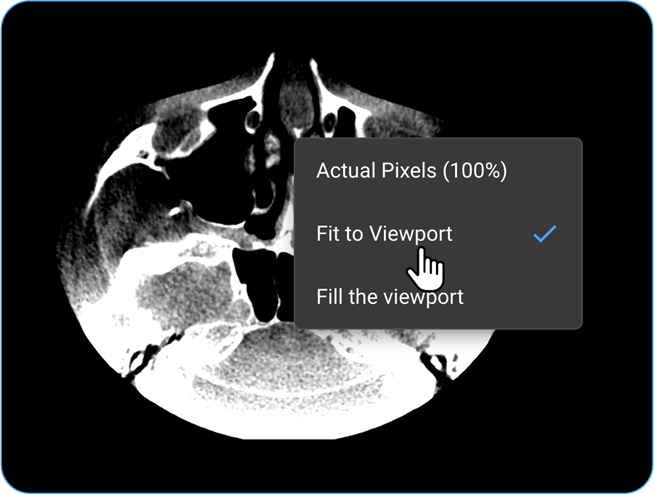
a. Actual Pixels (100%): Displays the image at its original resolution.
b. Fit to Viewport: Automatically adjusts the image to fit the viewer screen.
c. Fill the Viewport: Enlarges the image to fill the entire viewer.
- To return to the study details page, click the left arrow at the top-left corner.
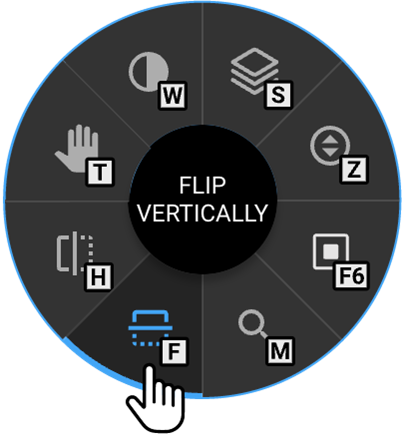
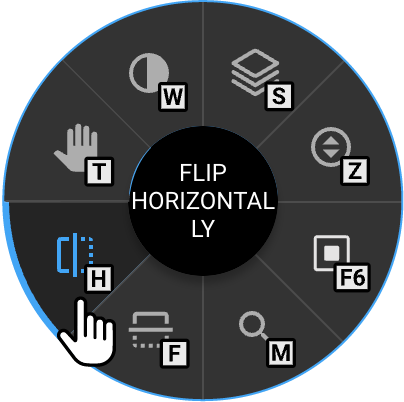
A. Flip the Image
- Locate the rectangular box icons around the wheel marked with H (Horizontal Flip) and F (Vertical Flip).
-
(Alternatively, press "H" or on your keyboard while the wheel is open.
-
Flip Options:
-
Click on the "H" icon to flip the image horizontally.
-
Click on the "F" icon to flip the image vertically.
-
-
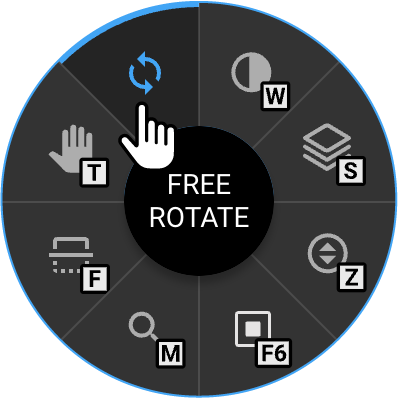
B. Rotate the Image
- On the Adjustment Wheel, locate the Free Rotate icon and click on it.
-
Left-click and hold on your mouse, then move it to rotate the image as desired.
-
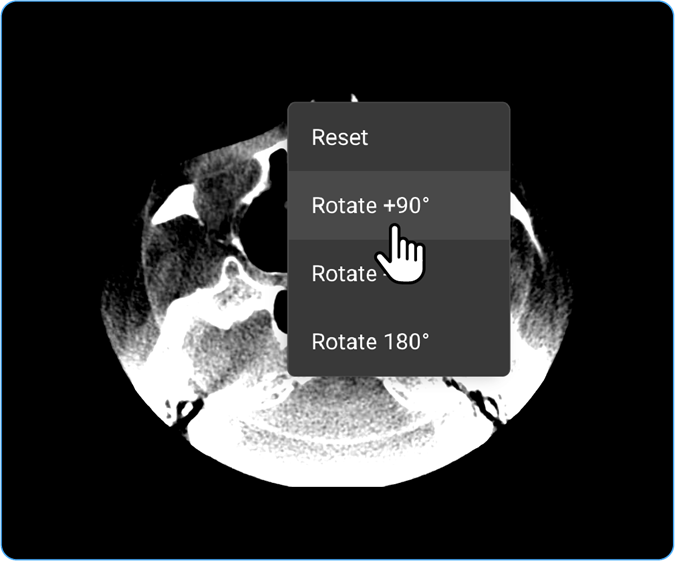
Alternative Rotation Options: Left-click once to access quick rotation options:
- Reset Restores the image to its original position.
-
Rotate +90° Rotates the image clockwise by 90 degrees.
-
Rotate -90° Rotates the image counterclockwise by 90 degrees.
-
Rotate 180°. Flip the image upside down.
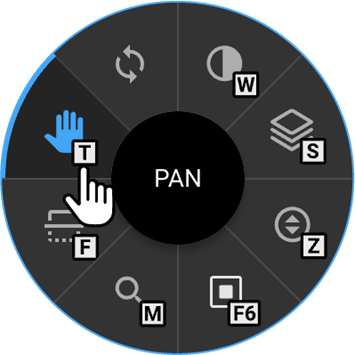
C. Pan the Image
- Click on the Palm/Hand icon in the Adjustment Wheel or press "T" on your keyboard while the wheel is open.
-
Left-click and hold on to the image, then drag it in any direction to pan as needed.
-
Additional Alignment Options: Left-click once to access more options:
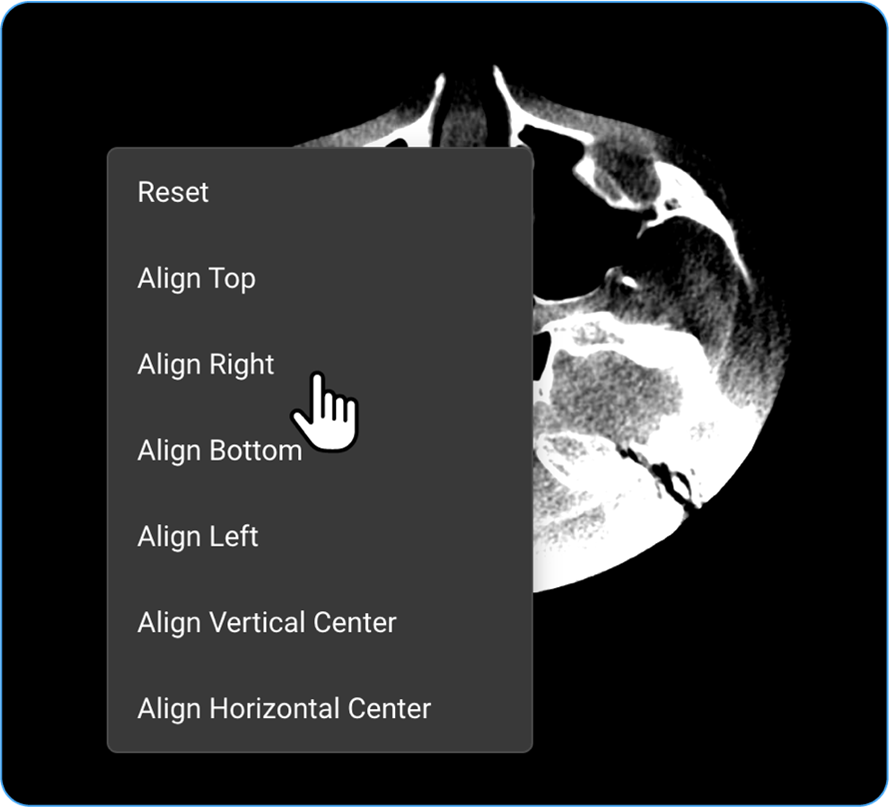
a. Reset: Restores the image to its original position.
b. Align Top: Moves the image to the top of the viewport.
c. Align Right: Align the image to the right side.
d. Align Bottom: Moves the image to the bottom of the viewport.
e. Align Left: Align the image to the left side.
f. Align Vertical Centre: Centres the image vertically.
g. Align Horizontal Centre: Centres the image horizontally.
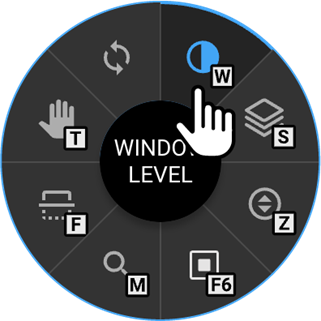
D. Adjust Contrast/Brightness
- Locate the Window Level icon on the Adjustment Wheel or press "W" on your keyboard while the wheel is open.
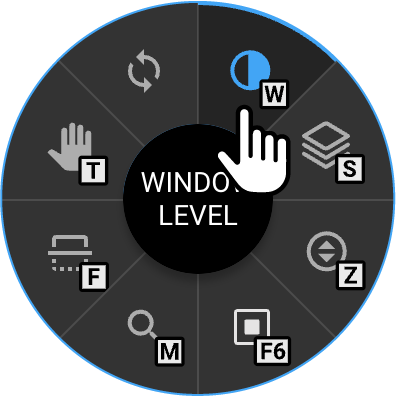
- Left-click and hold, then move the cursor to adjust contrast and brightness as needed.
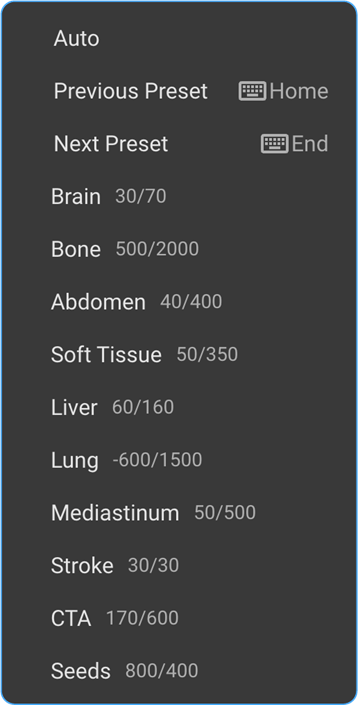
- Additional Adjustment Options: Left-click once to access preset options:
-
Auto: Automatically adjusts contrast and brightness.
-
Reset to Default (40/400): Restores the default contrast/brightness settings.
-
Configure Preset: Allows customisation of contrast/brightness settings.
F. Focus on Specific Image Areas
- Locate the Shutter Rectangle feature on the Adjustment wheel to mask unnecessary areas and highlight specific regions for better diagnostic efficiency.
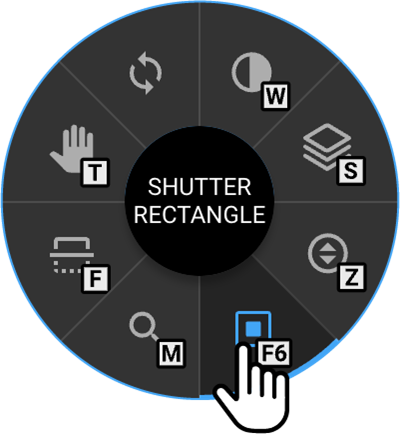
- Alternatively, press F6 on your keyboard while the adjustment wheel is open to activate the Shutter tool.
- Left-click and drag on the image to draw a rectangle over the area you wish to focus on.
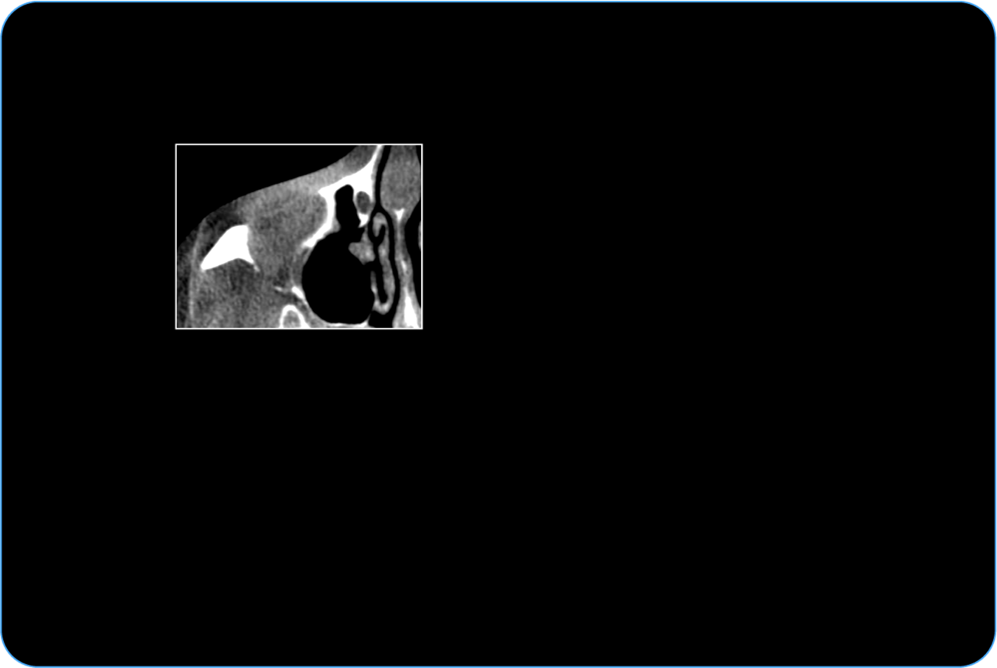
- The selected region will remain visible, while the surrounding areas are masked.
- Additional Shutter Options- After activating the Shutter tool, left-click once to access different shutter shapes:
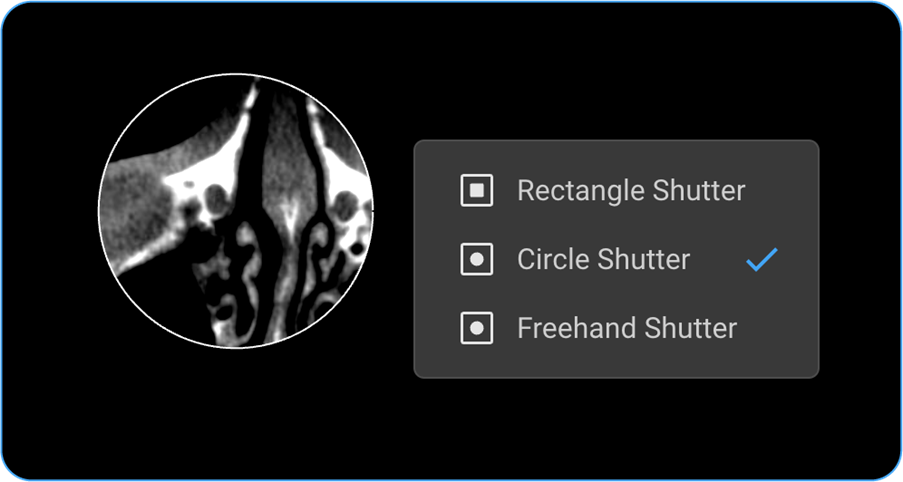
- Rectangle Shutter: Masks the area outside the drawn rectangle.
- Circle Shutter: Masks the area outside a drawn circle.
- Freehand Shutter: Allows you to draw a custom shape to mask specific areas.
To enhance your experience with the OmegaAI Image Viewer, the adjustment wheel offers a variety of customization tools.
To access these additional tools, toggle down the adjustment wheel menu.
Below is a list of available tools along with their primary functions:
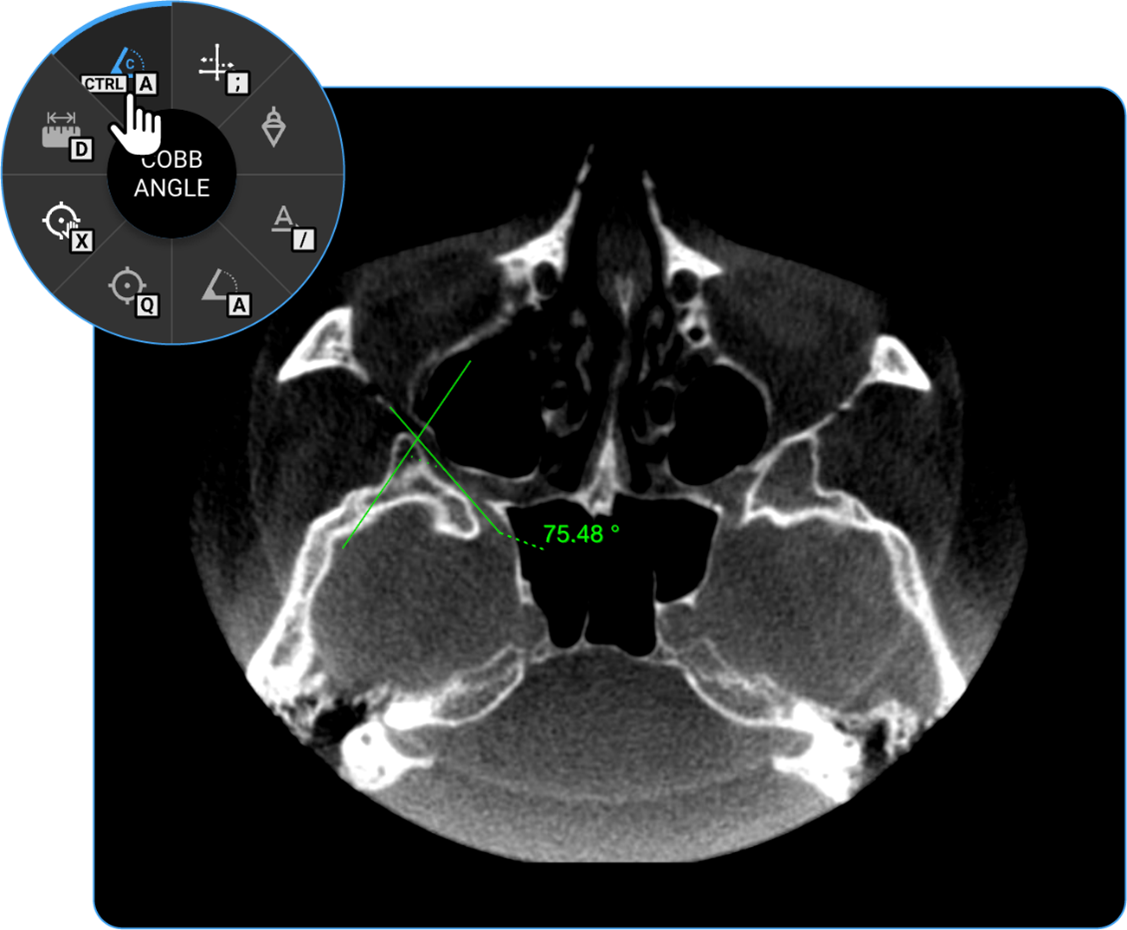
- Cobb Angle: Locate the Cobb Angle tool on the adjustment wheel and click on it to measure the degree of spinal curvature, aiding in scoliosis assessment.
- Length: Locate the Length tool on the wheel and click on it to calculate the distance between two points on the image, useful for measuring anatomical structures.
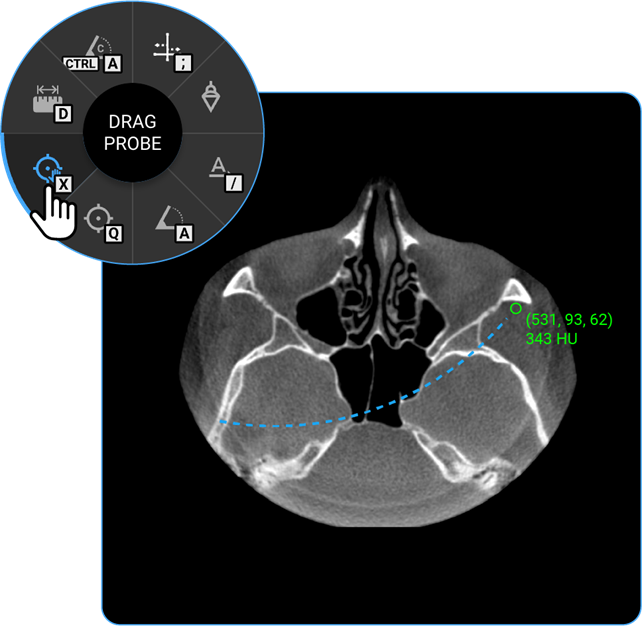
- Drag Probe: Click on the Drag Probe tool to move a probe point across the image and assess pixel values or other parameters dynamically.
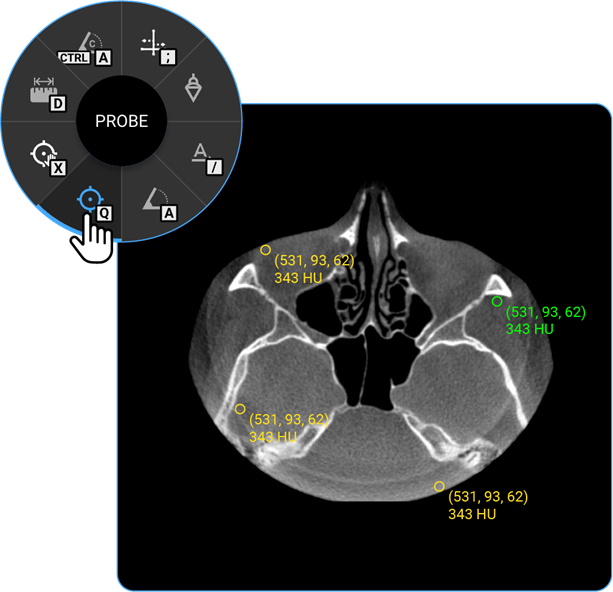
- Probe: Select the Probe tool to analyse specific pixel values, providing information on intensity or density at a particular point.
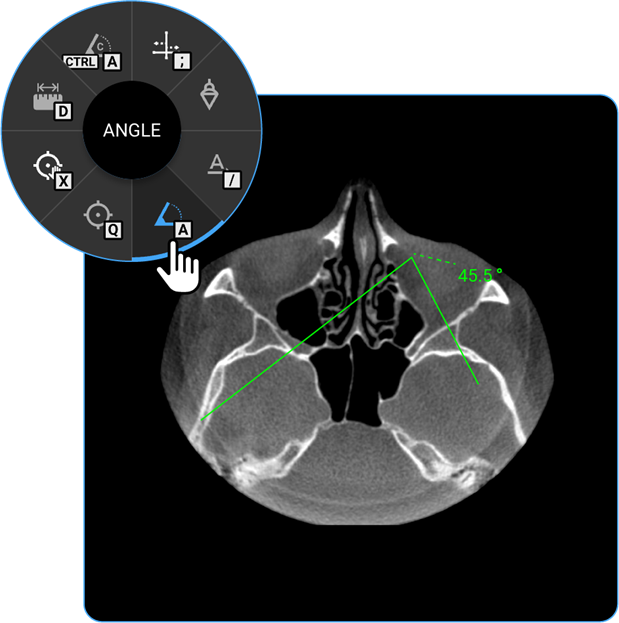
- Angle: Click on the Angle tool to determine the angle between two intersecting lines, assisting in anatomical evaluations.
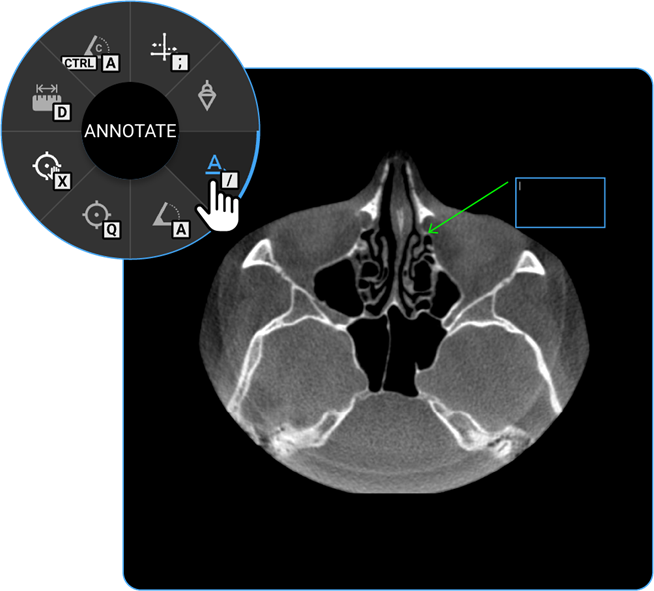
- Annotate: Use the Annotate tool to add text or markers to the image for documentation or instructional purposes.
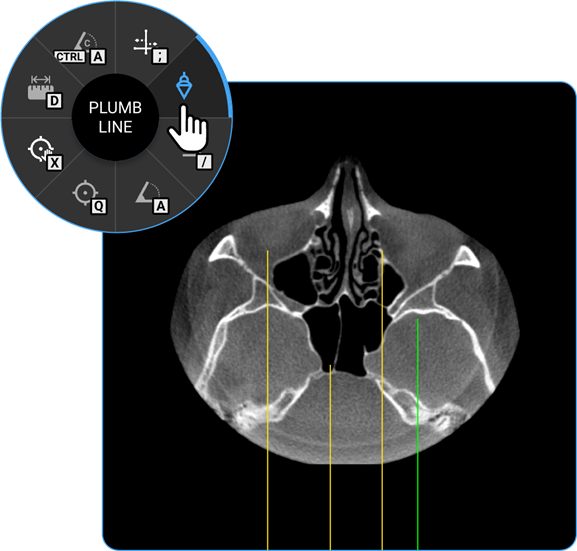
- Plumb Line: Select the Plumb Line tool to draw a vertical reference line, helpful in assessing alignment or structural deviations.
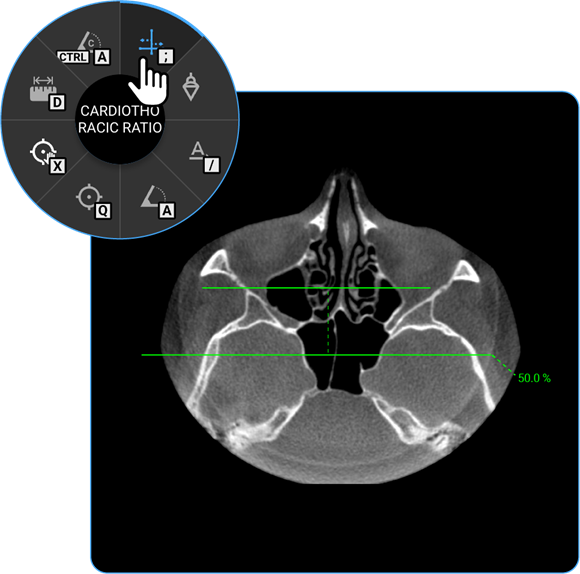
- Cardiothoracic Ratio: Click on the Cardiothoracic Ratio tool to calculate the ratio of the cardiac width to the thoracic width on chest radiographs, aiding in the evaluation of heart size.
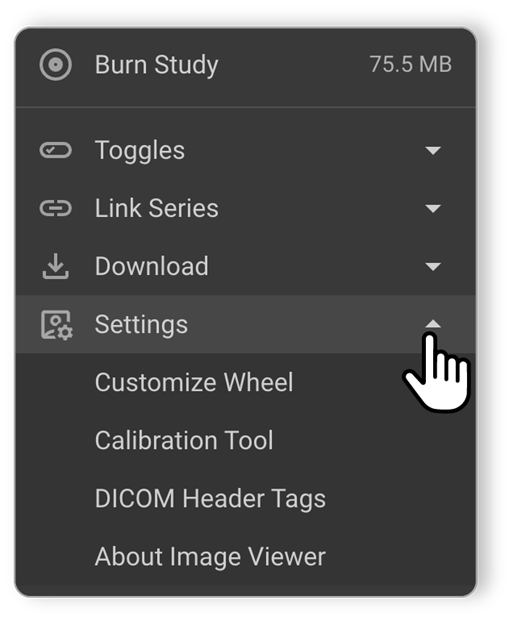
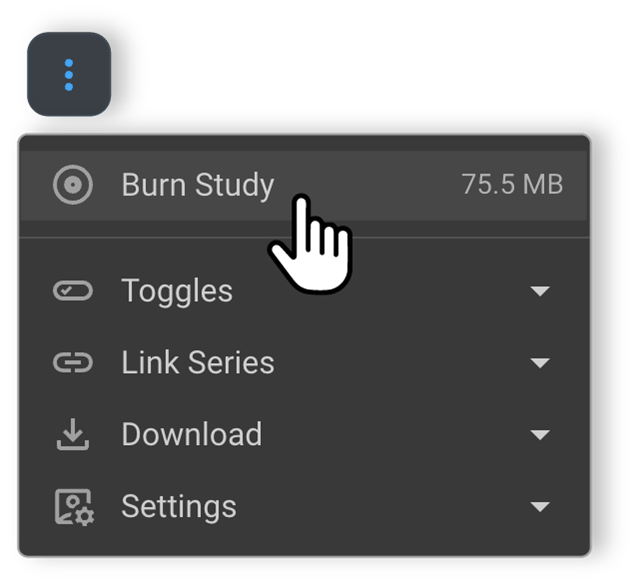
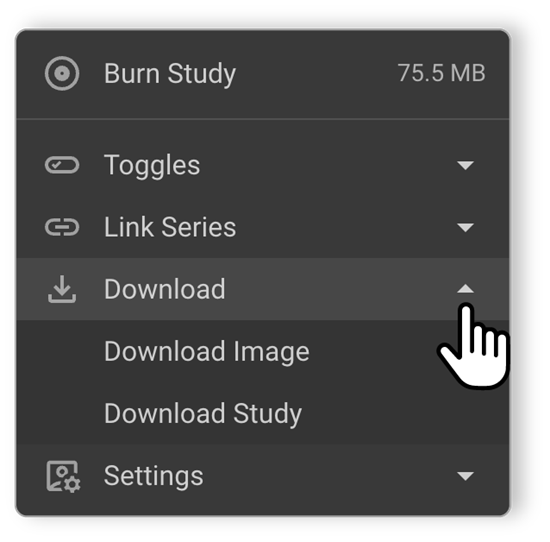
What’s in the More Options (⋮) Ellipsis Drawer Options Menu?
Click the three dots (⋮) on the toolbar to access advanced features:
1. Burn Study
- Burn the current study to a CD/DVD.
- Shows study size to confirm if it fits.
- If no images/documents exist, the size shows 0 MB.
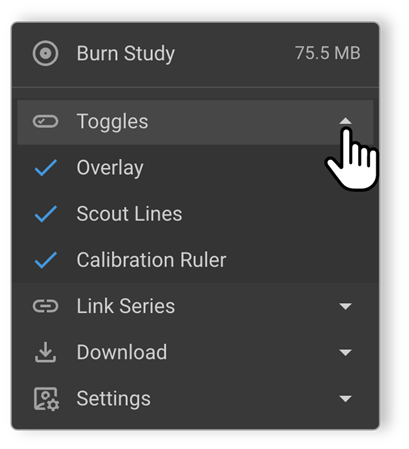
2. Toggles
- Overlay: Add/remove image layers.
- Scout Lines: View scout lines.
- Calibrated Ruler: Enable precise measurements.
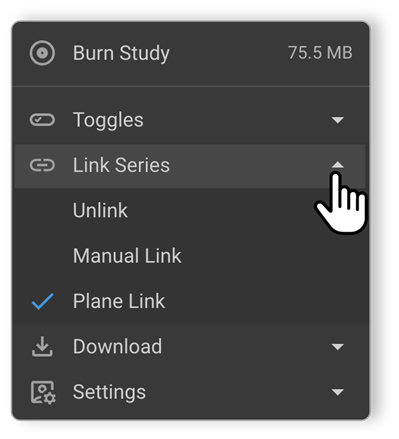
3. Link Series
- Unlink: Disconnect linked series.
- Manual Link: Select and link manually.
- Plane Link: Auto-link based on image plane.
4. Downloading Studies and Images
Blume allows users to download their studies and images directly from the Completed Appointments section. You can download either a single image or the entire study, as well as print or save reports for your records.
On Desktop
- Access Completed Appointments Navigate to the Completed Appointments section and select the desired study.
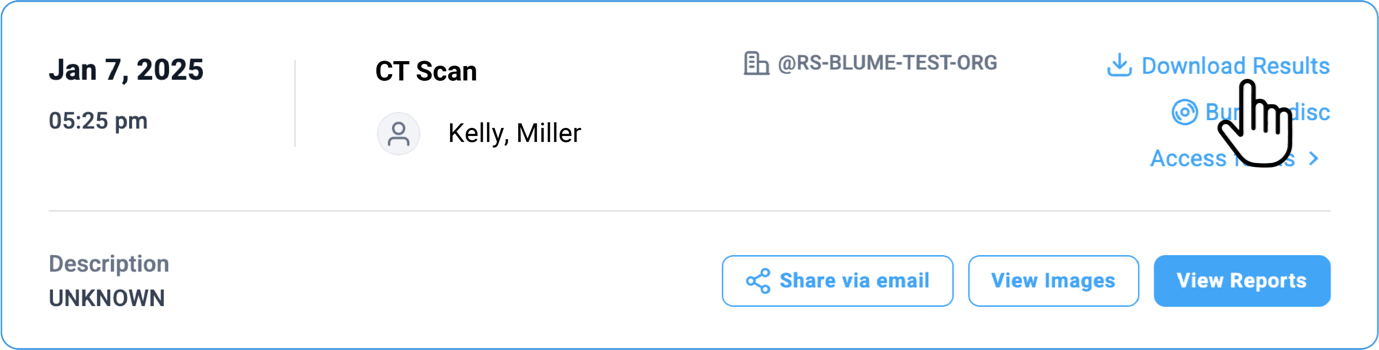
- Download from the Appointment Card
Click the Download Results option in the top-right corner of the selected study.
- A message appears at the bottom of the screen: “Your requested study results will commence shortly.”
Note: You can also copy the study results to a CD using the Burn to CD option. (Available on web only.)
-
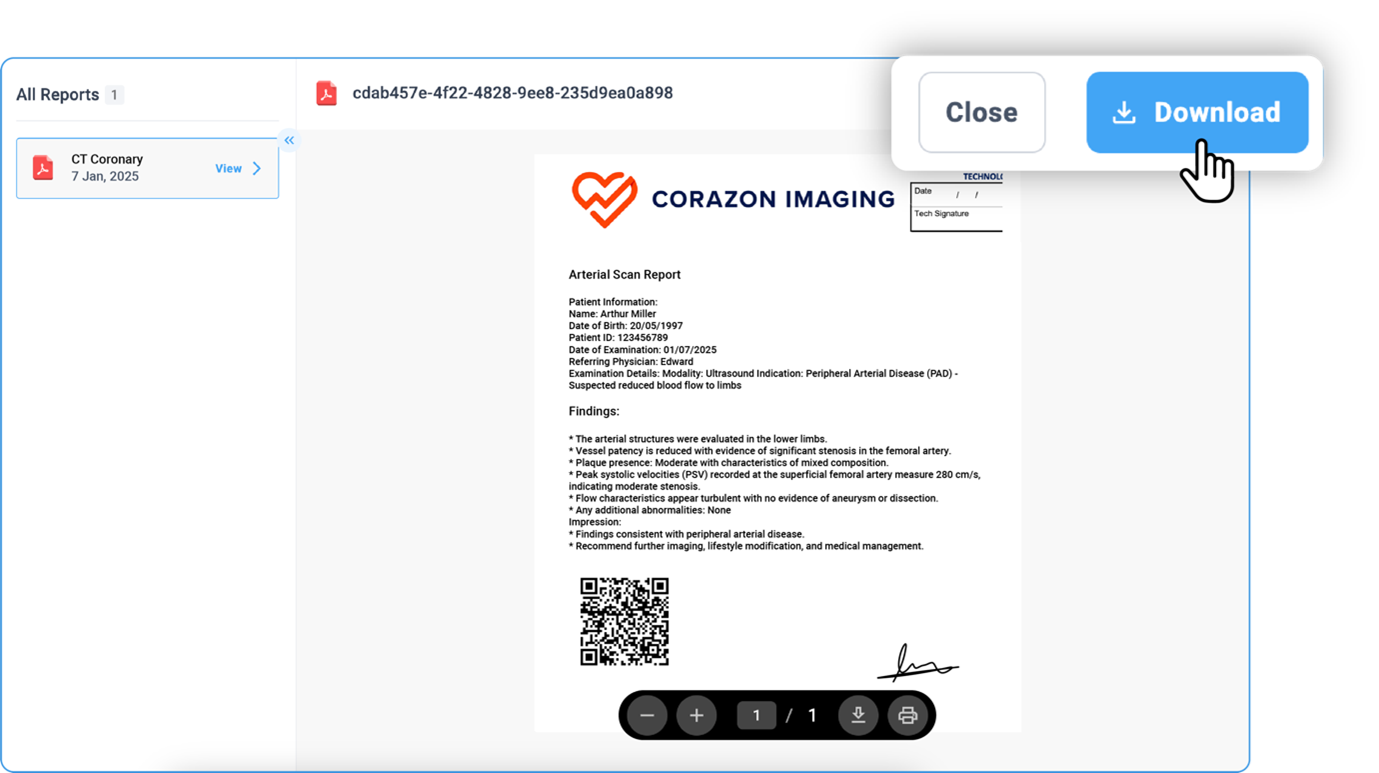
Alternative Options to Download or View the Study
a. Click View Reports at the bottom of the selected study to open it.b. Once opened, locate the toolbar at the top of the page and click the Download button.
c. You can also click the Download arrow at the bottom of the page.
d. To print, use the Print option next to the download button (available both at the top and bottom of the page).
-
Using the Document Viewer (Blue Icon)
a. After selecting View Image, wait for the image viewer to load.b. If a report or study is available, it will automatically open in the document viewer alongside the image viewer.
c. Click the Download button at the bottom of the page to save the file.
d. Use the Print button if a printer is connected to your system.
e. Click Show Pages to view all pages of your report or document.
f. Use Zoom In / Zoom Out for better visibility.
-
Downloading Images from the Image Viewer
-
Click View Images to open the Image Viewer.
-
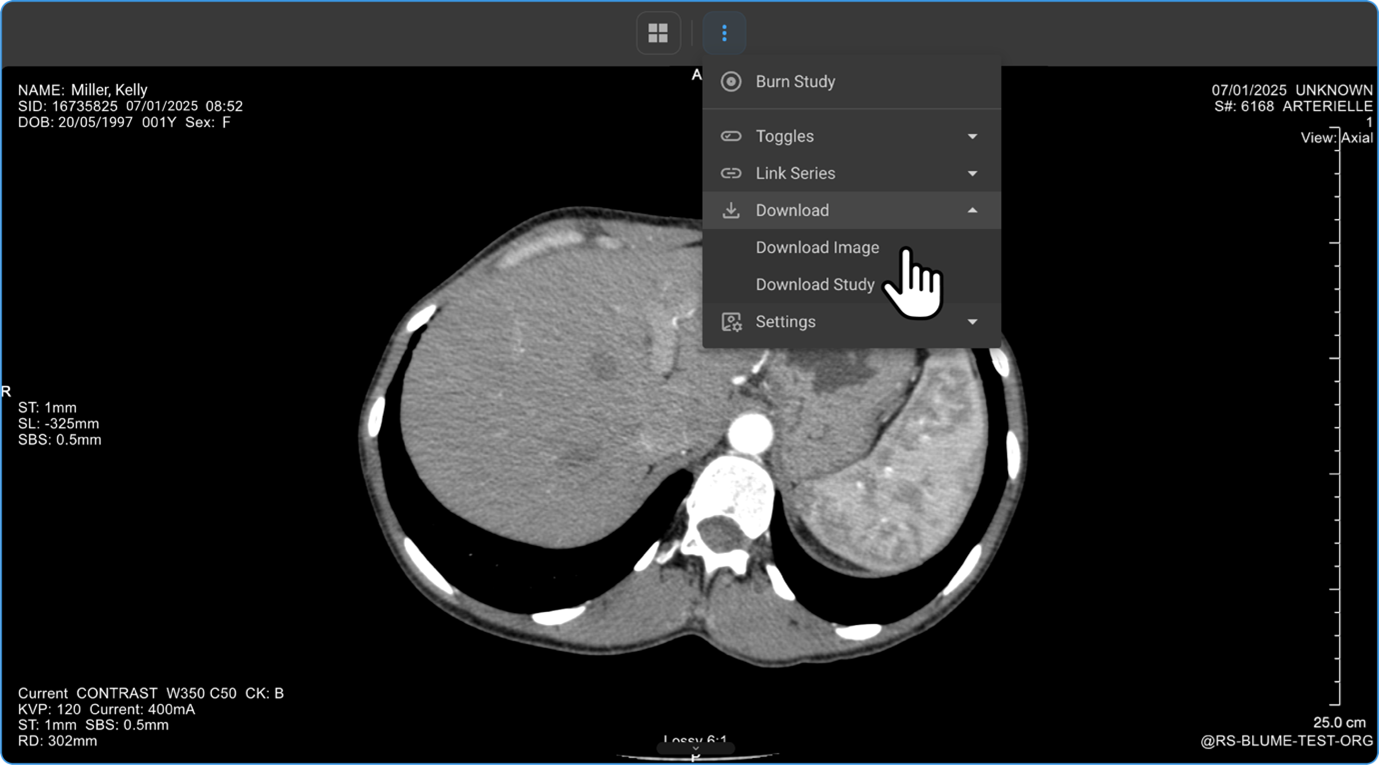
Click the three-dot menu (⋮) in the viewer toolbar.
-
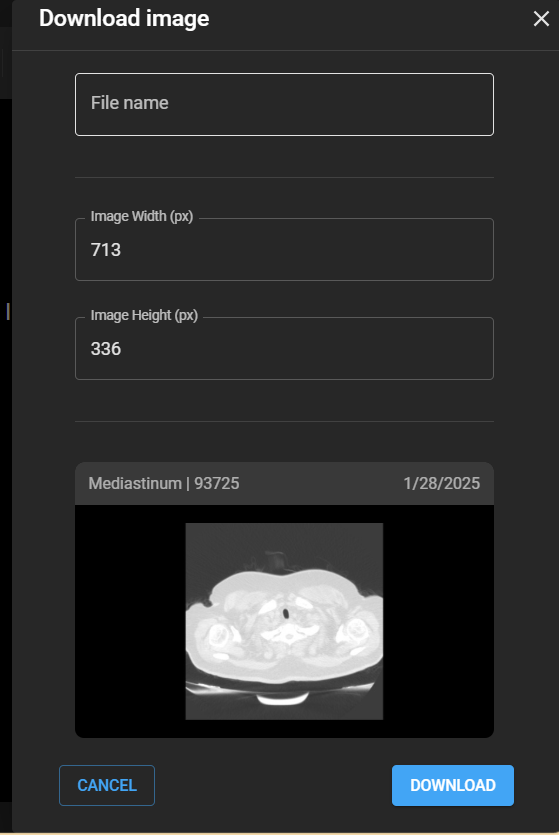
Select Download → Download Image or Download Study.
-
Enter the file name and preferred image resolution (in pixels), then click Download.
-
Mobile
-
Access Completed Appointments
Log in and navigate to Completed Appointments, then select the study you wish to view.
-
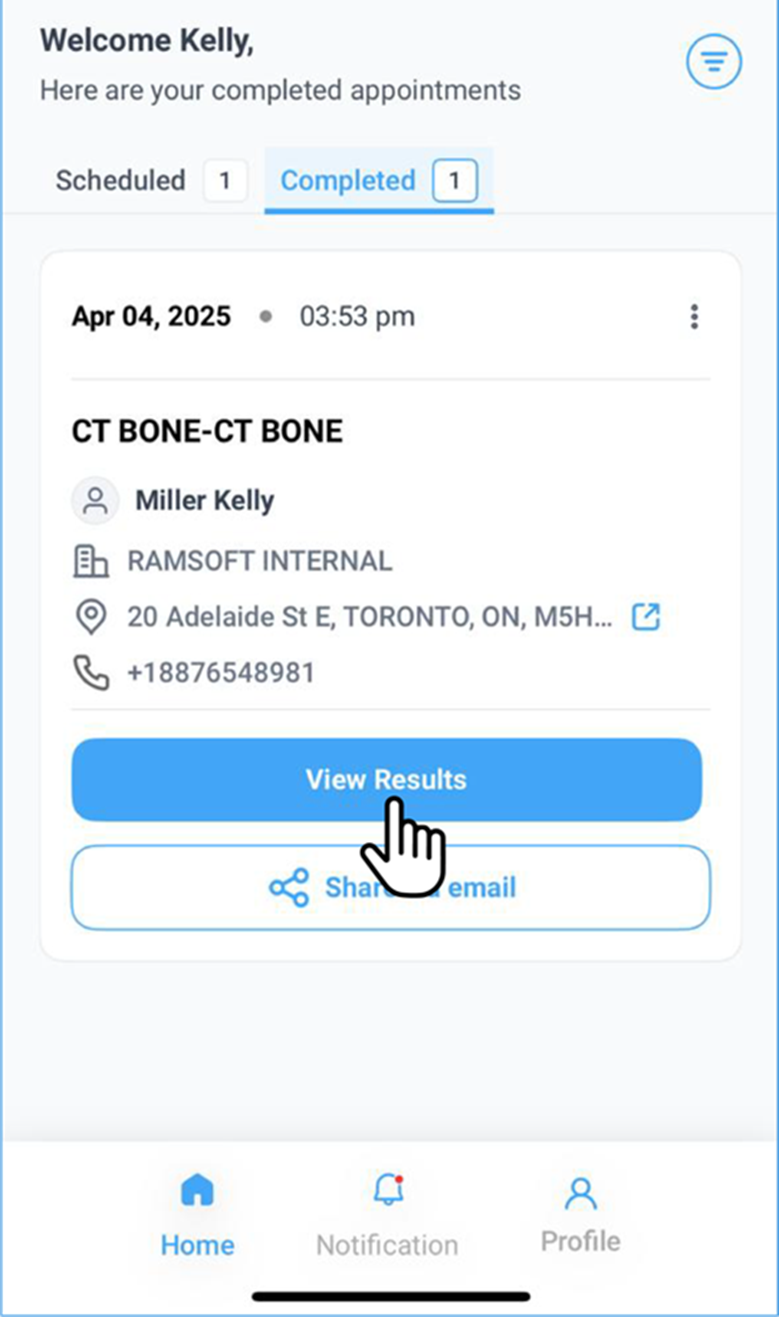
View Results
Tap View Results to see available options:
-
View Images — Opens attached study images in the Blume Image Viewer.
a. Swipe up to scroll through series, right to move between frames.
b. Pinch to zoom in or zoom out.
c. Tap the back arrow (top-left) to exit the viewer.
-
Available Reports — Tap the download arrow to save the report or tap the report itself to open it.
a. Scroll up/down to navigate through pages.
b. Use the download arrow (top-right) to save.
c. Tap the back arrow (top-left) to exit.
-
Forms — Tap to view registration or clinical forms linked to the study.
-
-
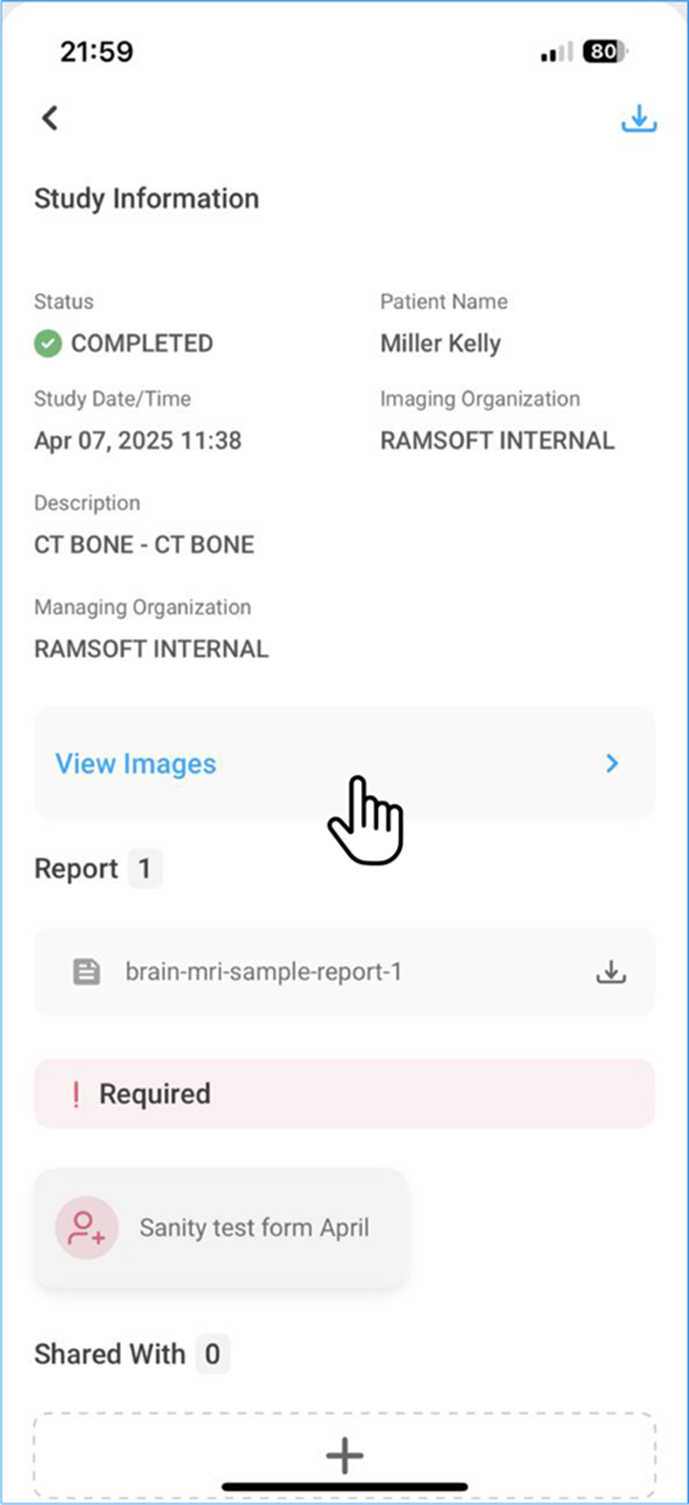
Download Study (ZIP Format)
From the Study Information page, tap the arrow icon next to the Study Information section to download images in ZIP format.
-
Download from Home Page
Under Completed Appointments, tap the Download Results button to download the study. You can also monitor the download progress on the screen.
Viewing Images in Completed Appointments
- Go to Completed Appointments and select the desired study.
- Tap View Results to open the Study Information Page.
- Locate and tap View Images to access the available images.
-
Use finger touch to PAN the images.
-
Pinch in/out to zoom in or out.
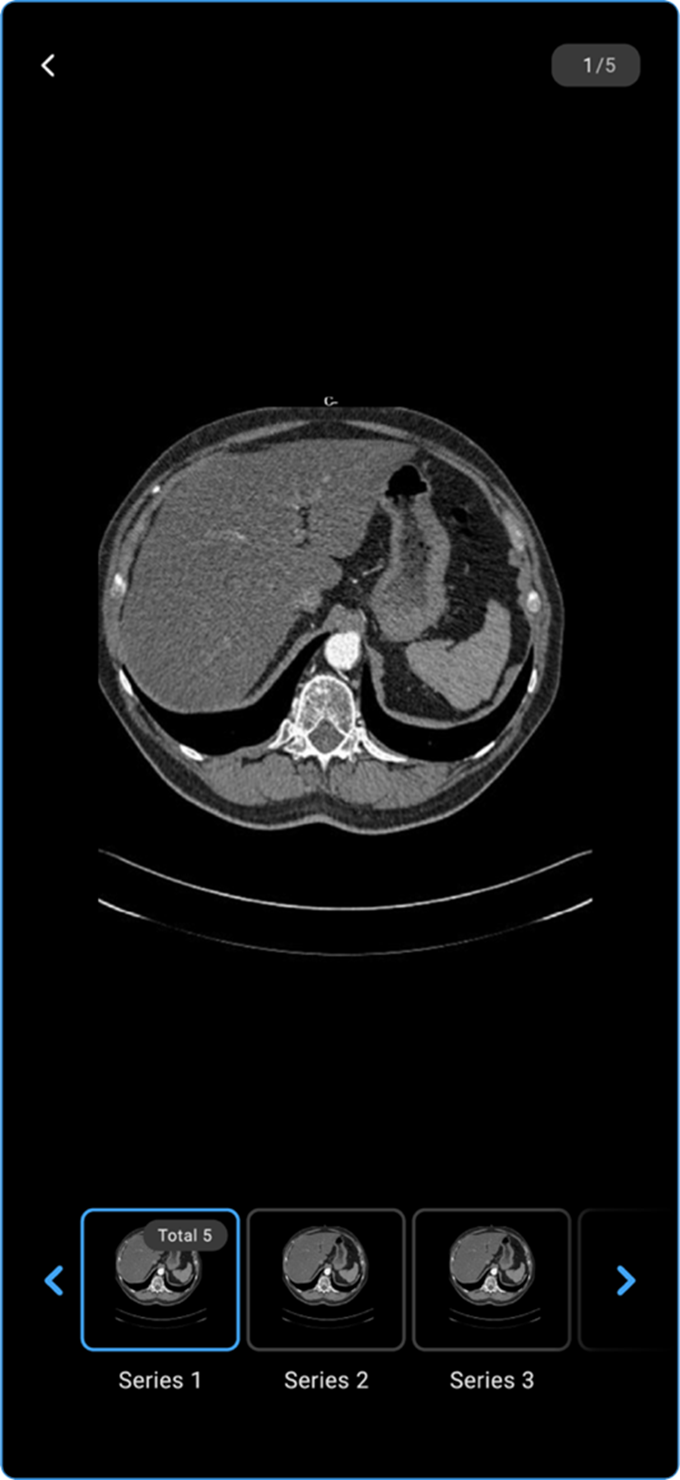
- Scroll sideways to navigate through other images in the series.
5. Settings
Includes multiple options:
- Customising Wheel: Rearrange the tool wheel for faster access.
- Calibration: a. Draw a line with known measurement → Enter value → Confirm. b. Viewer adjusts scale for accurate measurements.
- DICOM Header Tags: View study metadata.
- About Image Viewer: See software details.