Viewing Studies
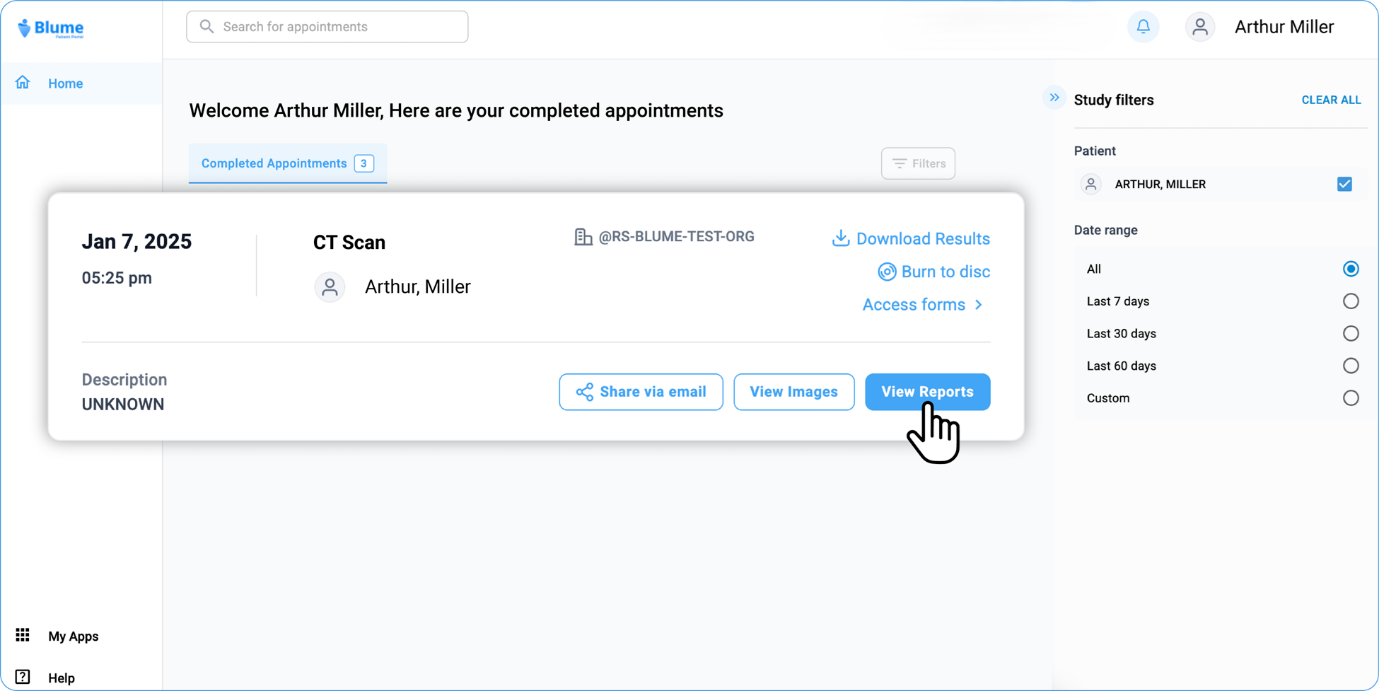
• All your medical studies are available under the Completed Appointments tab, making it easy to access your records without navigating through multiple sections.
• By default, the latest studies appear first.
• To reset filters or sorting, click the Filter icon in the top-right corner of the homepage.
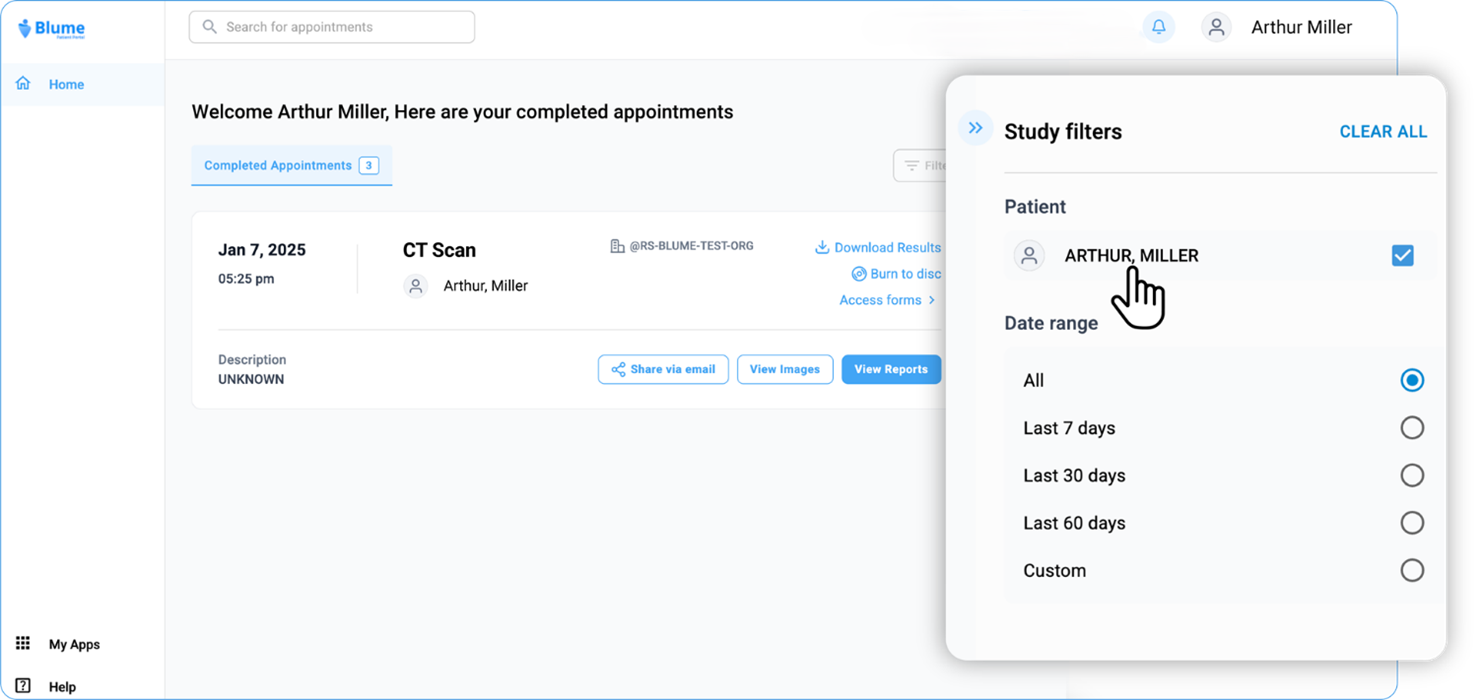
• You can access study details by viewing either Images or Reports from the Completed Appointments section on the Homepage.
Note: Design Update (Web View)
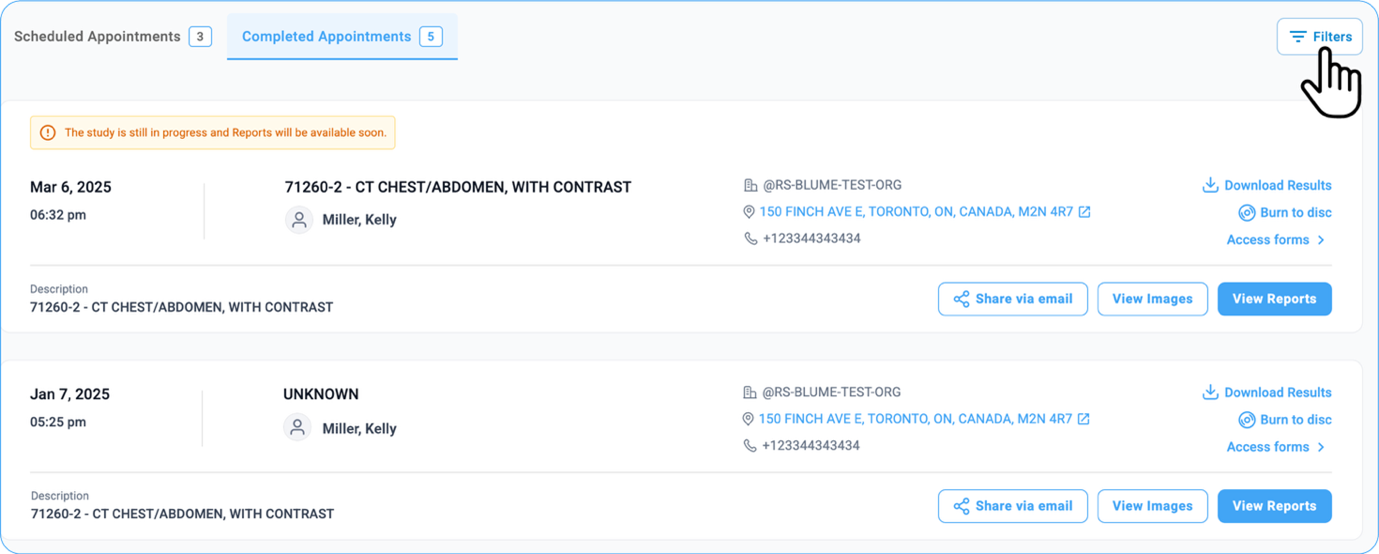
• Appointment Cards now appear in full-screen mode for better clarity.
• The Filter Panel now stays collapsed by default. (explained in detail below)
• Click the Filter button to open it and apply filters when needed.
Viewing Images or Reports from the Completed Appointments section:
( Web View)
1. Viewing Images
• Navigate to Homepage > Completed Appointments.
o Ensure the correct patient profile is selected if multiple profiles exist.
o Check for any applied filters and adjust as needed.
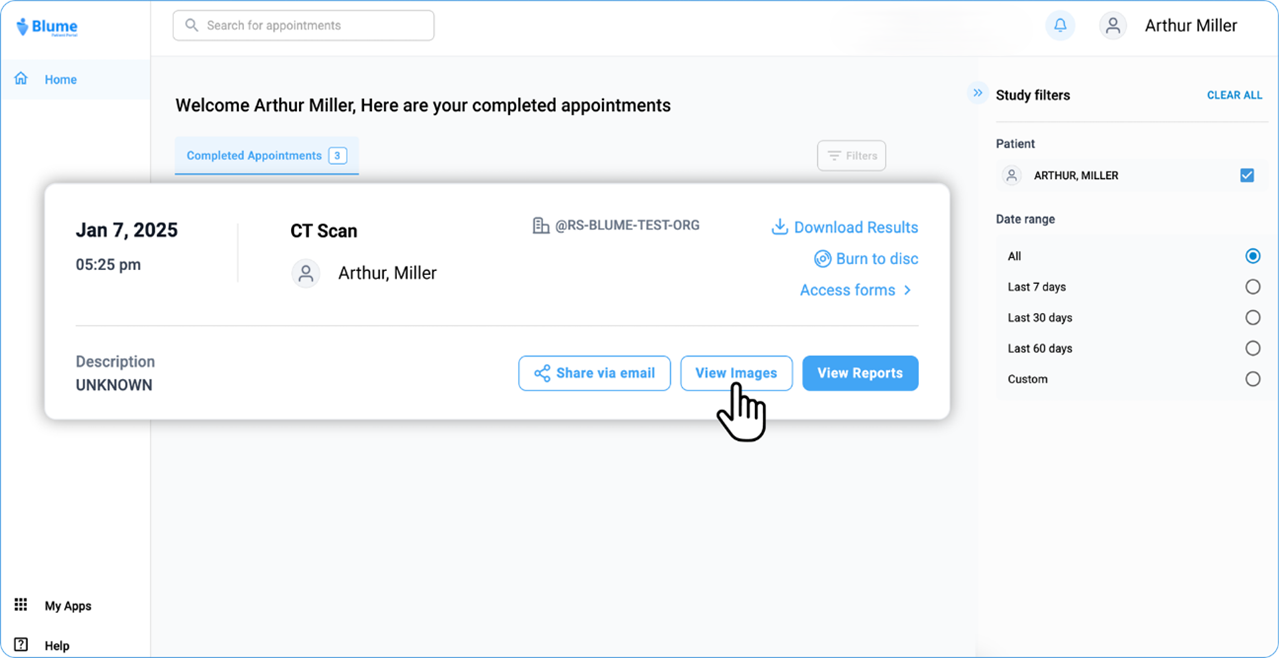
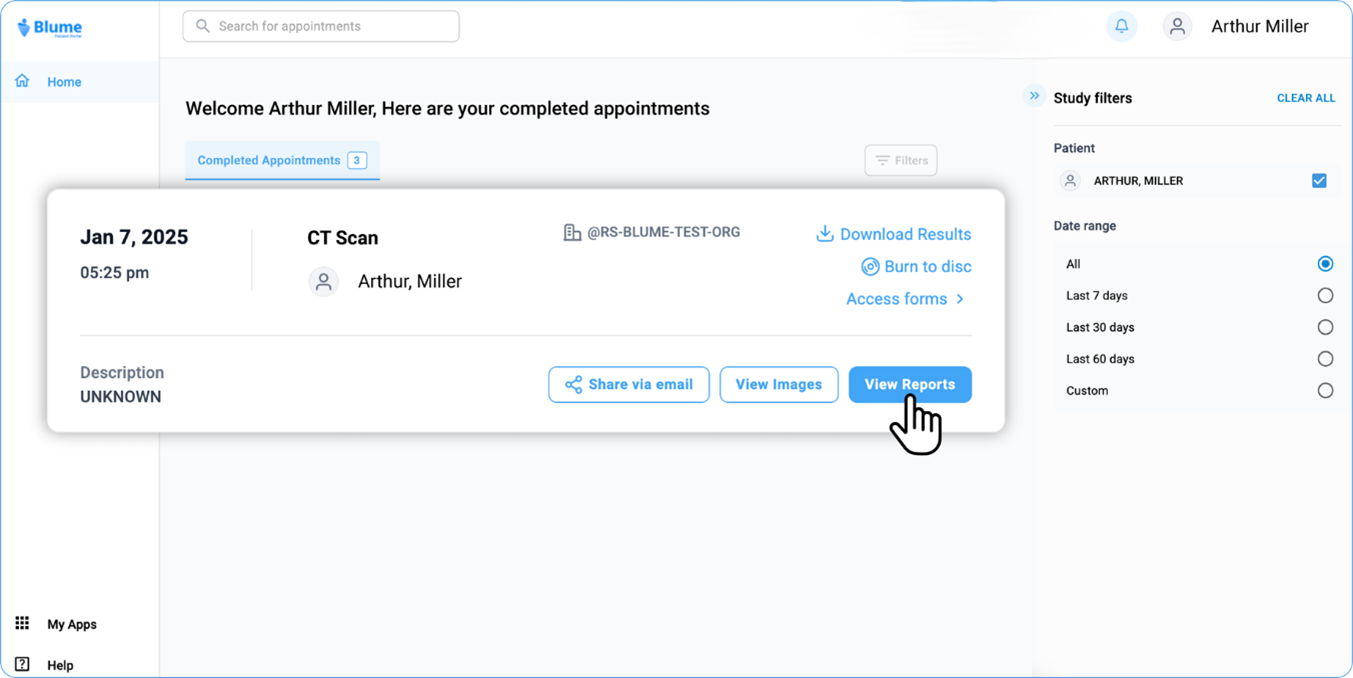
• Click on any appointment card to view its details. At the bottom, you’ll find options to View Images, View Reports, and Share via Email.
• Click View Images.
• Wait for the Image Viewer to load.
• The left panel displays patient details along with prior and current studies under the Study Explorer.
• The study currently opened is labelled as Current, while all others—including future studies—are labelled as Prior. Click to view studies by category (Current, Prior, or All).
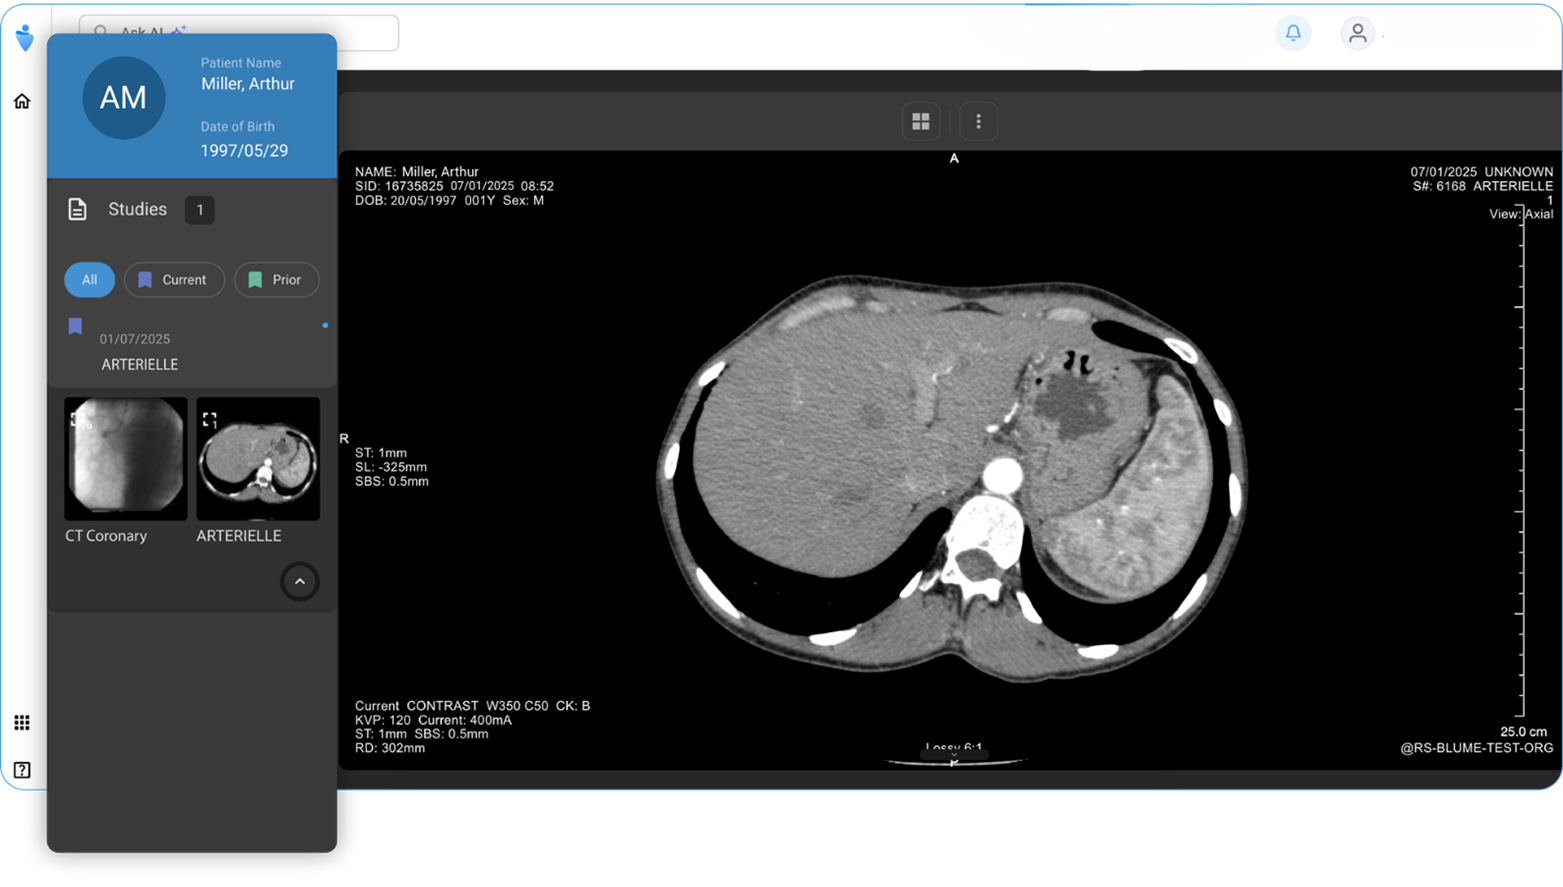
• The center viewport displays the study images, which can be adjusted or customised using available tools (see Viewing/Adjusting Images for more).
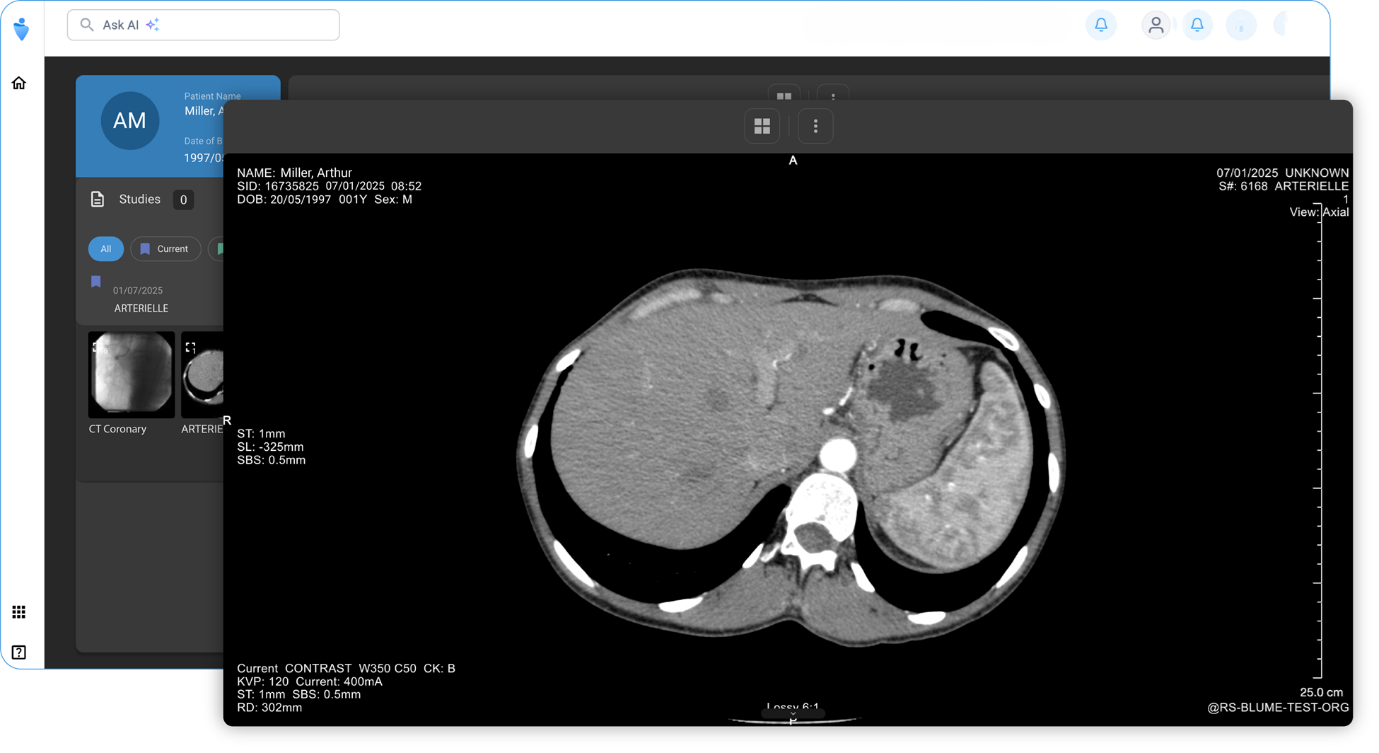
• To download images, go to the top toolbar and click the three-dot menu to access the download options.

• Reports, if available, are visible alongside the images for reference.
2. Viewing Reports
• Navigate to Homepage > Completed Appointments.
o Verify the correct patient profile is selected.
o Adjust filters as needed to locate the desired study.
• Click View Report at the bottom of the study card.
• This will open the All-Reports tab.
• The left panel will list all available reports.
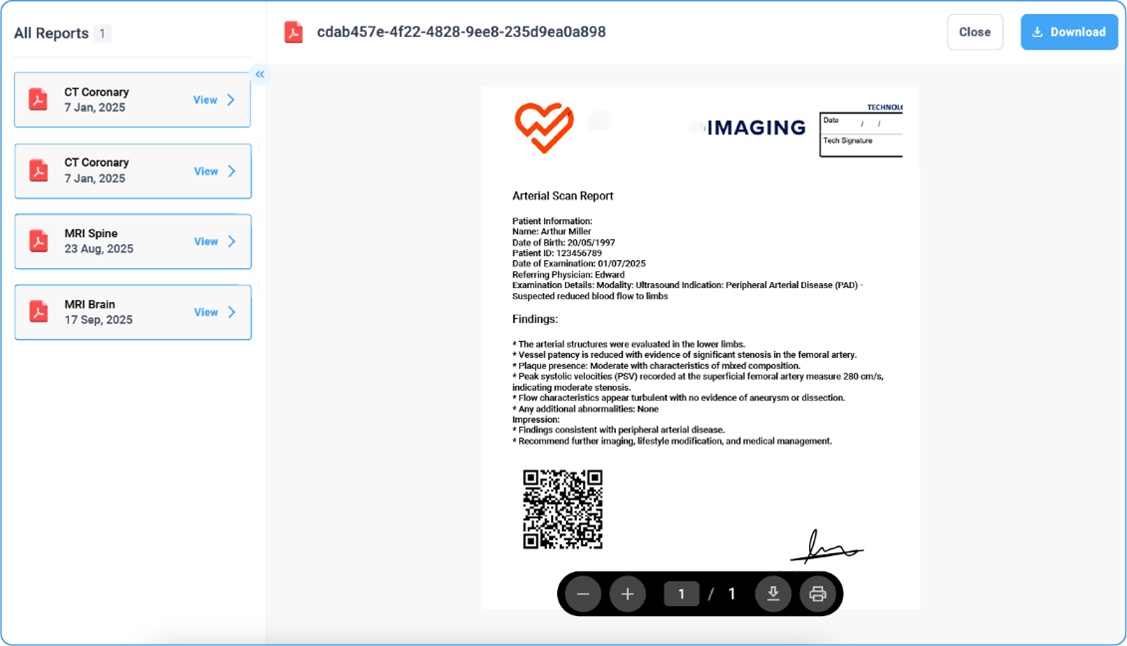
• Click on any report to open and view its contents.
• Scroll to navigate through the report.
• Use the download and print option, which is also available at the top-right corner.
• Additionally, use the bottom toolbar for options such as zoom in/out, download, print, and page navigation.

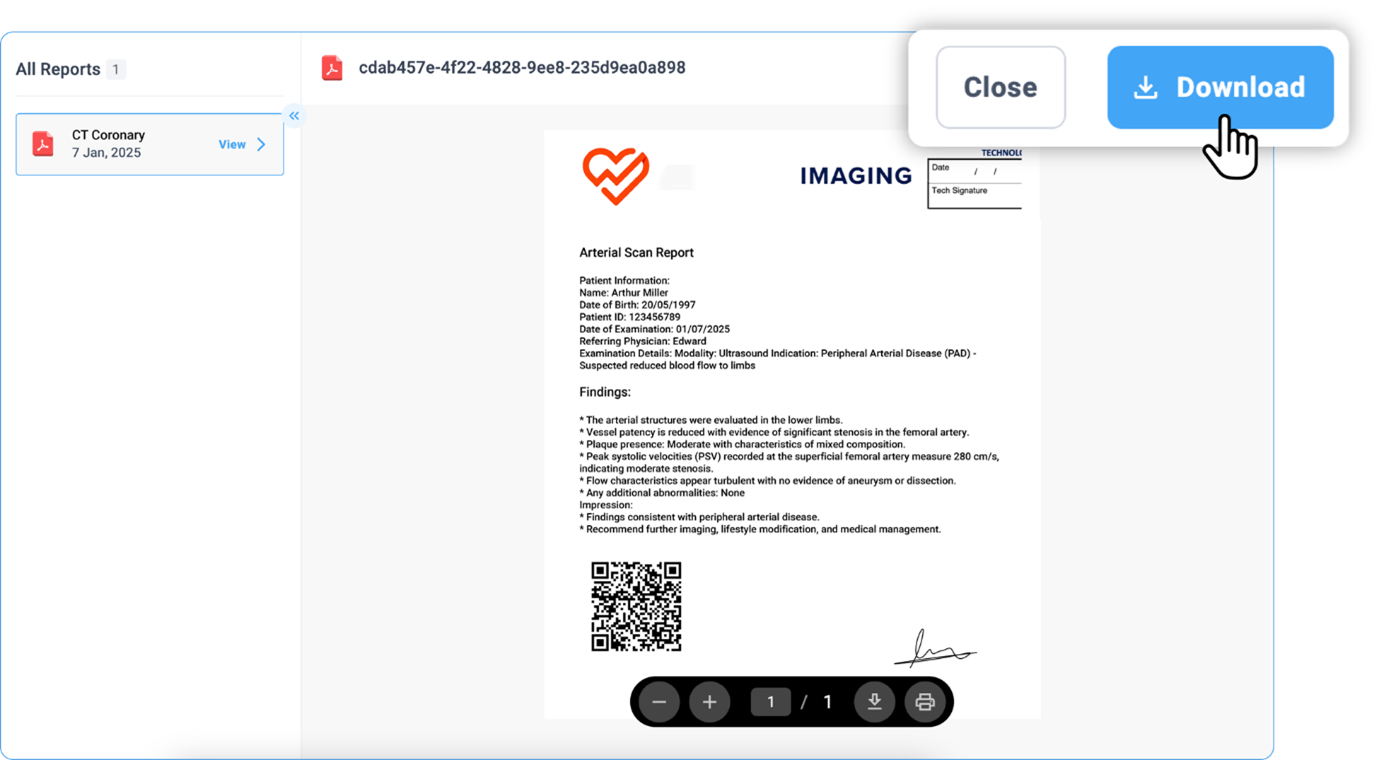
• Click Close to return to the Homepage when done.
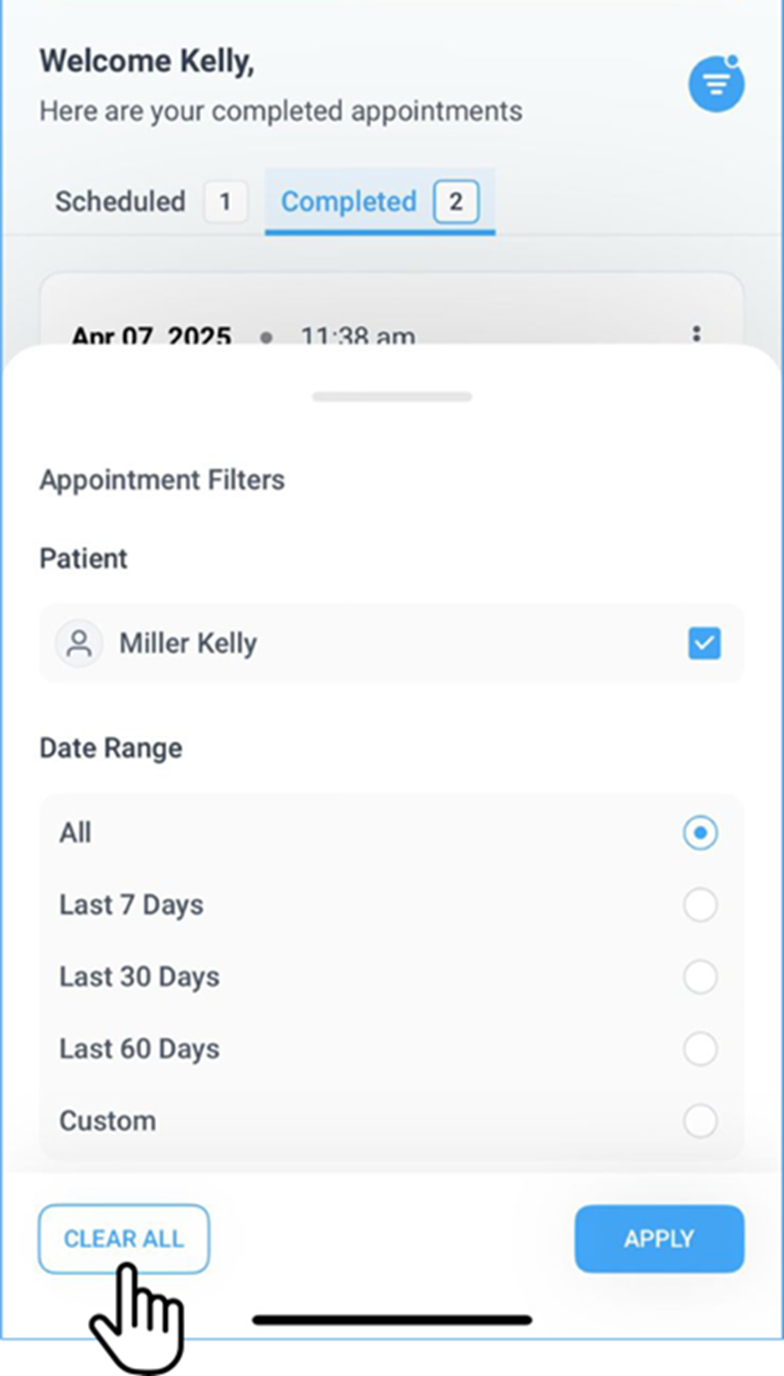
Design Update: Filter Panel (Web View)
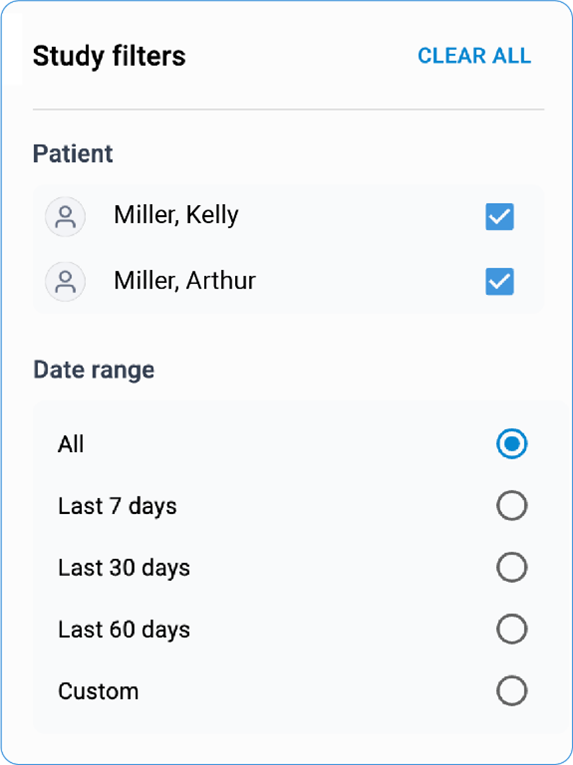
In the latest update to the Blume Web View, the behaviour of the Filter Panel in the Completed Appointments section has been refined. Previously, the filter panel opened automatically by default. With the new update, it now remains collapsed by default, offering a cleaner and more focused interface. Users can still access and apply filters at any time by clicking the Filter button. This change enhances the overall user experience by reducing visual clutter while keeping filtering options easily accessible.
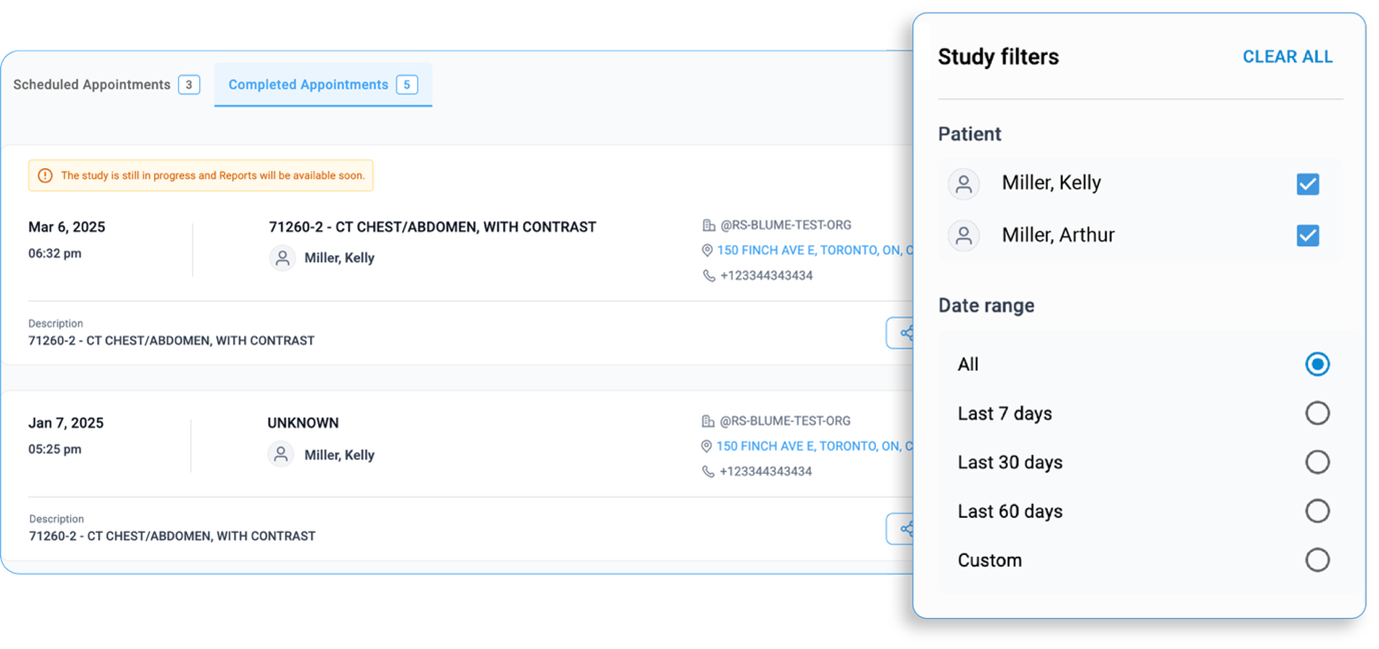
The updated filter options let users easily switch between profiles under the primary account and refine studies by date range—All, Last 7 Days, Last 30 Days, Last 60 Days, or Custom.
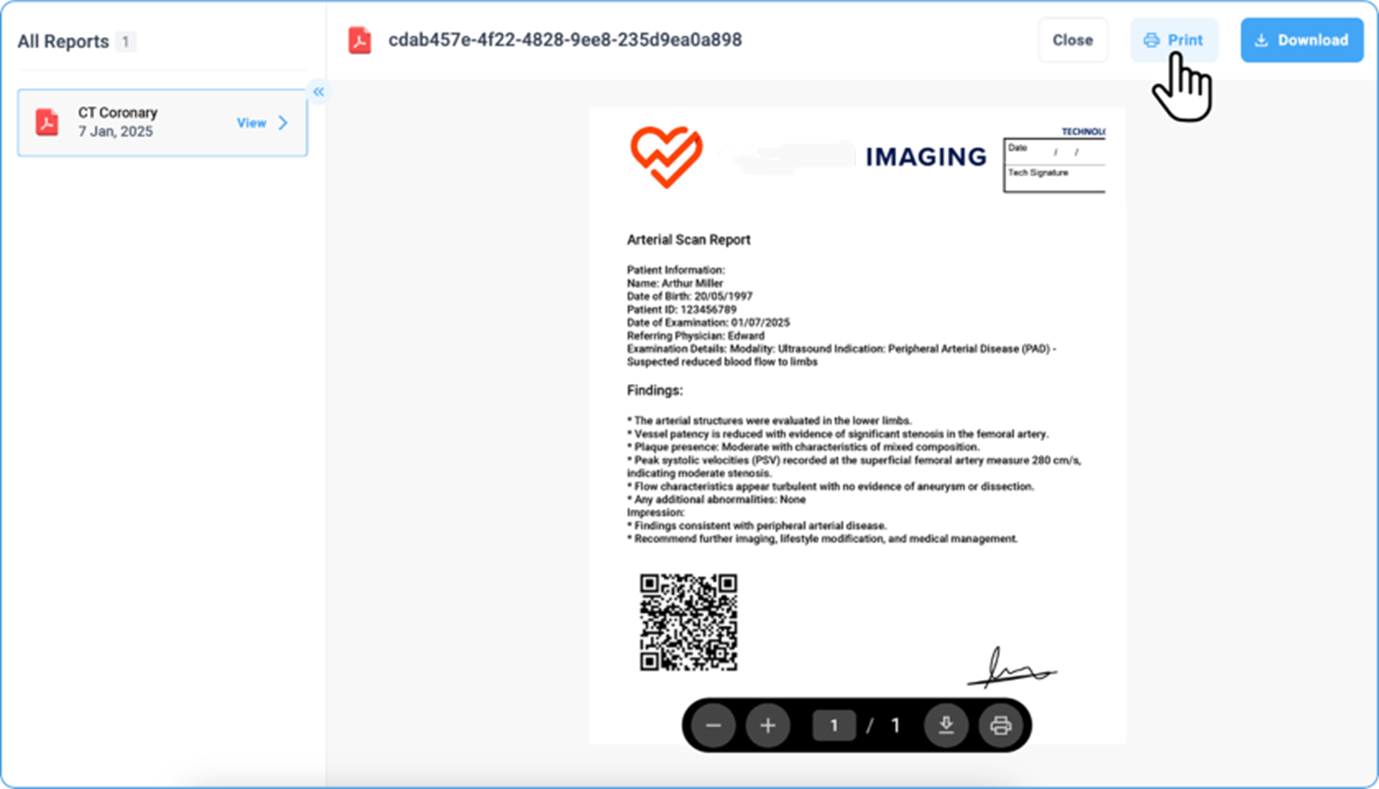
Print Option for Reports
In addition to the features above, a Print option has been introduced for reports under the View Reports section for the web/desktop view. Once a report is open, you’ll find a Print icon next to the Download button at the top right corner of the report window.
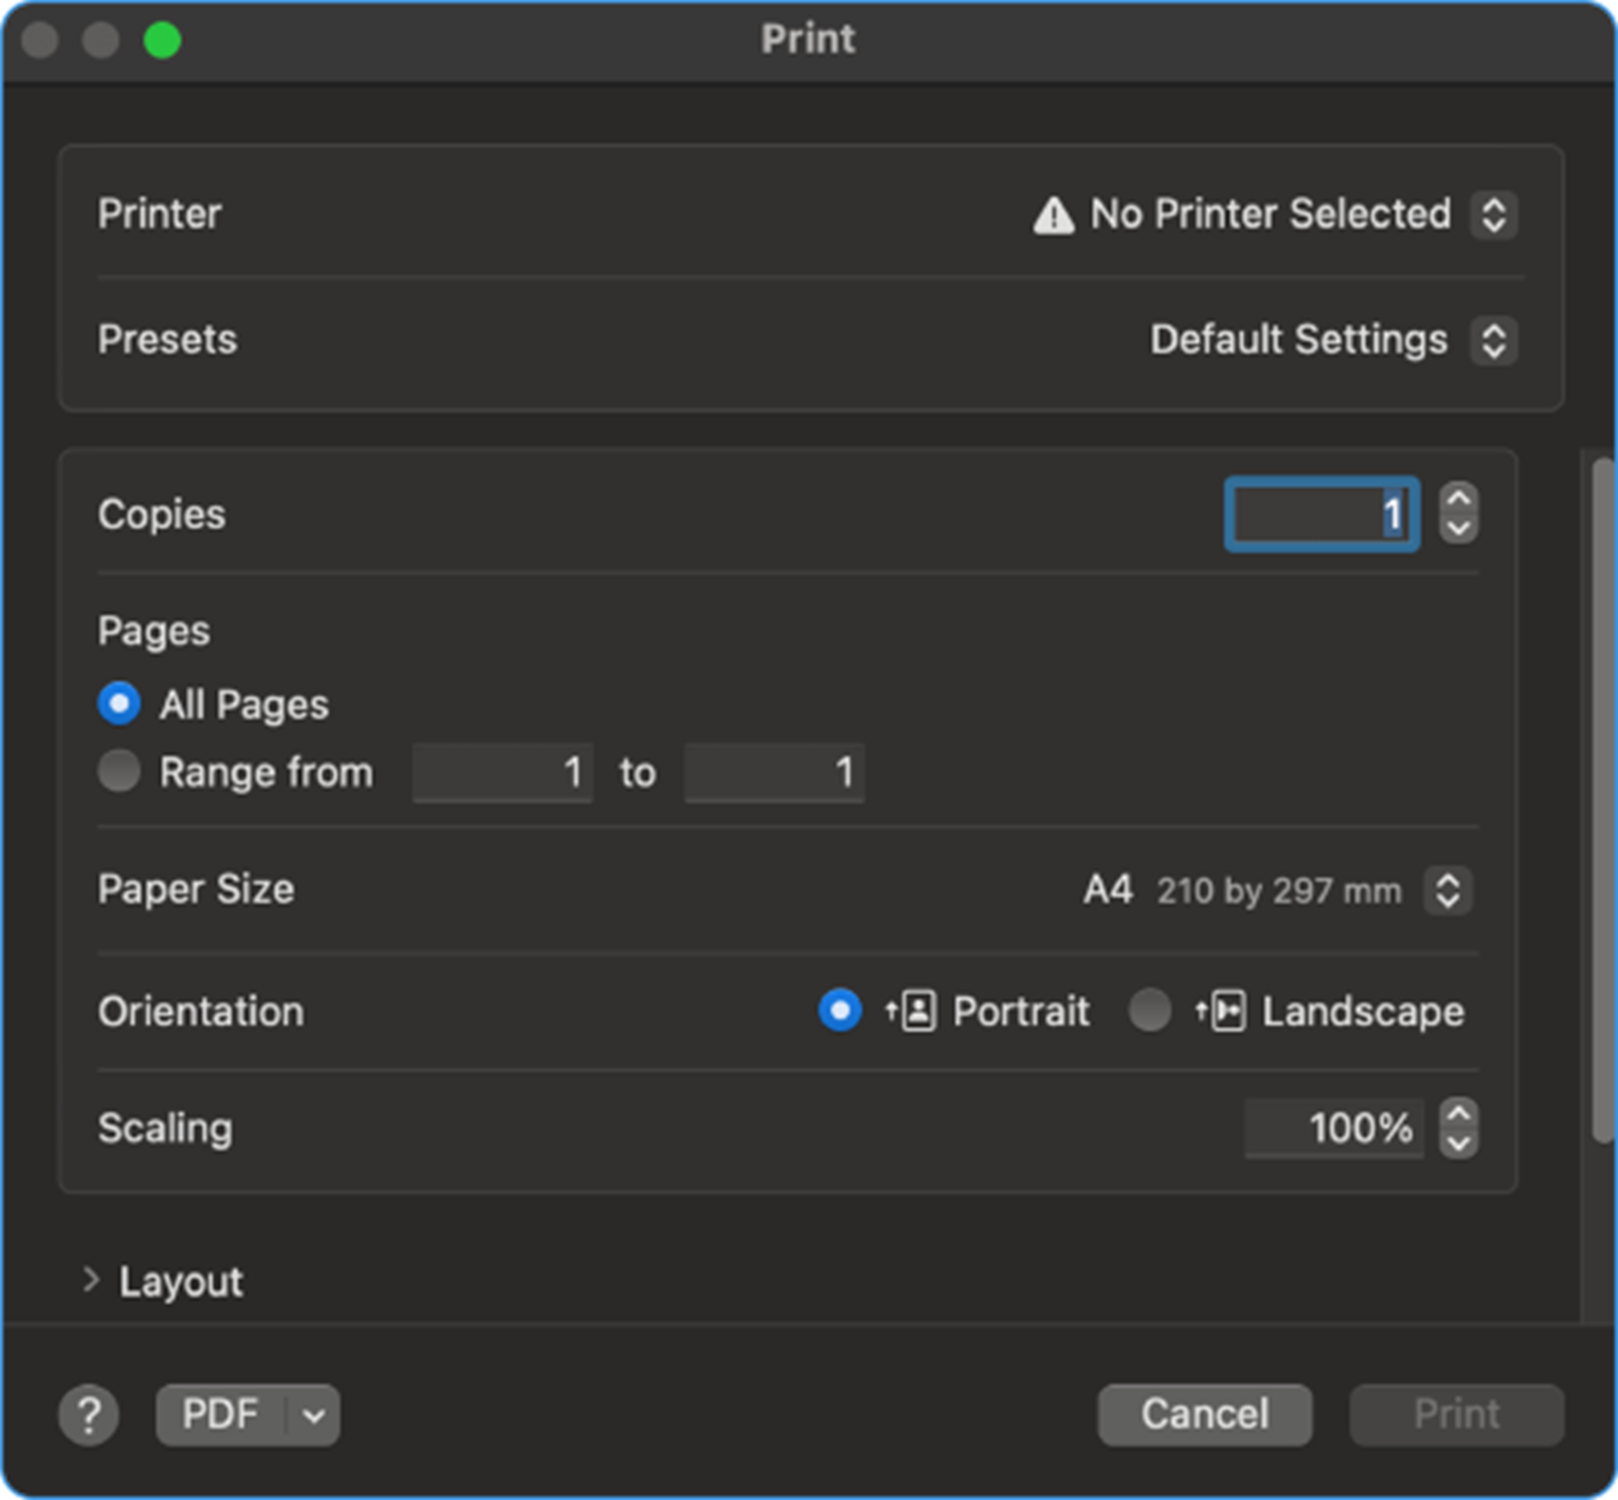
• Clicking the Print icon will open the Print Preview page.
Note: All print settings will be available on the left side of the Print Preview page for easy access and adjustments.
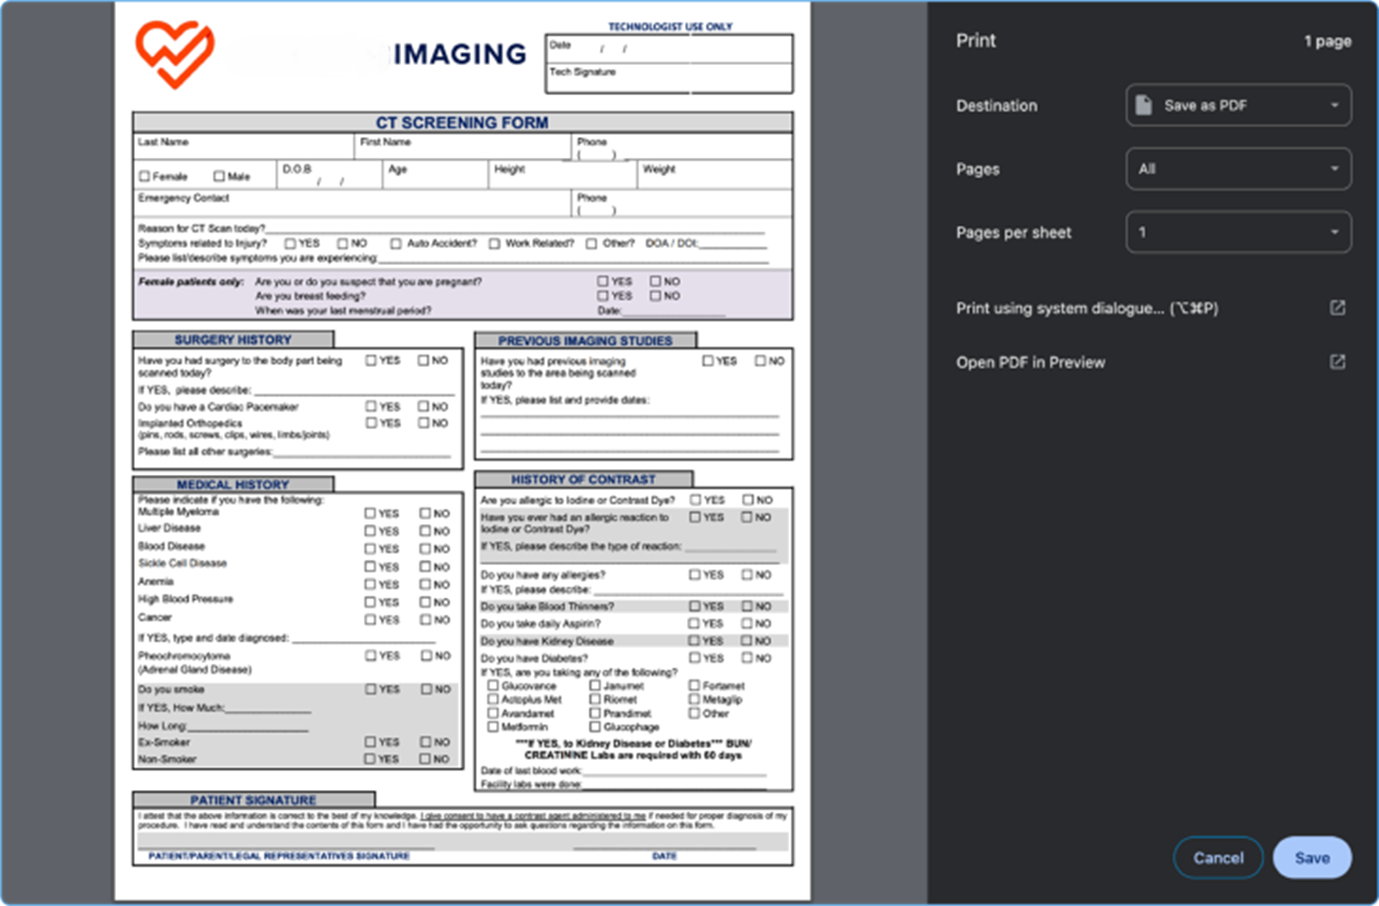
• You can select a printer from the available list or add a new one using the Add Printer button.
• Under the Copies section, specify the number of copies you wish to print.
• Choose the document layout — either Portrait or Landscape.
• Select which pages to print by choosing from :
a. All pages
b. Odd pages only
c. Even pages only
d. A custom page range by entering the desired numbers.
e. Choose to print in Colour or Black & White.

Under the More Settings section:
▫ Select the desired paper size* (letter, legal, A3, A4, etc.).
▫ Adjust the Scale — pick from Fit to Printable Area, Actual Size, or set a Custom Percentage.
▫ Choose how many pages per sheet you want: 1, 2, 4, 6, 9, or 16.
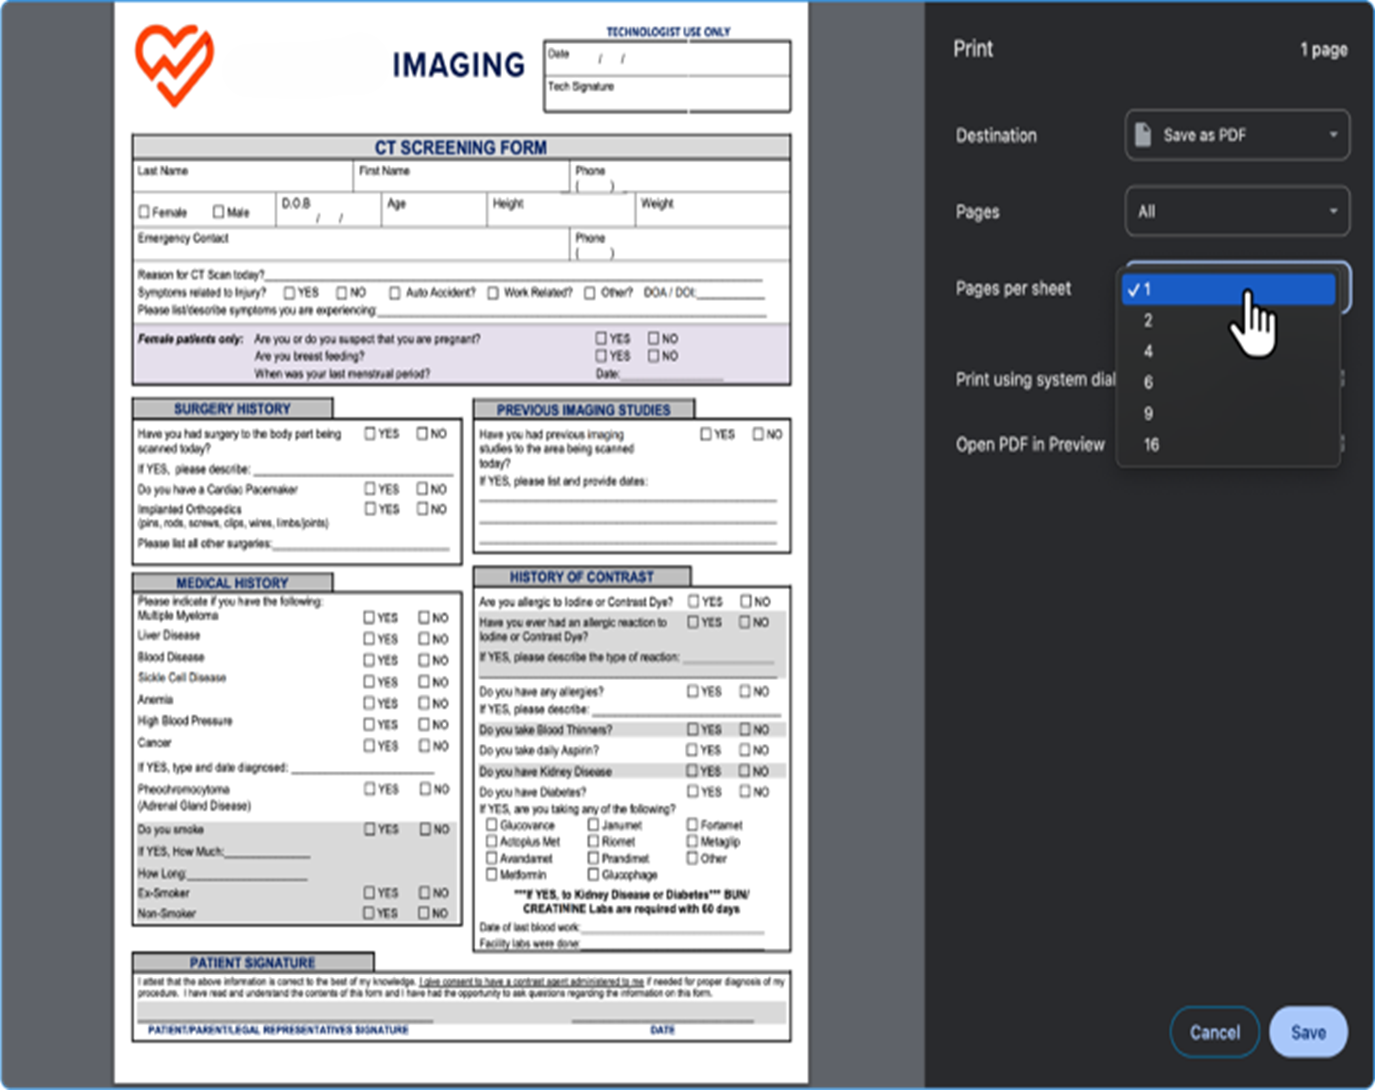
At the bottom of the left-side menu, you’ll also find the option to Print Using System Dialog if you prefer your computer’s default printing interface.
Additionally, at the top of the Print Preview window, you’ll find a Question Mark (?) icon.
Click this to access help or FAQs specifically for printing via Microsoft Edge.
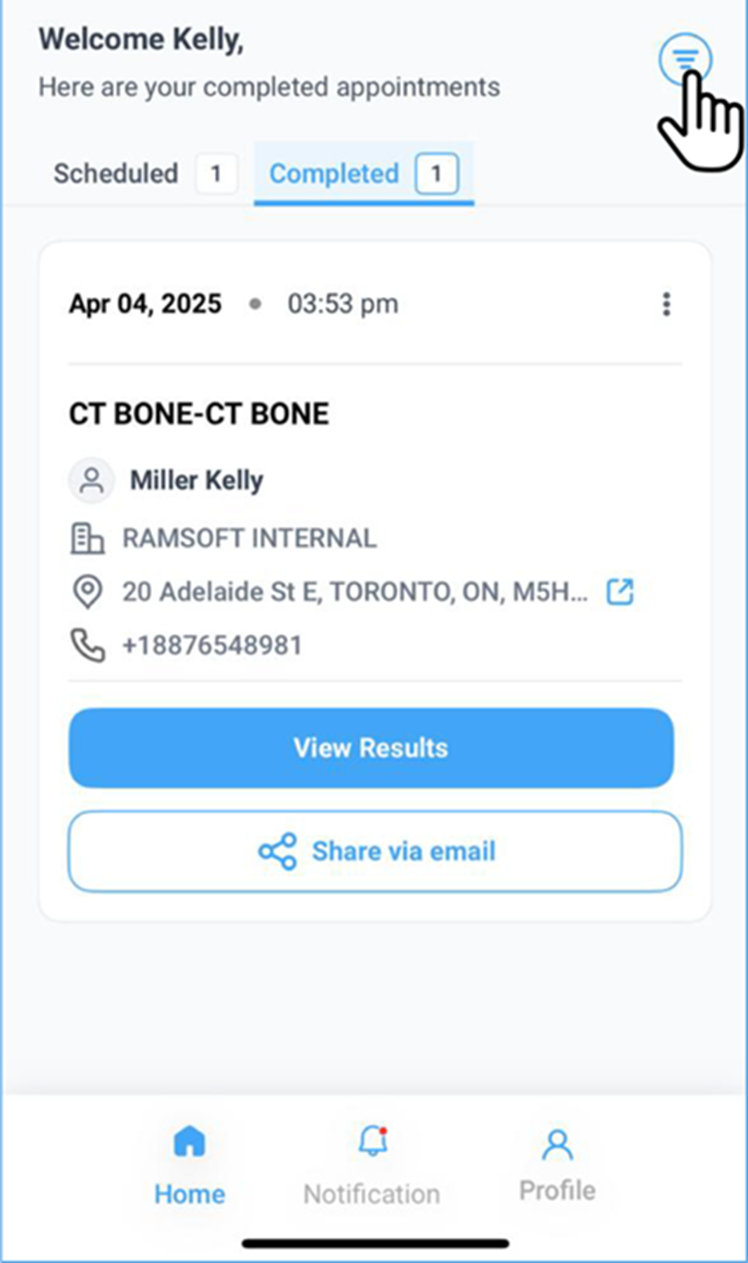
Mobile
Once you log in to your Blume account on mobile, you can view your completed appointments directly from the main dashboard.
Viewing Images, Reports, and Forms
-
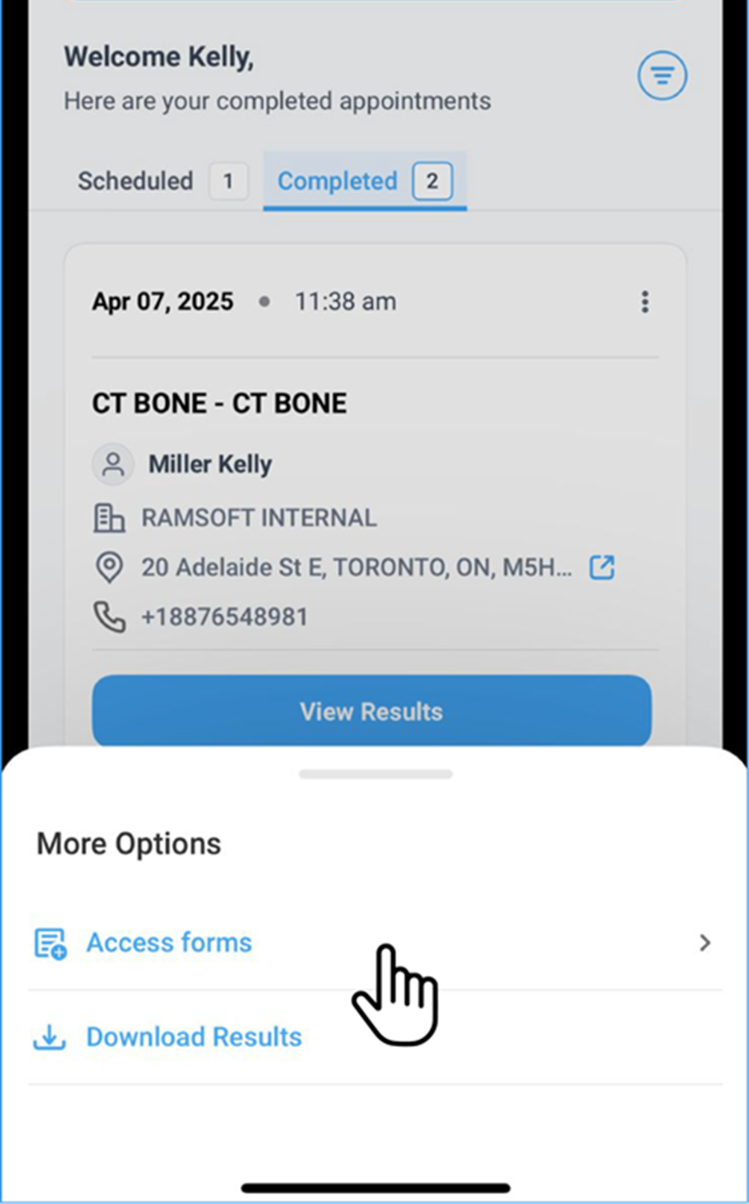
Under the Completed Appointments section, locate and select the desired study.
-
At the bottom of the appointment card, tap the VIEW RESULT button.
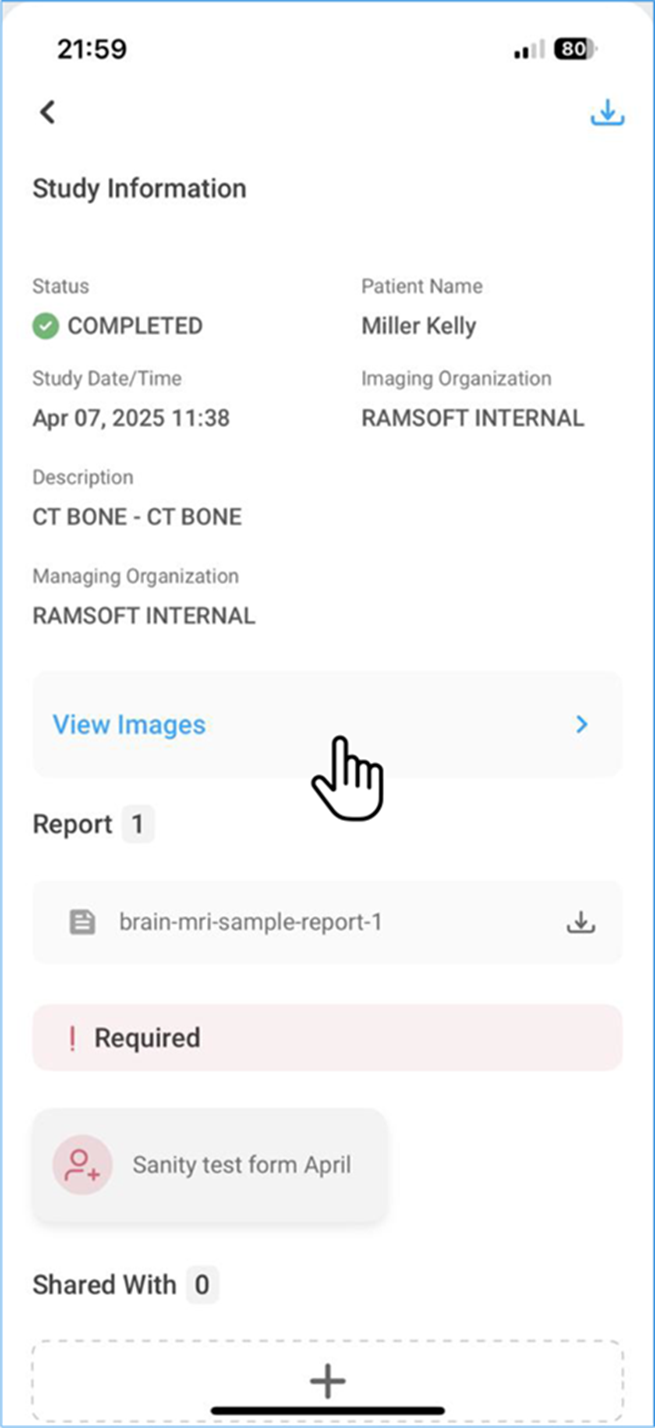
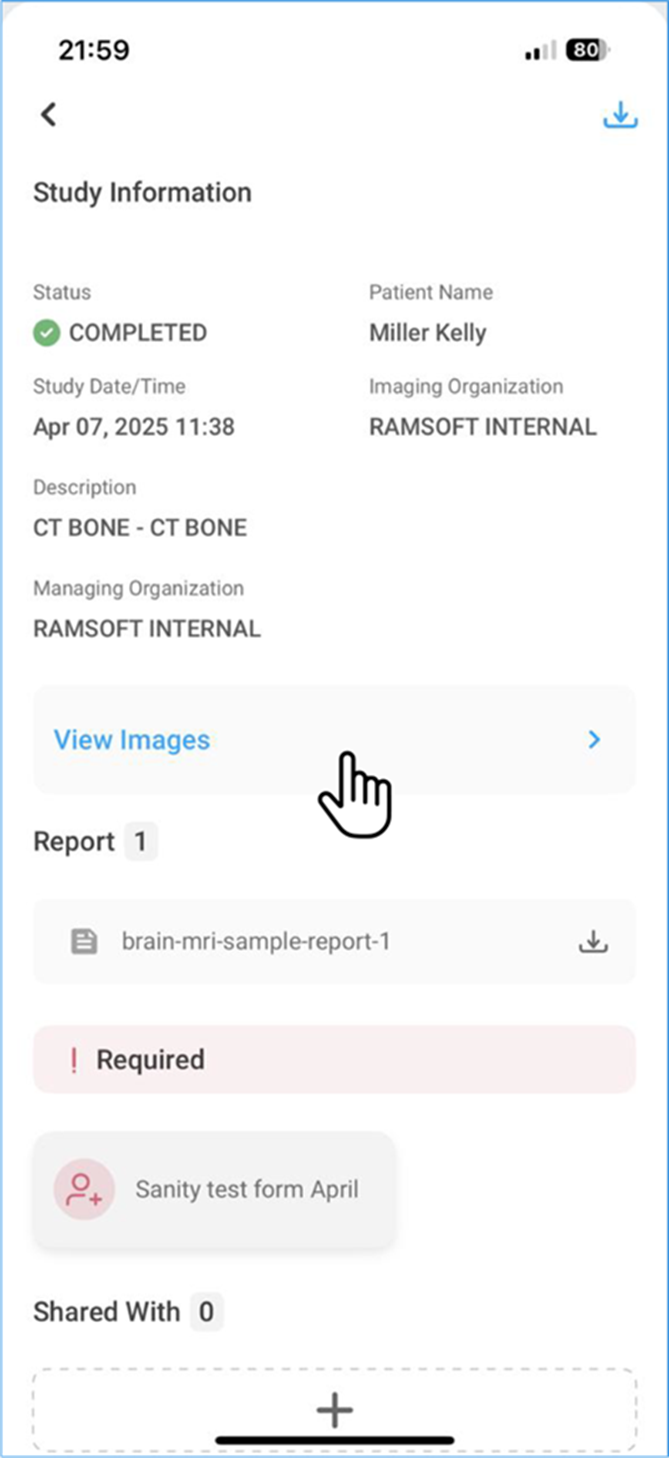
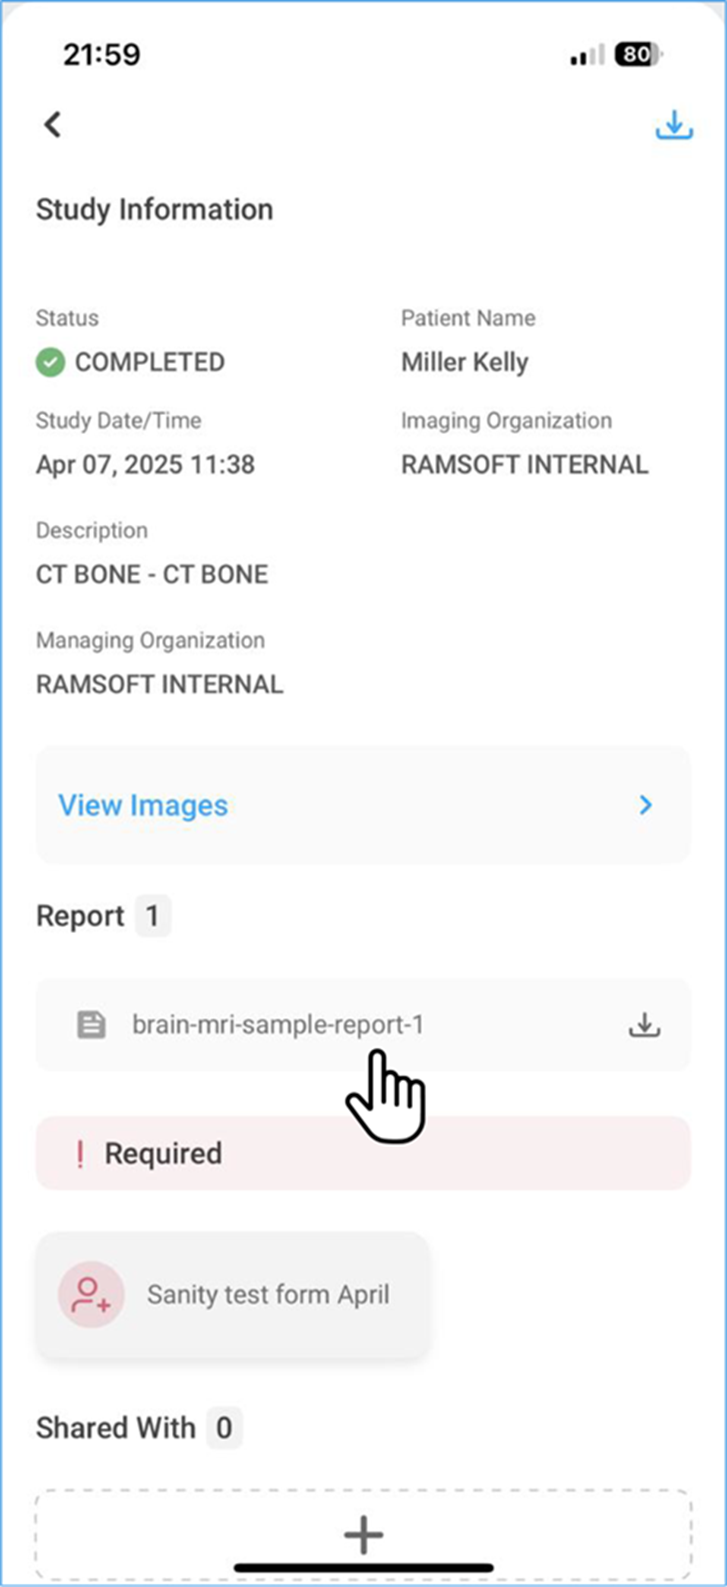
- You will be directed to the Study Information Page, where you can see:
• Study Status
• Patient Details
- To View Images, locate the View Image button below the Study Information Section.
-
Tap the View Image button to open the image viewer, where you can review the attached images.
-
To View Reports, locate the Reports button below the View Images Section.
-
Tap the Reports button. (The number displayed beside the button indicates the number of reports available.)
-
Tap the Forms button to access any forms associated with the study
Note:
To filter and refine your results:
-
Tap the three horizontal lines icon next to your username.
-
Apply filters based on:
• Linked Profiles: If multiple profiles are associated with your account, select the desired profile.
• Date Range: Adjust the date range as needed to refine your search.