Scheduling with Unknown Imaging Procedures: Unknown Orderset
Blume supports the ability to schedule appointments even when the exact imaging procedure is not yet known. This flexible scheduling option is especially useful in situations where clinical decisions are still pending but an appointment needs to be secured in advance.
This capability ensures smoother workflows and helps reduce delays in patient care by allowing front desk or scheduling teams to reserve time slots proactively.
Self-Scheduling Flow: Uploading Imaging Request Form and Selecting Procedure
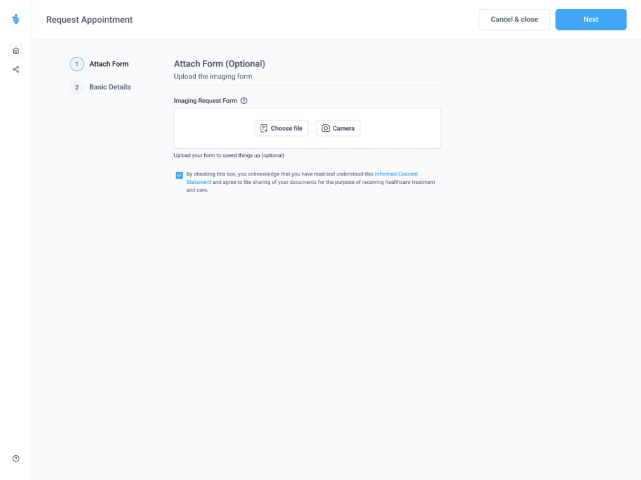
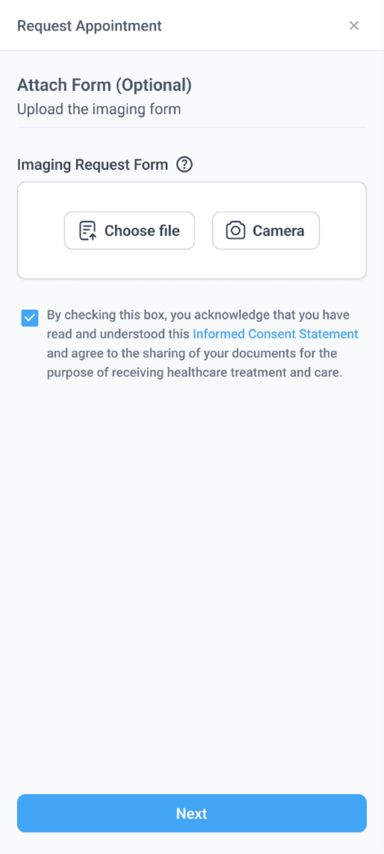
As part of the enhanced self-scheduling workflow, users now have the option to upload an imaging request form at the initial stage of appointment scheduling.
Uploading the Imaging Request Form
- To access the Upload Imaging Request Form section, copy the self-scheduling link provided by your healthcare organization, paste it into your browser, press Enter, and follow the steps on the Request an Appointment page.
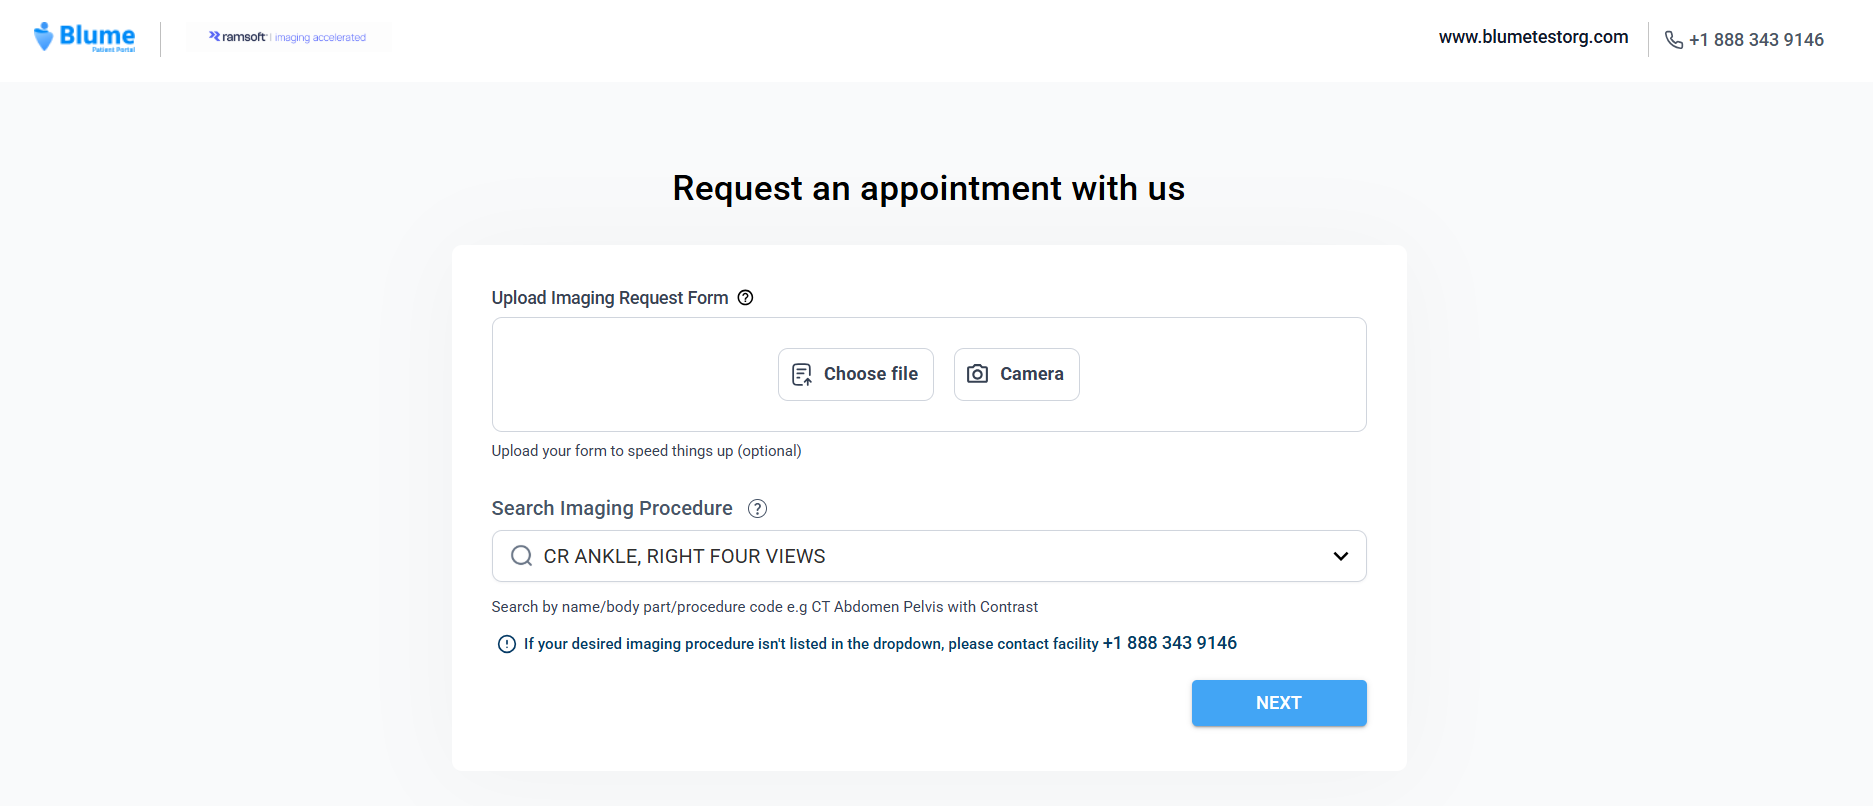
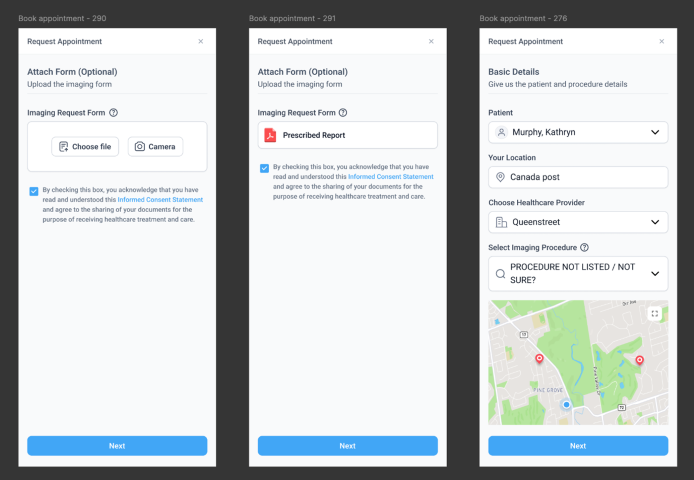
- Two upload options are available:
- Camera (available on web-responsive and native apps)
- Choose File from local storage (available on the web)
- Only one file can be uploaded using the above options.
- Uploading the form is optional.
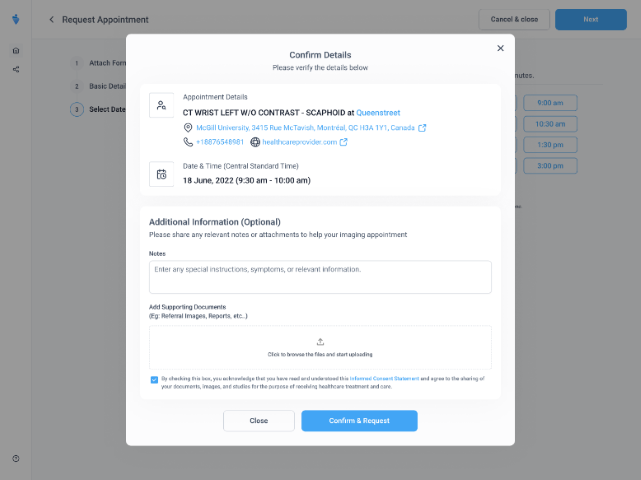
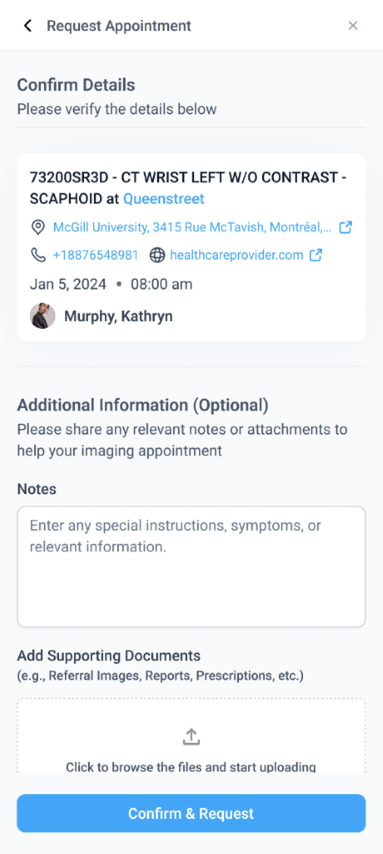
Note: If a supporting document or image is uploaded then the informed consent statement populated and you need to check the box to proceed.
- Once done, click on the Next button to proceed.
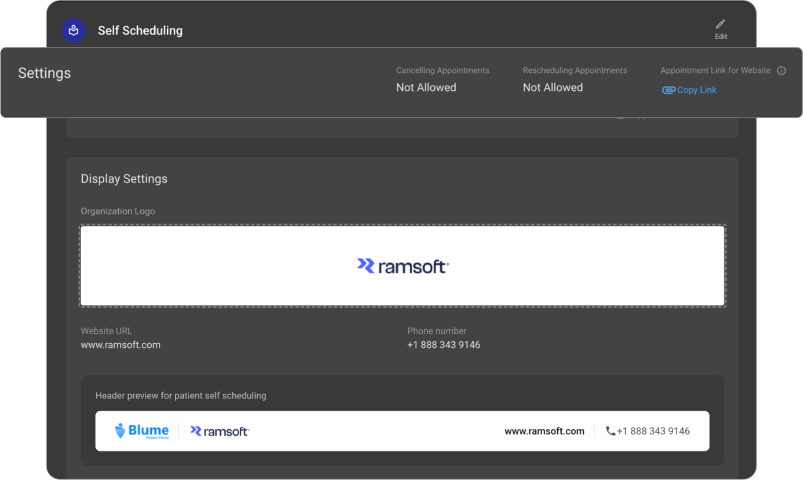
Once uploaded, the document will be visible under the same Upload Imaging Request Form header.
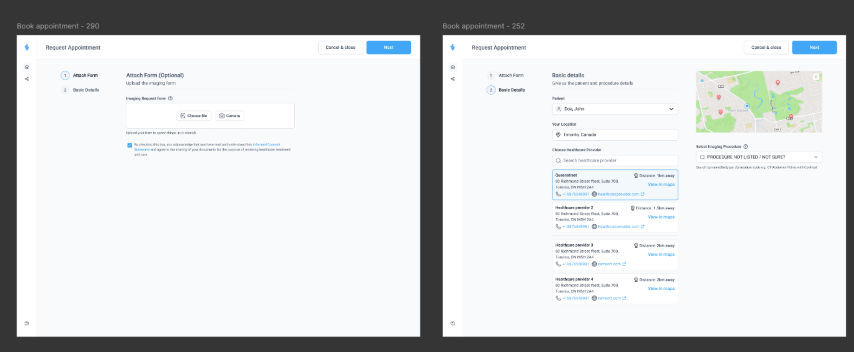
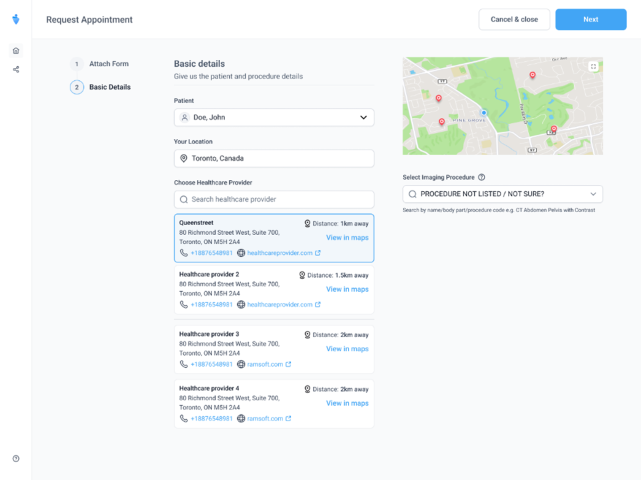
Location and Provider Selection
- Users must then enter their Current Location while requesting appointment.
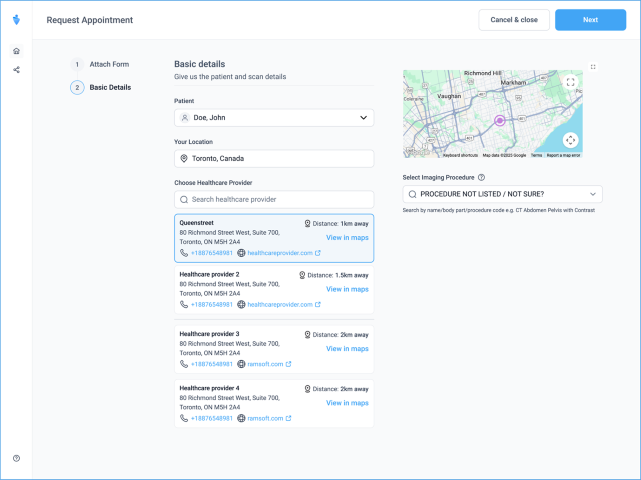
- Based on the selected scan type and location, available Healthcare Providers will be listed.
- A secondary list will show providers who do not accept online bookings. Their contact details can be expanded to reach out directly.
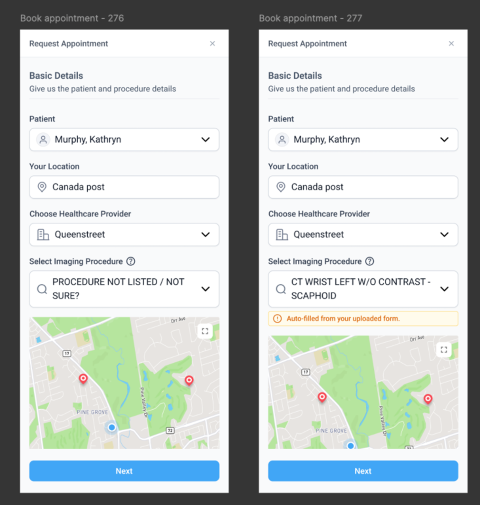
Selecting an Imaging Procedure
- On the right side of the screen, below the map, users will find the Select Imaging Procedure section.
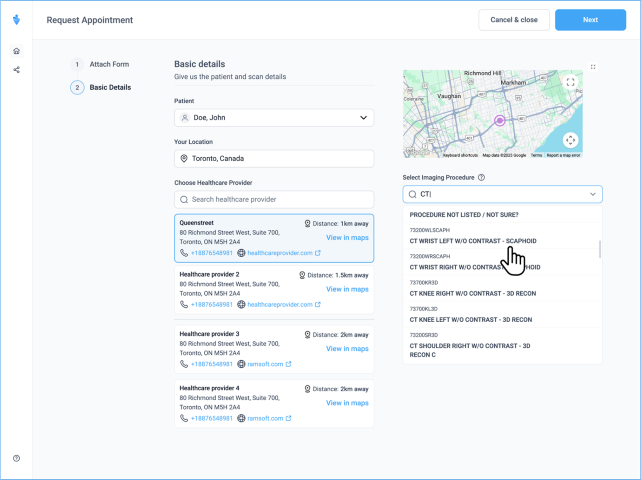
- Users can search by body part, scan name, or procedure code using the dropdown menu.
Unknown Order sets
Blume supports scheduling even if the imaging procedure is unknown. This feature is available to organizations using the AFD license.
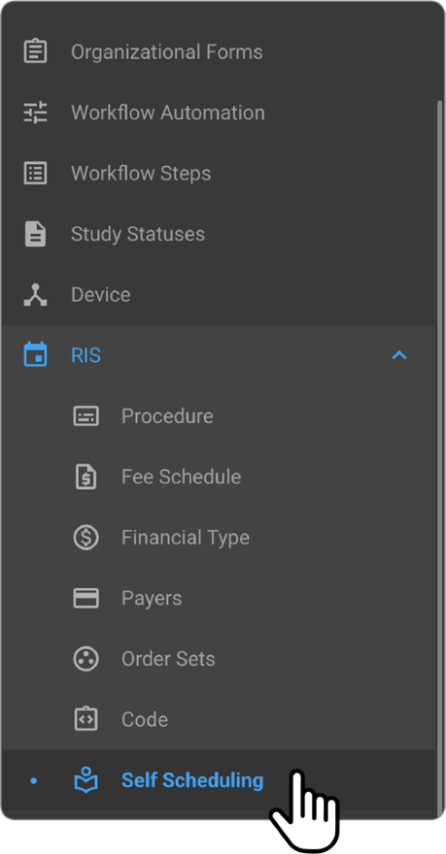
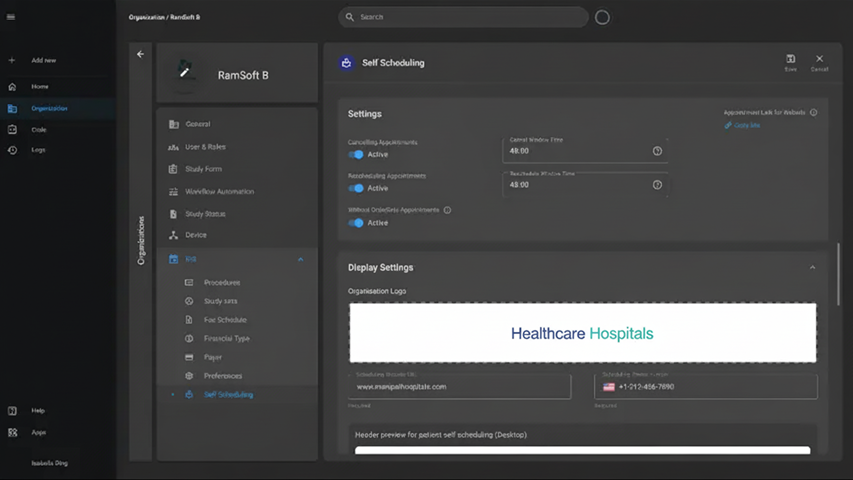
For organizations with AFD licenses, a toggle in OmegaAI, under Organization > Details > RIS > Self-Scheduling, allows users to schedule appointments if the procedure is unknown.
-
Even when the user is unsure about the exact name of the scan or the specific imaging procedure required, they can still proceed with scheduling by uploading the imaging request form (if available).
-
If no document is uploaded and the user is unsure about the procedure:
-
The system will not show the slot selection screen.
-
Instead, the user will be taken directly to the Additional Information (Optional) & Notes Box to provide any additional details manually.
-
This helps users continue the scheduling process even when they don't have a specific procedure name or code available.
-
If users are uncertain about the imaging procedure and do not upload any supporting documents, the appointment will still be scheduled.
-
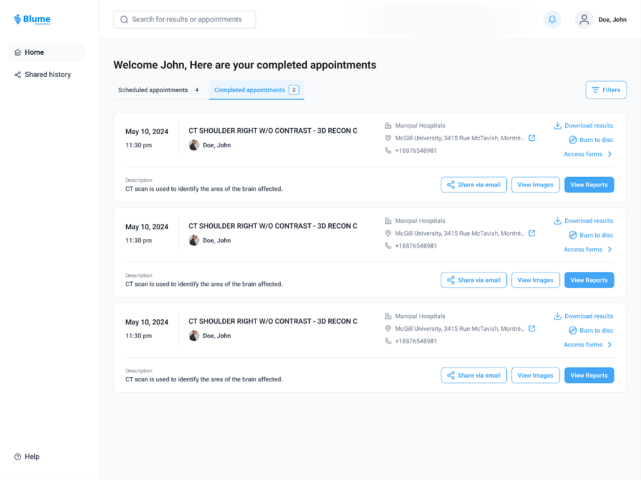
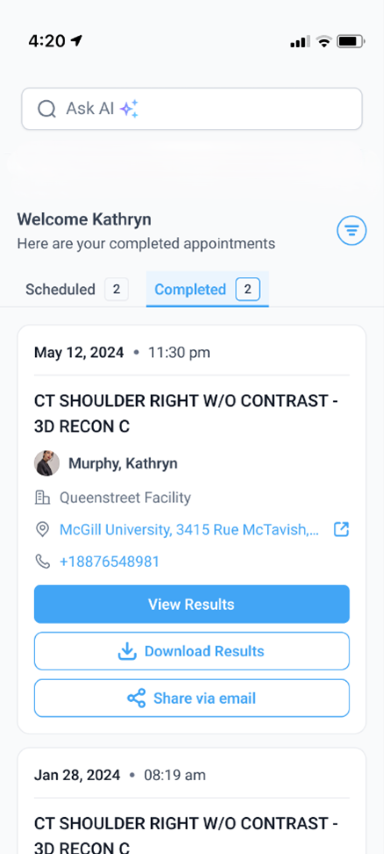
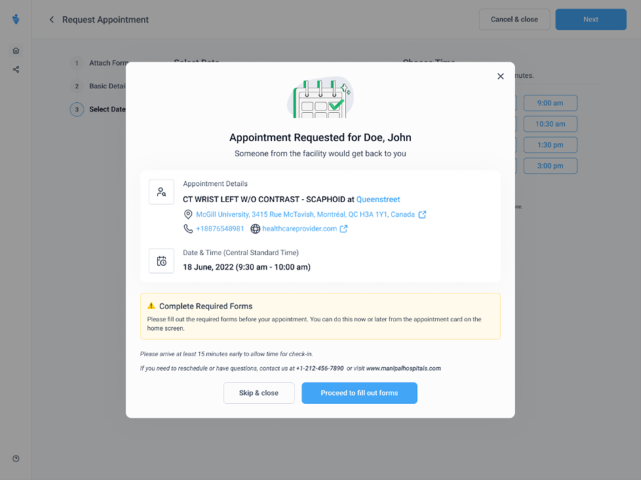
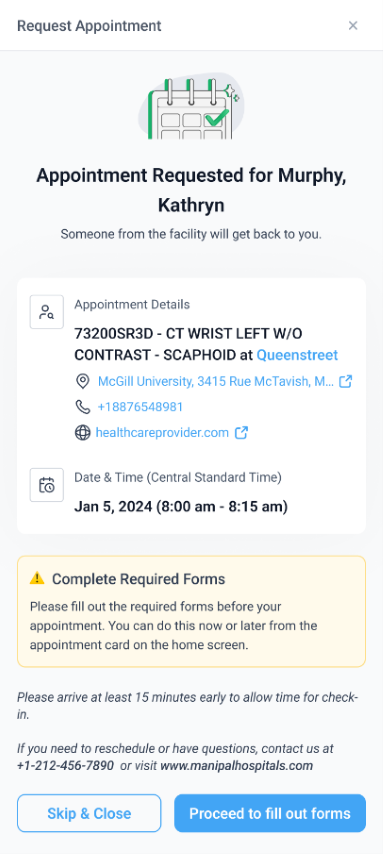
However, on Blume, under the scheduled appointments, the appointment card will display the procedure status as “Procedure Not Listed / Not Sure.”
-
Facilities can later update this after confirming the procedure with the patient via OmegaAI or PowerServer.
Summary of Workflow in Blume
-
Click Request Appointment.
-
Upload the Imaging Request Form.
-
Click Next to proceed to Basic Details and Location.
-
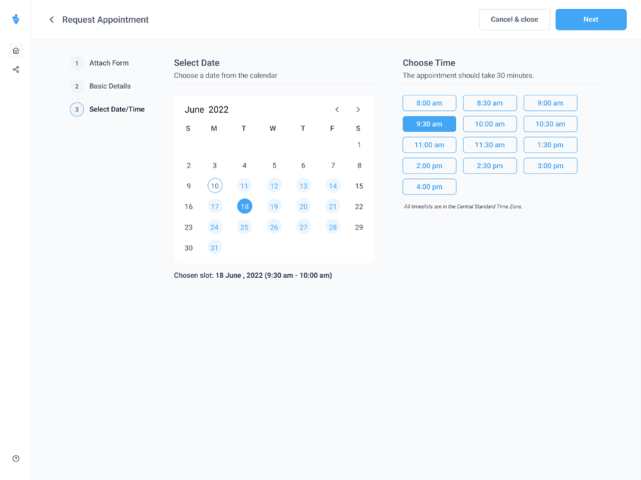
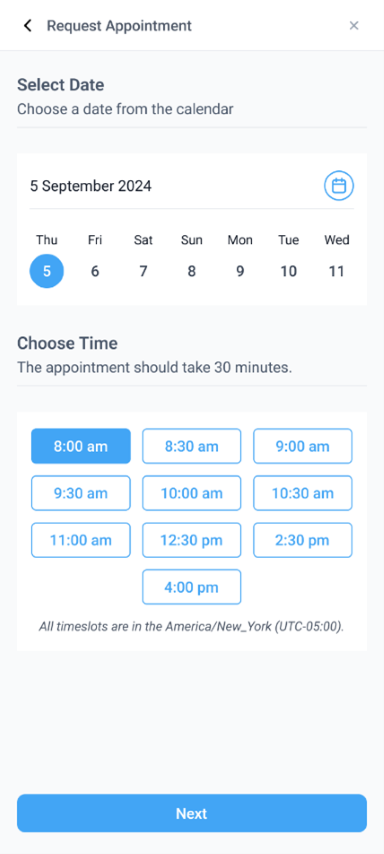
Click Next to go to the Slot Selection screen (only if the procedure is identified).
-
If the procedure is unknown and no document is uploaded, users are directed to the Additional Information (Optional) & Notes Box instead of the slot screen.
-
Continue through the remaining steps to submit your appointment request.
[Note: On the updated Blume application, on both web-responsive and native apps, for known order sets, the date and time slot selection screen will initially display a week view. If you prefer to view the full calendar, simply click on the calendar icon located beside the time slot dropdown.]