Self-Scheduling
Managing self-scheduling
Self-scheduling allows patients to request and schedule their own imaging appointments through the link provided by their organisation. Availability of this feature depends on the type of license purchased by each organisation.
This section explains how administrators can enable self-scheduling and how patients can use it to request appointments, upload documents, and complete forms.
Using Self-Scheduling
Follow these steps to request an appointment using the self-scheduling link:
A. Accessing the Self-Scheduling Page
- Copy the self-scheduling link or URL shared by your healthcare organisation.
- Paste the link into your browser and press Enter.
- You will be directed to the Request Appointment page.
B. Uploading Imaging Request Form (Optional)
-
If you have an image request form or any supporting document, click Choose File to upload it from your system.
-
On mobile devices, you can capture and upload an image directly using your device’s camera.
-
Uploaded files are automatically converted to PDF format.
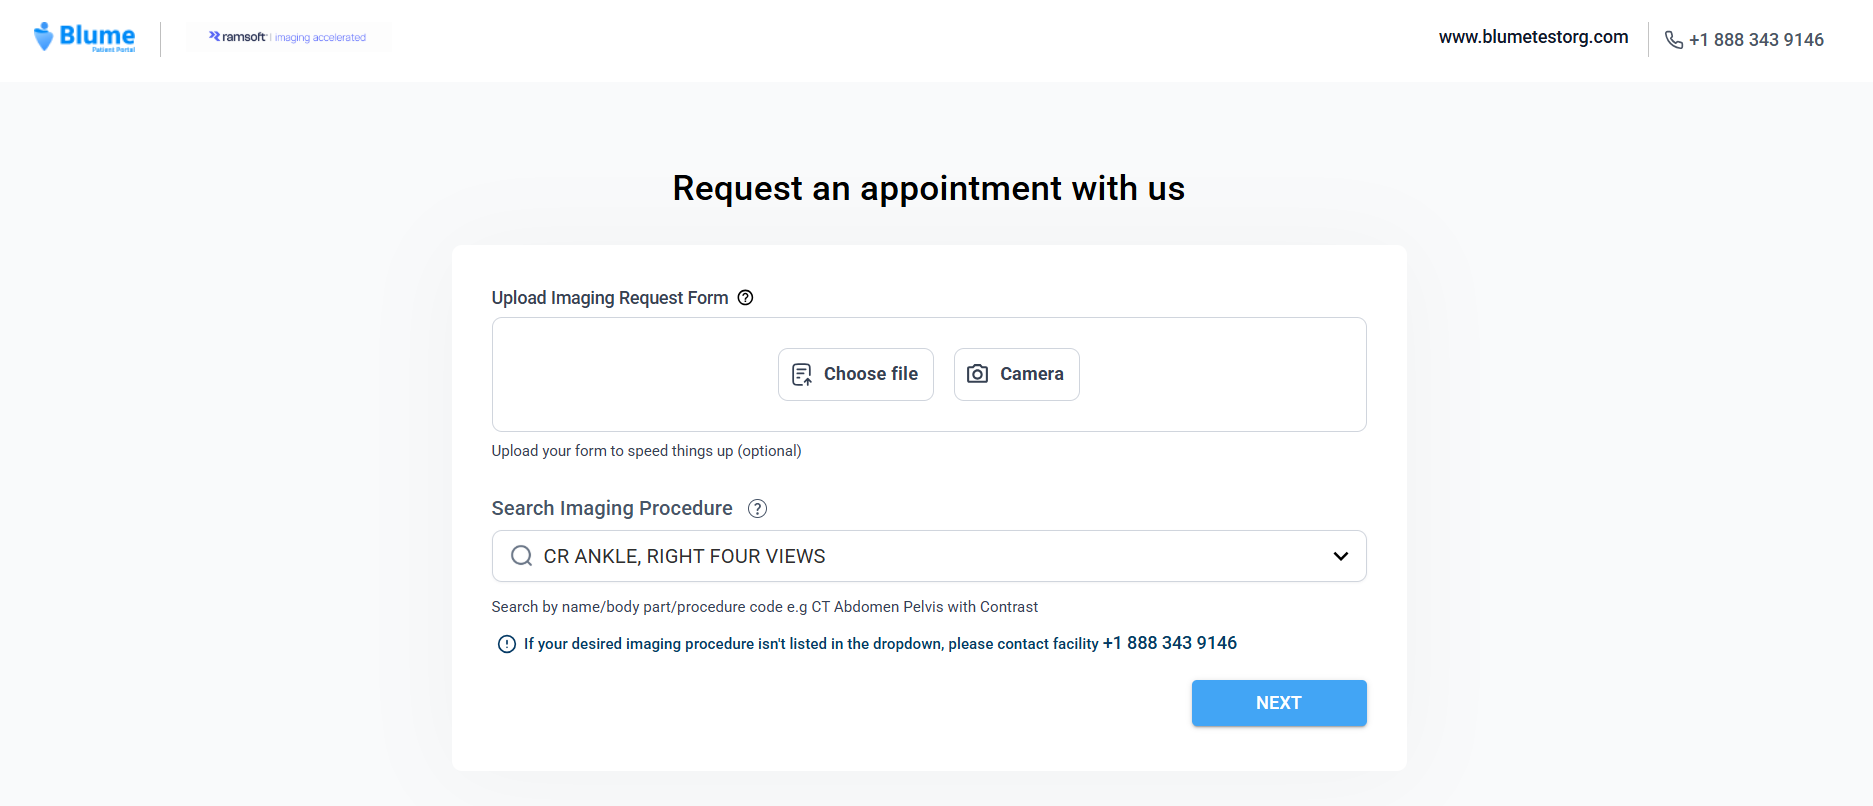
C. Selecting Imaging Procedure
-
Under Select Imaging Procedure, choose the appropriate procedure from the list.
-
Click Next to proceed.
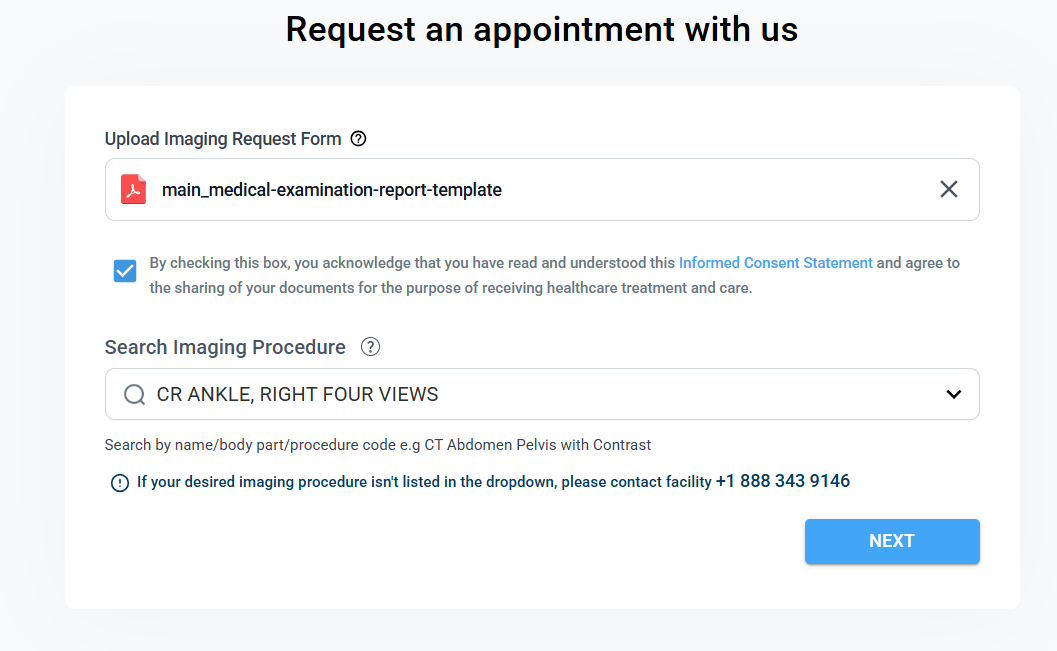
D. Providing Consent
Before continuing, you are required to review and accept the informed consent statement displayed in the document upload section:
“By checking this box, you acknowledge that you have read and understood this Informed Consent Statement and agree to the sharing of your documents for the purpose of receiving healthcare treatment and care.”
Consent Requirement Logic
A. When files are uploaded:
- The Informed Consent prompt will appear. You must check the consent box to activate the Next button and proceed.
B. When no files are uploaded:
- The Informed Consent checkbox is not applicable and will not be displayed.
- Click Next to continue.
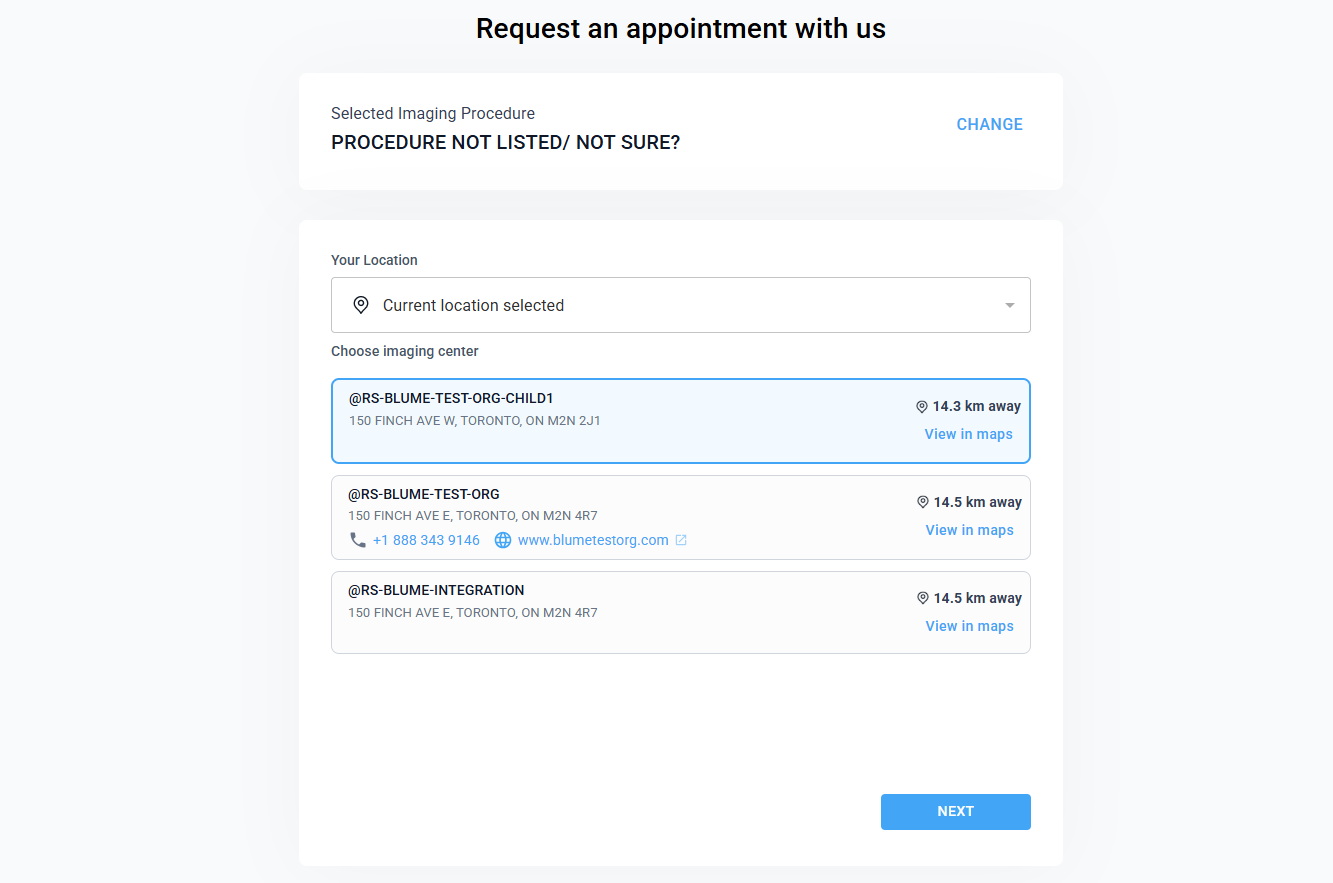
E. Location and Choosing Imaging Center
On this page:
-
Enter your location manually or allow the system to auto-detect it.
-
Based on your location, nearby imaging centres will appear from nearest to farthest.
-
Review the distance and click View in Maps to locate a centre.
-
Select your preferred imaging centre.
- Click Next
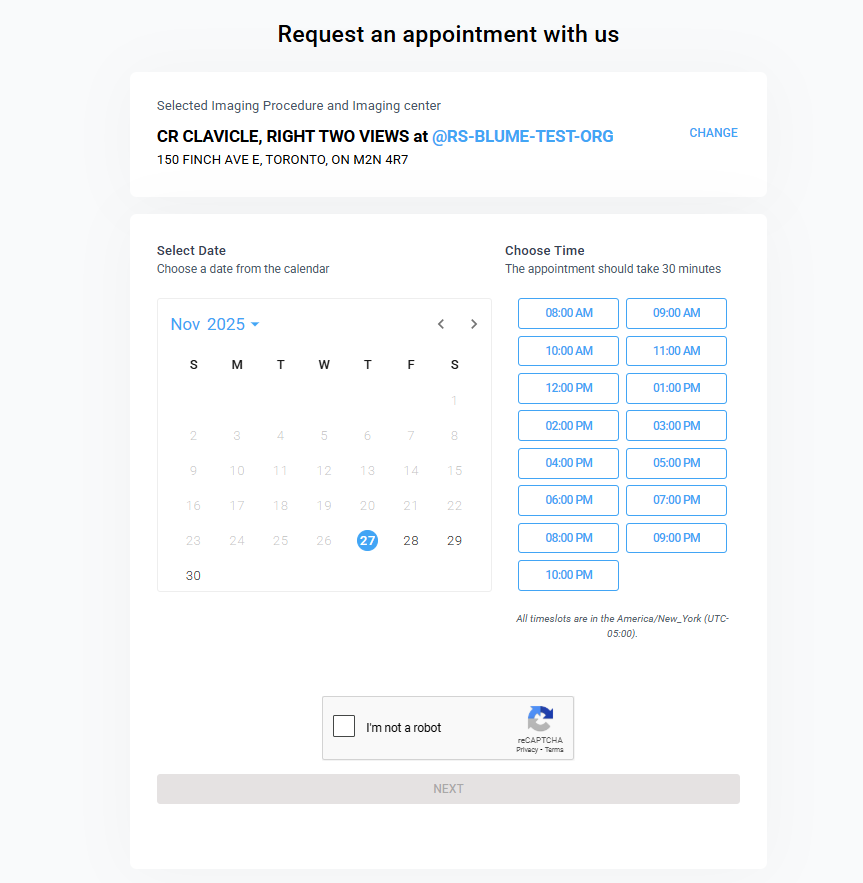
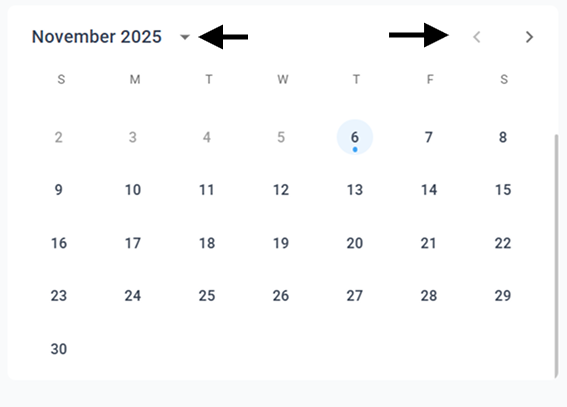
F. Selecting a Slot
You will be taken to the date and time selection screen.
- You will be directed to the Choose a Slot page.
-
You can select a date from the calendar. To change the year, click the arrow beside the year at the top of the calendar. To move between months, use the arrow at the far-right corner of the calendar to scroll through the available months.
-
Past dates cannot be selected — only current or future dates are available.
-
Choose an available time slot displayed on the right side of the calendar.
-
You’ll need to complete the CAPTCHA verification to confirm your identity.
-
Click Next to confirm the booking or Cancel/Close to discard changes.
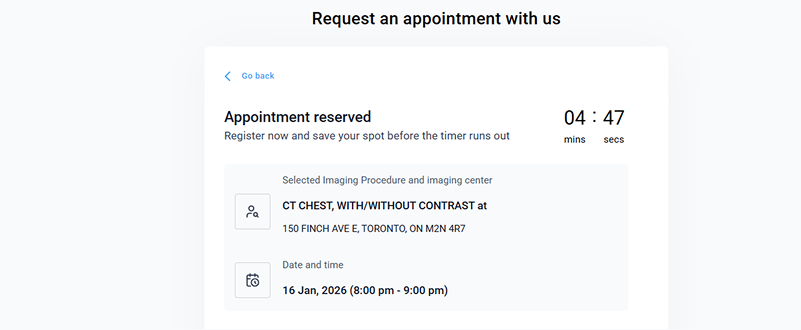
G. Requesting Appointment
-
On this page, you’ll need to complete your registration before the timer on the top-right corner runs out.
-
You can view the basic appointment details at the top of the page.
-
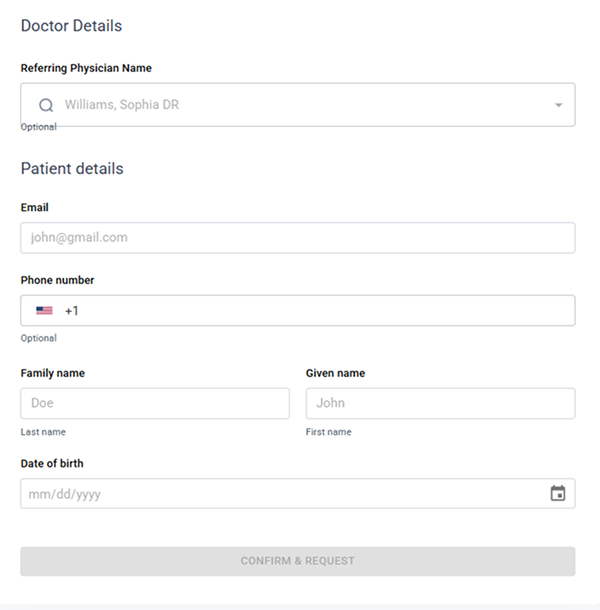
Scroll down to fill in the required fields as outlined below:
I. Doctor Details (Referring Physician) – Optional
-
Use the Meta Search option to look up the referring doctor, if applicable.
II. Patient Details
a. Email Address
b. Phone Number – Optional
c. Family Name and Given Name
d. Date of Birth – Select from the calendar picker
Once all details are entered, click Confirm and Request to submit your appointment request.
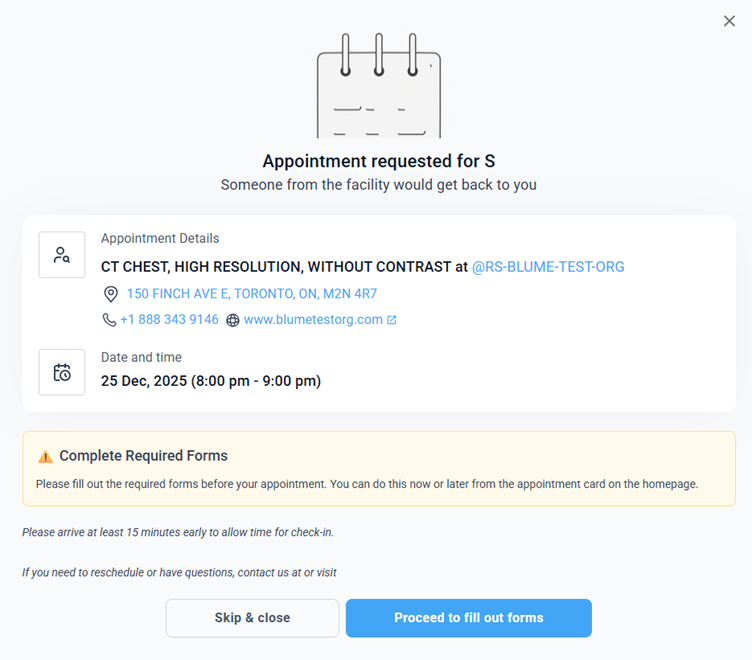
H. Completing Forms (Optional)
After submission, you will see an Appointment Request Submitted message with your appointment details.
- You will also have the option to Proceed to Fill Forms or Skip and Close.
If you choose to proceed:
- You will be redirected to the Forms section.
- All pending forms appear on the left panel.
- Click Fill It below each form to open and complete it.
- Click Submit when done. You can exit any form anytime using the X (close) button.
I. Viewing Requested Appointments
On the Blume app home screen, under Scheduled Appointments, all your requested appointments will appear along with their details.