Cancelling Appointments
How do I cancel an appointment?
Desktop
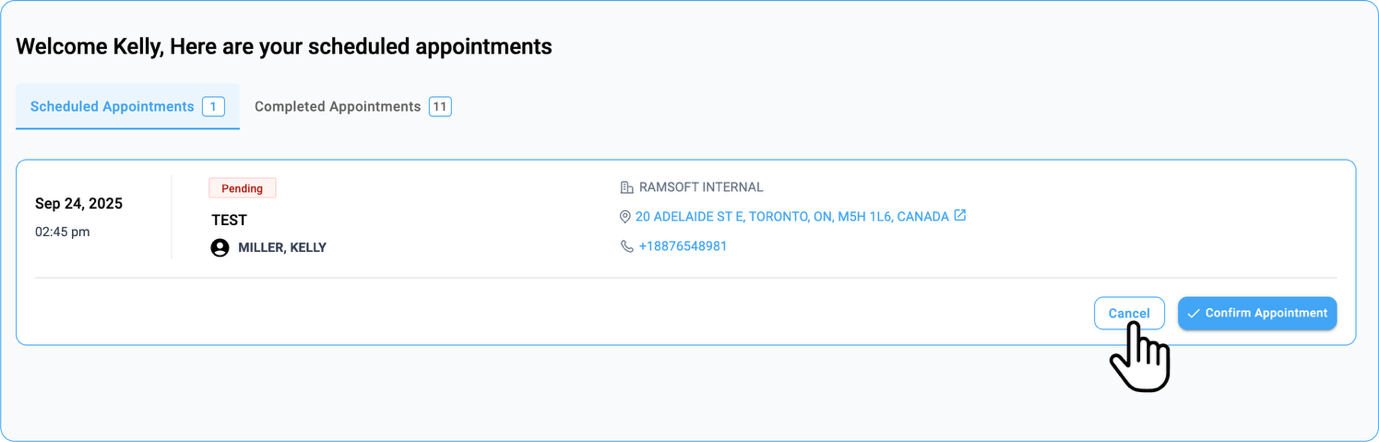
- For Pending Appointments:
-
Click the Cancel button on the right side of an appointment card with a Pending status.
-
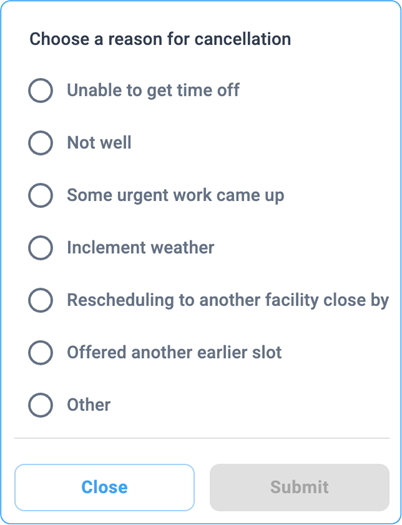
Choose the reason for cancellation from the dropdown and click Submit.
The status will change to Cancelled.
- For Scheduled Appointments:
-
Go to the desired appointment card with a Scheduled Status.
-
Locate the cancel button below the Access Forms.
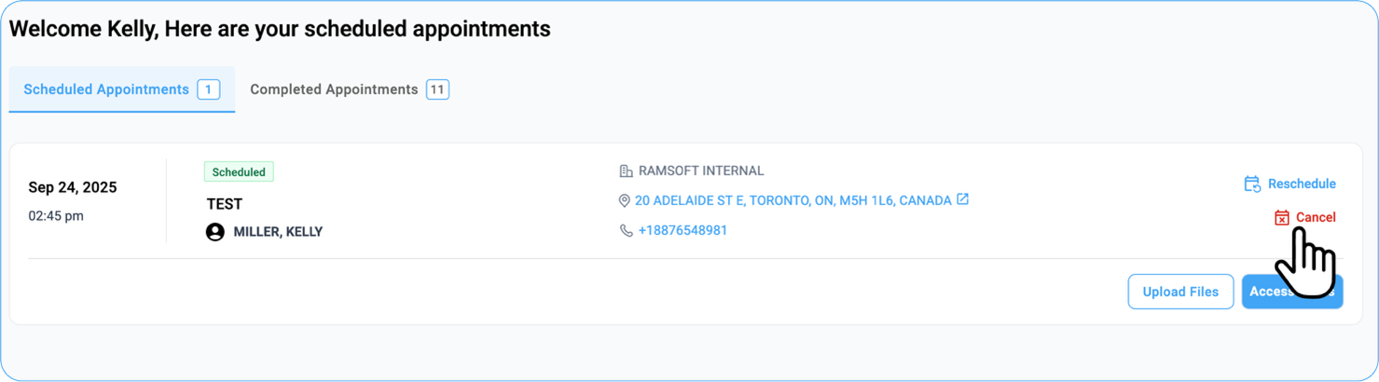
-
Click the Cancel icon.
-
Choose the reason for cancellation from the dropdown and click Submit.
The status will change to Cancelled.
Mobile
-
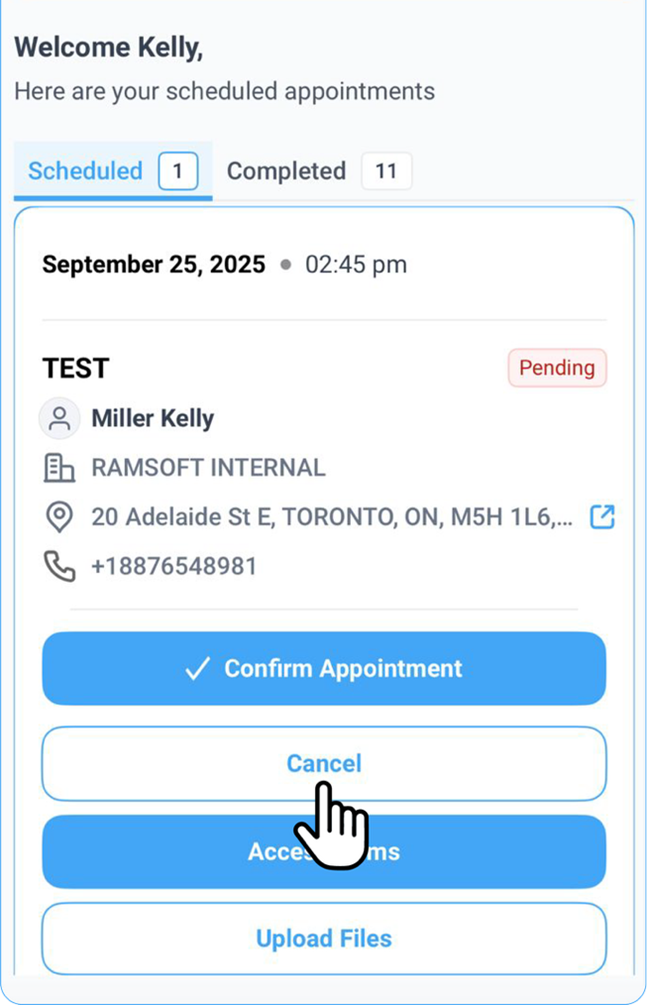
For Pending Appointments:
-
You can see the options—Confirm Appointment, Cancel, and Fill Out Forms—at the bottom of the selected appointment card.
-
To cancel, simply tap the Cancel button.
-
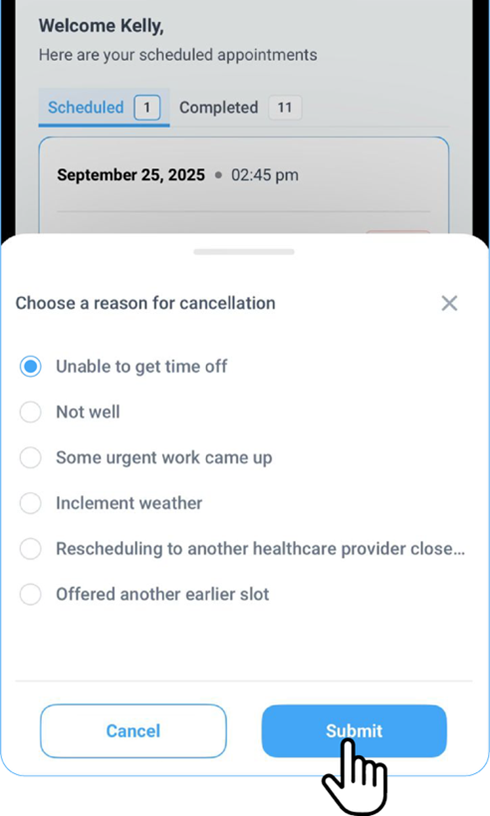
Select a reason for cancellation from the dropdown list.
-
Tap Submit to confirm the cancellation — the appointment status will update to Cancelled.
-
-
For Scheduled Appointments:
i. All relevant options are directly visible at the bottom of the selected appointment card.
ii. You will see two updated options:
-
Fill Out Forms (formerly labelled as Access Forms).
-
View Supporting Documents (formerly labelled as View Attachments).
-

iii. Below these, you’ll find two clear action buttons:
- Reschedule on the right side.
- Cancel on the left side.
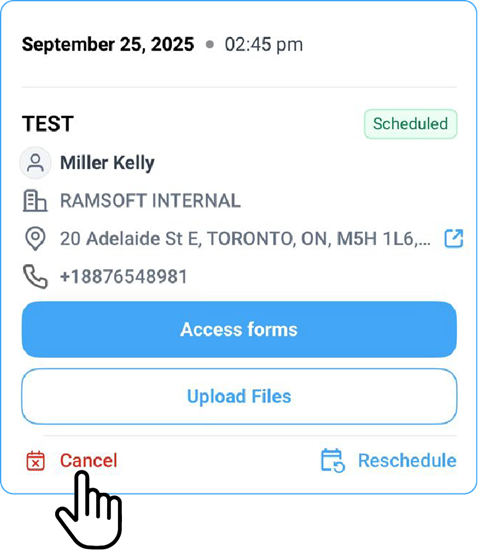
iv. To cancel an appointment, tap Cancel.
v. Choose a reason for cancellation from the dropdown.
vi. Tap Submit to confirm.
